
Change Location on Yik Yak For your Samsung Galaxy S24+ to Enjoy More Fun | Dr.fone
Change Location on Yik Yak For your Samsung Galaxy S24+ to Enjoy More Fun
Yik Yak has to be one of the most controversial social media applications. First launched in 2013, Yik Yak went into haze in 2017 after receiving harsh criticism due to its poor privacy policies. However, after four years of complete shutdown, Yik Yak was relaunched in 2021 with improved security features and functionality.
Ever since its relaunch in August last year, many users on Yik Yak have been looking for ways to change their location to meet people in other cities/states. So keep reading if you’ve been trying to find solutions to swap locations in Yik Yak. In today’s guide, we will share the best ways to change the Yik Yak location and connect with people from different corners of the world.
Part 1: What you should know about Yik Yak
If you are not familiar with Yik Yak, here’s what you need to know. Yik Yak is a one-of-a-kind social media platform designed to help users connect with people through text-based posts. In addition, users can anonymously post content and interact with other users in the same location.
Yik Yak also has a dedicated “Peek” feature that allows users to explore what people are talking about a particular topic in different locations. Even though Yik Yak has limited features compared to other social media apps like Instagram and Snapchat, Yik Yak still has its fair share of a fan base. People love Yik Yak for its anonymity and enjoy meeting new like-minded people.
Now, users look for ways to change location on Yik Yak to meet people from different areas. By default, users can only see posts from their current location, and after a while, their feed starts to look pretty repetitive. But, by changing their places, they can expand their radar and find new posts from the desired locations.

Part 2: How to Change Location On Yik Yak
So, what are the different ways to change location on Yik Yak? Since Yik Yak uses your phone’s GPS sensors to detect the current location, you’ll have to manipulate the GPS signals to get the job done. To do this, you can use different methods such as:
1. Using the peek feature to view other local Yik Yak groups or communities
As we mentioned earlier, Peek is the built-in feature of Yik Yak that allows users to find out what people are saying about a particular topic in different locations.
However, this feature has a few limitations. First, even though you’ll be able to explore posts from other locations, you won’t be able to react to them. A user can only respond to posts in his particular area. So, “Peek” would only be a suitable solution for exploring posts from other locations, but not changing the Yik Yak location itself.
2. Use Dr.Fone - Virtual Location to fake GPS location
If you are looking for an effective way to change your location in Yik Yak, we recommend using a professional GPS simulator like Dr.Fone - Virtual Location. It’s a cross-platform geo spoofing tool with a built-in teleport mode. With the “Teleport Mode” feature, you’ll be able to change your location to anywhere in the world with a single click.
It means you’ll be able to publish your own Yik Yak posts from different locations and react to someone else’s posts without interruptions. Apart from Yik Yak, you can also use a tool like Dr.Fone - Virtual Location to manipulate GPS signals in other location-based apps like Pokemon Go or Tinder. It’s a great way to meet people from other cities on dating apps, as any geo-restrictions won’t bind you.
Dr.Fone - Virtual Location
1-Click Location Changer for both iOS and Android
- Teleport your current location to anywhere in the world with a single click.
- Fake location on dating and social apps to meet more friends.
- Spoof location on location tracking apps to protect your privacy.
- Compatible with both iOS and Android systems.
- Work with location-based apps, like Pokemon Go , Snapchat , Instagram , Facebook , etc.
3981454 people have downloaded it
So, here’s the step-by-step process for changing location on Yik Yak using Dr.Fone - Virtual Location.
Step 1: Install and launch Dr.Fone - Virtual Location on your computer. Double-click on its icon to launch the applications and click the “Virtual Location” option.

Step 2: Now, tap “Get Started” to proceed further.


Step 3: You’ll be asked to choose your device type on the next screen. Based on which smartphone you’re using, either select Android or iOS and click “Next” to proceed further.

Step 4: A map with your current location will appear on your screen. Select the “Teleport Mode” icon at the top-right corner and search for a specific location using the search bar.

Step 5: Select the desired location and the pointer will automatically move to the selected location. Finally, tap on the “Move Here” button to set it as the current location for your device.

So, that’s how you can change location on Yik Yak using Dr.Fone - Virtual Location on both Android and iOS. Once your location is changed, you’ll be able to see posts from other areas on Yik Yak and react to them.
Part 3: FAQs about Yik Yak
Before concluding this guide, we would like to address a few frequently asked questions about Yik Yak. These are a few common queries across many platforms, including Quora and Reddit.
1. How do you get banned from Yik Yak?
Since its relaunch, Yik Yak’s community guidelines have improved drastically. Now, users have the liberty to downvote any post that they find offensive (in any manner). A post that receives more than 5 downvotes will automatically get removed from the platform, and the account will go under the review stage by the in-house Yik Yak team. The team can then decide whether to block the account or not.

2. Does VPN work with Yik Yak?
Yes, a VPN can be used with Yik Yak. However, it’s not possible to change GPS location with a VPN. For people who don’t know, a VPN only changes the IP address of your system and doesn’t change the actual GPS location. So if you want to change your GPS location, you’ll have to use a dedicated GPS spoofing tool like Dr.Fone - Virtual Location.
3. Can you delete a yak?
Yes, you can quickly delete any Yak you want on Yik Yak. Yaks are text posts that users publish on the platform. So, as the owner of their posts, they have the power to delete a particular Yak as well. To delete a Yak, all you have to do is tap the “three dots” next to a Yak, click on “More Options,” and then tap the “Delete” button to complete the process.
Conclusion
Whether you use Yik Yak for fun or have gotten addicted to its anonymity, changing your GPS location on the platform will allow you to expand your social circle and meet strangers from other parts of the world. However, there’s no direct way to change location on Yik Yak. You’ll have to use geo spoofing software such as Dr.Fone - Virtual Location to do the job. The teleport mode feature will make it quite convenient to manipulate your GPS location and access new posts on Yik Yak.
 safe & secure
Simple and Effective Ways to Change Your Country on YouTube App Of your Samsung Galaxy S24+
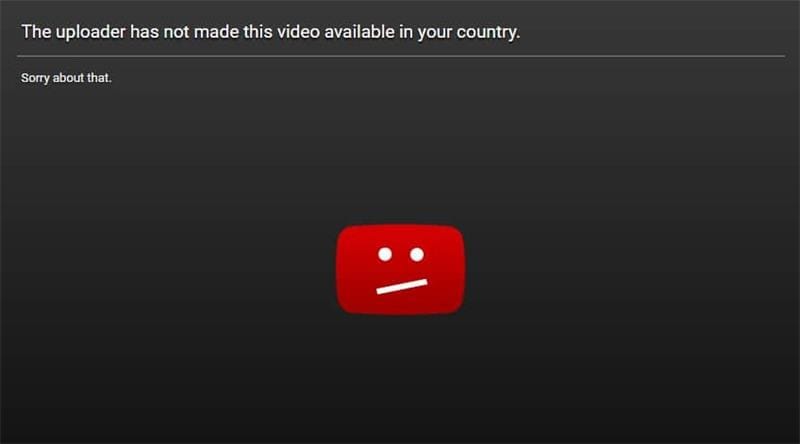
YouTube is easily the most popular video-sharing and media platform today. It’s where you can find free popular and trending videos across the globe to stream to your heart’s content. However, you’ll notice that some videos are blocked in some countries for several reasons, including copyright claims, legal requests, or licensing rights.
If you want to bypass these restrictions, simply read below to learn the simplest and most effective ways to change your location on YouTube. You’ll be able to access content that is otherwise restricted in your country by following our handy guide in no time.
Part 1: How to Change Location Settings on YouTube?
You can change your YouTube location settings if you want to make some videos available in your country. We’ll show you how to change your YouTube region, whether you’re on a computer, Android, iPhone, or iPad, by following these simple steps below.
Method 1: Change Your Location on YouTube from Computer
Here are the steps to change location on YouTube while using a computer.
Step 1: Click your Profile Picture.
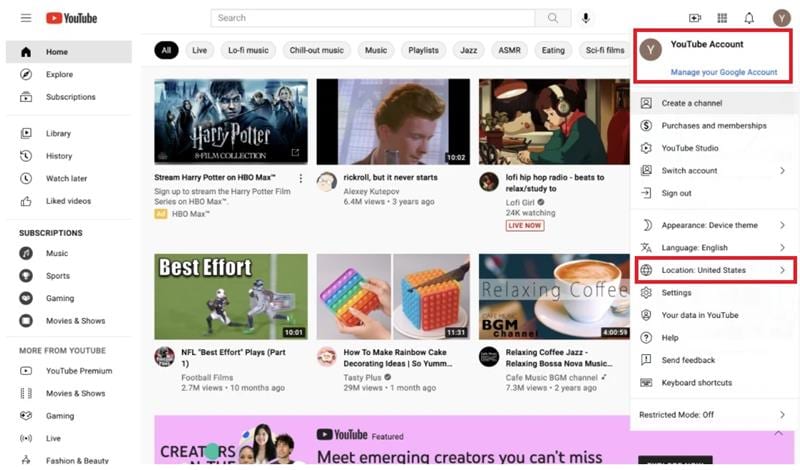
Step 2: Click Location.
Step 3: Choose the location you’d like to use.
Method 2: Change Your Location on YouTube from Android
Here’s how to change your country on YouTube if you’re on Android.
Step 1: Open YouTube on your Samsung Galaxy S24+.
Step 2: Tap your Profile Picture and choose Settings > General > Location.

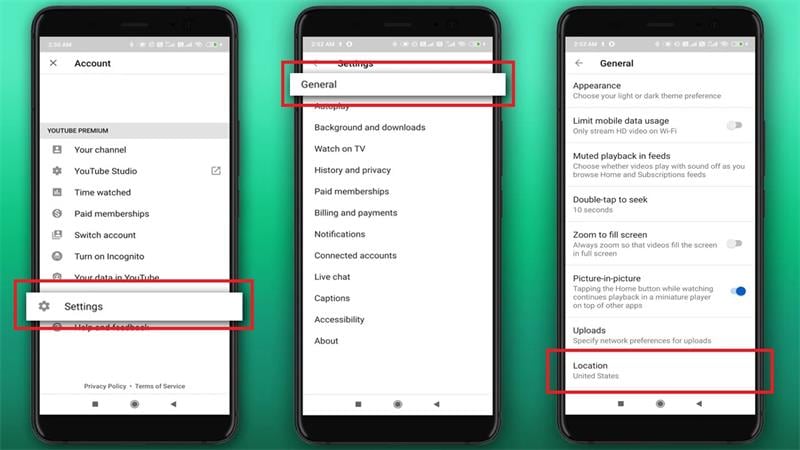
Step 3: Choose your desired country from the list of available options.

Method 3: Change Your Location on YouTube from iPhone and iPad
Lastly, if you’re using an iPhone or an iPad, simply follow the steps below to change your location on YouTube.
Step 1: Tap your Profile Picture.
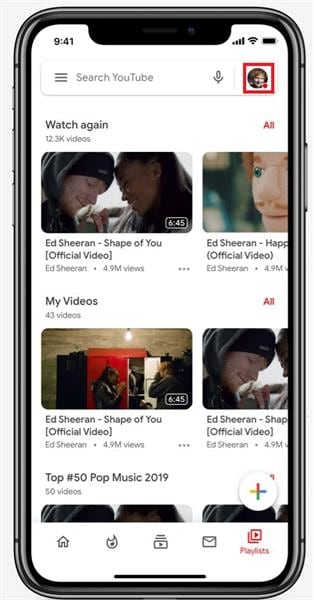
Step 2: Tap Settings > General > Location.
Step 3: Select your desired country.
Part 2: How to Change Your Country to Watch Blocked YouTube Videos?
There are generally no issues when watching YouTube videos anywhere you are. The only instance to have problems accessing YouTube is when you are in a country where the platform is blocked, such as in North Korea or China. Even then, some contents are still geo-restricted unless you’re in the right region.
In this part, we’re listing five different methods to access YouTube’s full library so you can stream all you want.

Method 1: Change Your Home Area on YouTube Manually
Here are the steps to manually manage your home area on YouTube to change your location.
Step 1: Sign up for YouTube TV and open the YouTube TV application.
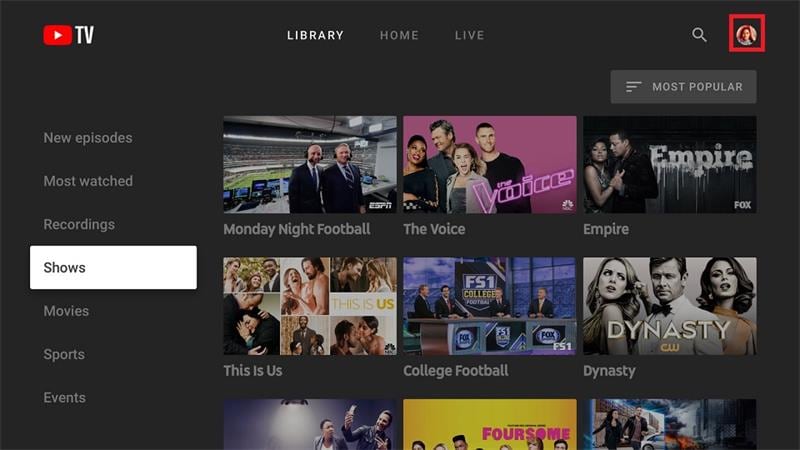
Step 2: Click your Profile Picture and click Location > Home Area.
Step 3: Update your home area.
Note
You can only change your location twice a year. You should also use YouTube at least once every three months in your country to ensure YouTube TV provides the correct local networks.
Method 2: Change Location on YouTube Using a VPN
The simplest and most effective way to unblock restricted content on YouTube is by using a VPN. In this example, we’ll be using NordVPN to change your location on YouTube using a VPN. Here are the steps.
Step 1: Download and install NordVPN. Sign in or create an account.

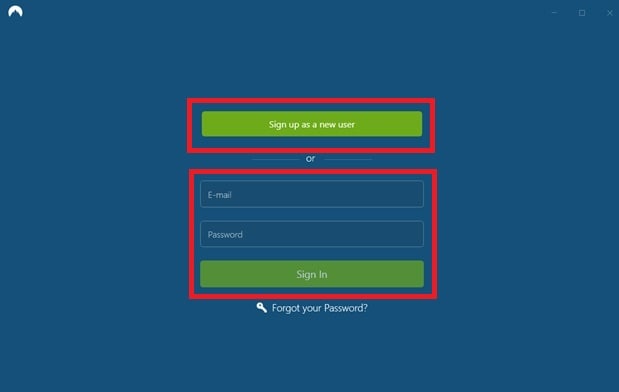
Step 2: Use Quick Connect or connect to a specific country by clicking on the pin on the map. You can click on Search here as well to find a specific server in the country of your choosing. There’s also a list of countries at the left sidebar so you can choose a server manually.
 Simple and intuitive video editing
Step 3: Open YouTube and browse previously blocked content.
The Best VPNs for YouTube
Aside from NordVPN, there are other VPNs you can try to access content on YouTube, including ExpressVPN, CyberGhost, and Surfshark.
NordVPN utilizes up to 5,200 servers in 60 countries, with some servers optimized for ultra-fast streaming. It’s one of the fastest VPNs available today, where you can unblock geo-restricted content wherever you are, with a no-logs policy for unbreakable encryption.
Like NordVPN, ExpressVPN optimizes speed for downloading and streaming. It uses more than 3,000 servers in more than 90 countries to provide cutting-edge connectivity, which includes 256-bit AES encryption for perfect anonymity.
CyberGhost has over 7,000 servers in more than 80 countries to unblock geo-restricted content across YouTube, Netflix, Amazon Prime, and more. CyberGhost doesn’t keep logs of your activities as well, ensuring your activity is safe.
Lastly, Surfshark is another reliable VPN to unblock restricted content on YouTube and other platforms. It uses up to 3,200 servers in 65 countries to provide a high-speed and low-latency connection at all times. Surfshark has a no-logs policy like the three VPNs on the list, making your online activity safe and anonymous.
Here’s a handy table to compare the best VPNs available today in terms of ratings, number of servers, supported devices, prices, and more.
| NordVPN | ExpressVPN | CyberGhost | Surfshark | |
|---|---|---|---|---|
| Number of Servers | 5,200 Servers | 3,000 Servers | 7,000 Servers | 3,200 Servers |
| Streaming Reliability | Excellent | Good | Good | Excellent |
| Streaming Services | YouTube | |||
| Netflix | ||||
| HBO Go | ||||
| Amazon Prime | ||||
| SkyGo | ||||
| BBC iPlayer | ||||
| Etc. | YouTube | |||
| Netflix | ||||
| HBO Go | ||||
| Amazon Prime | ||||
| SkyGo | ||||
| BBC iPlayer | ||||
| Etc. | YouTube | |||
| Netflix | ||||
| Amazon Prime | ||||
| BBC iPlayer | YouTube | |||
| Netflix | ||||
| HBO Go | ||||
| Amazon Prime | ||||
| SkyGo | ||||
| BBC iPlayer | ||||
| Etc. | ||||
| Supported Devices | Windows, macOS, iOS, Android, Linux, Smart TVs, Routers | Windows, macOS, iOS, Android, Linux | Windows, macOS, Linux (command line), iOS, Android | Windows, macOS, iOS, Android, Linux |
| Average Speeds | 100+ MBPS | 100+ MBPS | 100+ MBPS | 100+ MBPS |
| 24/7 Support | Yes - with live chat | Yes - with live chat | Yes, but email only: [email protected] | Yes, but email only: [email protected] |
| Free Trial | None - but with a 30-day money-back guarantee | None - but with a 30-day money-back guarantee | 24-Hour free trial | 7-day free trial for Android, iOS, and macOS only |
| Prices | $11.99 - 1 Month | |||
| $59.88 - 1 Year | ||||
| $95.76 - 2 Years | $12.95 - 1 Month | |||
| $59.95 - 6 Months | ||||
| $99.95 - 1 Year | $12.99 - 1 Month | |||
| $41.94 - 6 Months | ||||
| $56.94 - 2 Years + 4 months free | $12.95 - 1 Month | |||
| $47.88 - 1 Year | ||||
| $59.76 - 2 Years |
Method 3: Change Your Country on YouTube Using a Proxy Server
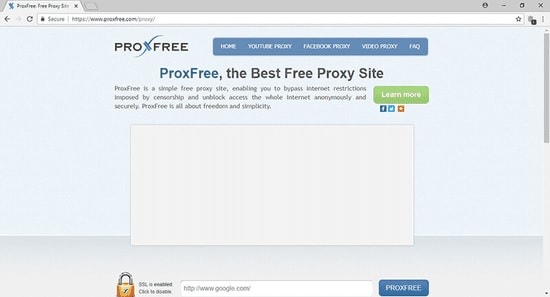
Using a Proxy to mask your location on the internet allows you to change your country on YouTube to access blocked content. In this example, we’ll use ProxFree YouTube Proxy to view locked YouTube content. Here are the steps to change your country on YouTube using a Proxy Server.
Step 1: Go to ProxFree YouTube Proxy .
 ZoneAlarm Extreme Security NextGen
Step 2: On the Server Location dialogue box, choose a country in the available options on the dialogue box.
Step 3: Enter the URL of the specific video you want to see unblocked and click PROXFREE to open YouTube in the proxy’s tab.
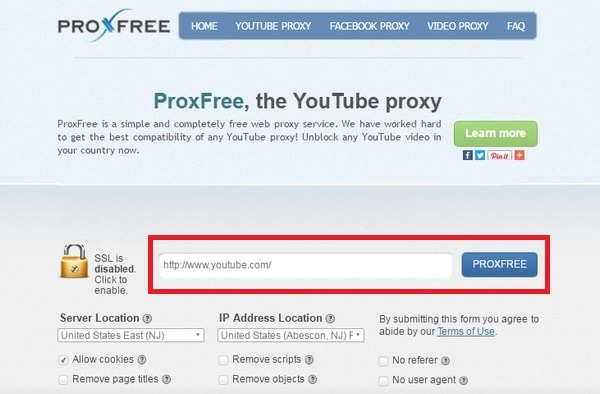
Note: You can also use YouTube’s search bar once YouTube’s tab is open on your proxy to search YouTube videos as usual.
Method 4: Change Your Country on YouTube Using a SmartDNS
Using SmartDNS to bypass YouTube geo-restrictions is useful for viewing blocked content in your country. This is because SmartDNS changes the Samsung Galaxy S24+ device’s virtual location by editing its DNS address. Here are the steps to change your country on YouTube using SmartDNS.
Step 1: Find and select a DNS Server address from different DNS providers online. In this example, we’ll be using SurfShark .

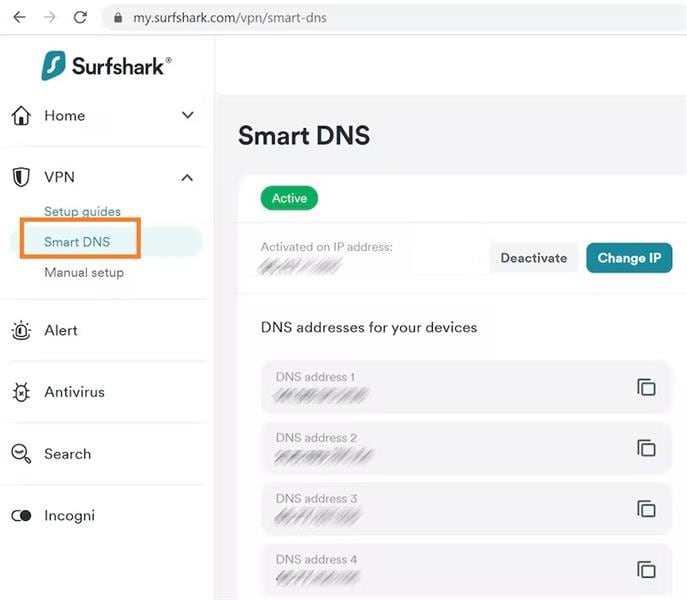
Step 2: Login or create an account. Click Smart DNS > Activate Smart DNS. Take note of the DNS address available to input on your computer’s Network Settings.
Step 3: Open Network Settings on your computer and find DNS Settings.
Step 4: Input your DNS Server address and click Ok once done. The DNS address should activate once you reconnect to the internet.
Note****_:_ Your IP address changes every 24 hours, which your ISP does. You’ll have to update your DNS address when it happens.

Method 5: Other Ways to Bypass YouTube’s Regional Filter
The easiest way to bypass YouTube’s regional filter is simply by downloading YouTube videos outright. Many websites are available online that allow you to download YouTube clips for free. In the step-by-step guide below, we’ll be using iTubeGo to download YouTube videos for viewing at a later time.
Step 1: Download and install iTubeGo . Launch the application on your computer.
 vMix HD - Software based live production. vMix HD includes everything in vMix Basic HD plus 1000 inputs, Video List, 4 Overlay Channels, and 1 vMix Call
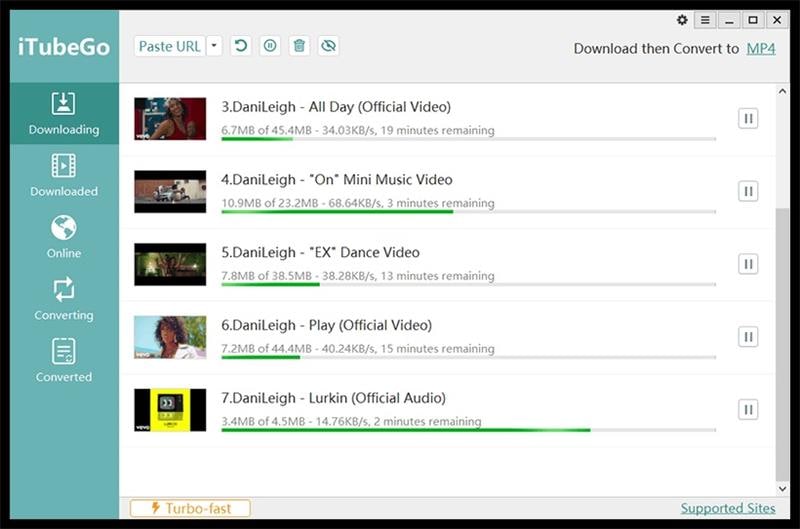
Step 2: Click Paste URL and paste the YouTube video’s URL on the dialogue box.
Step 3: Click Download to save the YouTube clip on your computer.
Here are the pros and cons of using each method to unblock geo-restricted content on YouTube.
| Pros & Cons | Manually on YouTube TV | Using VPNs | Using Proxy Servers | Using SmartDNS | Offline Downloads |
|---|---|---|---|---|---|
| Pros | You can easily change locations without downloading other applications. | Change countries on-the-fly to access even more content. | Some Proxy Servers don’t require downloading applications to use. | Unblocks geo-restricted content, much like VPNs. | You can always watch videos at a later time once downloaded. |
| Cons | You’re only allowed to change twice a month. | VPNs aren’t free, and you have to pay for a subscription. | Setting up Proxy Servers requires a little bit of technical know-how. | DNS is prone to manipulation by hackers. | You need to download a dedicated program to save YouTube videos. |
Part 3: Why Do Regions Block YouTube Content?
Although all YouTube videos are hosted on the same platform, a lot of them are geo-restricted to specific countries for various reasons. Many YouTubers sometimes lock their content in certain countries/regions due to licensing rights. YouTube may also block specific content to countries/regions to comply with local laws.
Conclusion
There are multiple ways to change your country on YouTube to access content that is otherwise unavailable in your location. You can change your country in settings on the YouTube app or use other methods, including using VPNs, SmartDNS, or Proxy Servers, to name a few. If all else fails, you can download an application that lets you save YouTube videos for offline viewing at a later time.
How to Change Samsung Galaxy S24+ Location on Skout
When it comes to dating application or website, Skout has made its appearance in this regard a long way back. The app was founded in 2007 and offers a platform to help you get connected with the people. You can use Skout either on your Samsung Galaxy S24+ or an iOS device. The main function of the app is that it takes help of your device’s global positioning system (GPS) and lets you find the users in a specific radius where you are.
Since it is a location-based app, many times you might have questioned like “how can I change my location on Skout”. If yes, this article is what just you need. We will assist you how to change location on Skout on Android as well as iOS devices. Scroll down and get to know more!
Part 1: 2 Solutions to Change Skout Location on iOS
1.1 Change Skout Location on iOS using a GPS Simulator
When you are an iPhone user, the best way to change Skout location is using dr.fone – Virtual Location (iOS) . This tool performs way better than any other in the market when you want to change iOS location. With the help of this, you can easily teleport anywhere across the world. Moreover, you can fake routes and show moving from various places. It is completely safe to use and a user-friendly one. Here is how you can do Skout location change on PC using this tool.
Step 1: Get the Software
From the original website of dr.fone – Virtual Location (iOS), download it on your computer and then install it. When you do the installation process completely, you are required to launch the program. After launching, choose “Virtual Location” tab from the first page.
Step 2: Plug iPhone to PC
Take your iOS device and get the original lightening cord as well. Make a secure connection between the computer and the iPhone using it. When it gets detected by the program, click on “Get Started” button.
Step 3: Activate Teleport Mode
You will see a map window now. Here, what you firstly need to do is to find the actual location of yours. If you can’t find the accurate location, go to the icon at the lower right part which is “Center On” icon. This will bring the accurate location.


Now, from the three icons available at the upper right side of the page, click on the 3rd one. This will enable the “Teleport Mode”. Once done, enter the name of the place in the field given and hit on “Go”.
Step 4: Spoof Location
The program will no longer take time and easily understand the location. It will display a pop-up from where you need to click on the “Move Here” button. The location will be successfully changed now. You can now see the changed or spoofed location on your Samsung Galaxy S24+ easily.

Dr.Fone - Virtual Location
1-Click Location Changer for both iOS and Android
- Teleport from one location to another across the world from the comfort of your home.
- With just a few selections on your computer, you can make members of your circle believe you’re anywhere you want.
- Stimulate and imitate movement and set the speed and stops you take along the way.
- Compatible with both iOS and Android systems.
- Work with location-based apps, like Pokemon Go , Snapchat , Instagram , Facebook , etc.
3981454 people have downloaded it
1.2 Change Skout Location on iOS using Cydia
Another way to get the Skout location changed is through Cydia. Cydia is basically a platform that allows you to install the applications that are not validated by Apple. However, you will need to jailbreak your device in order to go ahead.
Limitations:
- As we have mentioned above, one of the biggest disadvantages of using this way is that you will have to get your device jailbroken. And no doubt the other limitations will also be related to this.
- While using this method, your device may end up getting bricked. So, be sure if you really wish to use this method.
- Lastly, the method can make your device vulnerable to malware and other malicious apps.
If you are still comfortable using Cydia to change Skout location, let us move on the steps.
Step by Step Guide on how to change location on Skout app
Step 1: Open CYdia in the first place and search for “FakeLocation”.
Step 2: Tap on “Modify” and get back to the Homescreen.

Step 3: Look for the FakeLocation app icon now and tap on it. Once you open it, tap on “Choose my fake location.

Step 4: Use the map to adjust at the location you want to spoof.

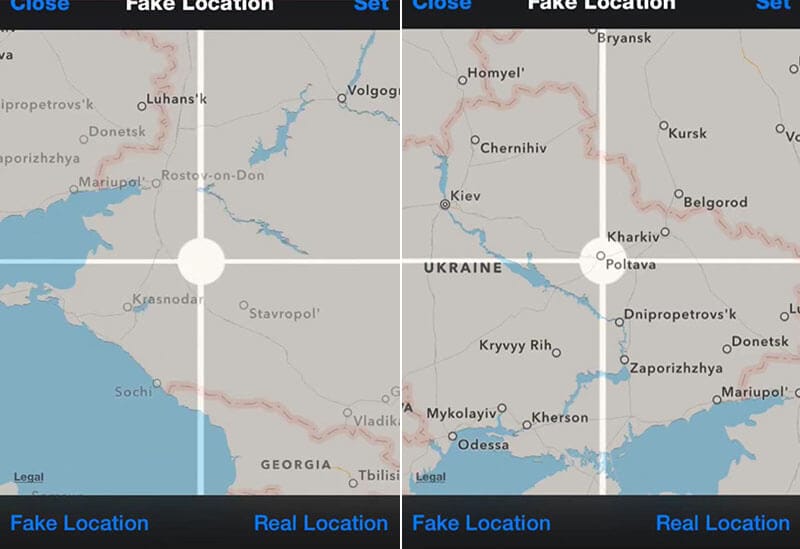
Step 5: Now, you are done. Just open Skout and enjoy the new location.
 SwifDoo PDF 2-Year Plan

Part 2: Change Skout Location on Android with a Spoofer App
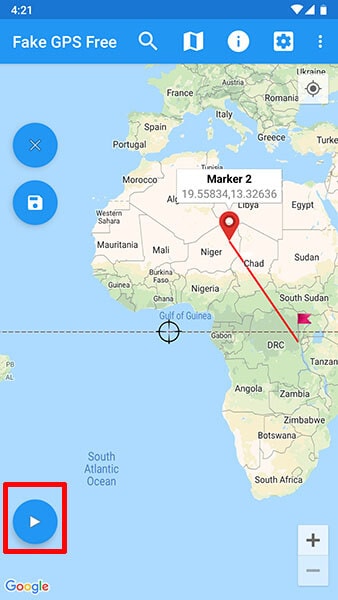
If you are an Android user and wondering how to change your location on Skout, all you need is a spoofer app. You can get a lot of options from Play Store. However, one of the popular apps that can be relied upon is Fake GPS GO Location Spoofer Free. This app doesn’t require rooting if your device is having Android version 6 and more. You can easily create routes with this app. Let us know how this works.
Step by Step Guide to change Skout location via FakeGPS Go
Step 1: Before you get the app installed it is important to turn on the developer options firstly. And to do this, all you need is to go to the “Settings” in your device and tap on “About Phone”.
Step 2: You will see a “Software Info” option. Tap on it and scroll to the build number. Tap on it 7 times and you will see the developer options getting enabled on your device.
Step 3: As we are using Android, you need to head to the Google Play Store and look for the app on it. Now, install and then open it to proceed.
Step 4: While the app is launched, tap on the “ENABLE” option located at the bottom.

Step 5: Now, you will be directed to the Developer options page. Here, choose “Select mock location app” and tap on “FakeGPS Free” subsequently.

Step 6: Now, get back to the Fake GPS app and the look for the route that you want to spoof. Press on the Play button and you are good to go. Your location will be changed on Skout.
Limitations:
- No matter spoofing is fun, but you need to be a little careful. In case it gets detected by the company, your account may get banned as this is against the policy of any app.
- The process of using the spoofer app to change Skout location can seem to be difficult and complex.
- Some apps require you to root your device in order to let you proceed with spoofing properly.
- When you spoof your location with the app too frequently, this may make your profile under suspicious activity monitoring.
Part 3: Use Tinder instead
Tinder has its own popularity among today’s generation and it has revolutionized the way of dating. If you are interested in faking location on a dating app, using Tinder will be our next suggestion. Unlike Skout, Tinder offers it own Tinder + feature in order to assist you in changing the location of your device. The condition is to subscribe the plan for Tinder +.
However, when you use Tinder +, you may feel it to be an expensive deal. On the other hand Skout is free to sign up. You need to be having a Facebook account in order to join Tinder whereas Skout doesn’t want any such requirement. Moreover, on Skout, you can have the meet tab with which you are allowed to see the photos of people and know the age.
Here are the detailed steps on how you can change location.
Step 1: Launch the Tinder in your Samsung Galaxy S24+ as the first step. Upon launching it successfully, go to your profile icon and tap on it. You will find it at the top of the screen.
Step 2: Look for the “Settings” option now and then choose “Get Tinder Plus” or “Tinder Gold”. You can now subscribe a plan and then Tinder + will be yours.
Step 3: Now, again open the Tinder app followed by tapping on the profile icon.
Step 4: Choose “Settings” and hit on “Swiping in” option. Next, tap on “Add a new location” and then you know what to do.

- Title: Change Location on Yik Yak For your Samsung Galaxy S24+ to Enjoy More Fun | Dr.fone
- Author: Abigail
- Created at : 2024-07-24 19:21:51
- Updated at : 2024-07-25 19:21:51
- Link: https://location-social.techidaily.com/change-location-on-yik-yak-for-your-samsung-galaxy-s24plus-to-enjoy-more-fun-drfone-by-drfone-virtual-android/
- License: This work is licensed under CC BY-NC-SA 4.0.