
How to Change your Nokia 105 Classic Location on Twitter | Dr.fone
How to Change your Nokia 105 Classic Location on Twitter
Twitter is one of the most used social media platforms of today’s time, where anyone can voice their opinion regarding any trend or event in the form of short messages. Moreover, it’s a free platform that displays the hot debates and news based on your country, which is usually a good thing.
However, it restricts other global trends due to the limited location exposure. However, you can change the trending location according to your preferences with a few tricks to avail the best experience. If you have questions such as how to change your Twitter location, then this article is for you.
Part 1: How to Change Location on Twitter
Usually, Twitter allows you to keep tabs on current hot topics in your country. While in Nowadays, people prefer to be aware of the global trends, which are impossible to access with the default settings. But there are a few valuable ways by which you can change Twitter location regardless of any device to gain the most out of this mega content platform.

How to Change Twitter Location on Mobile Phone
Twitter for mobile is easy to use, but it offers limited privacy options compared to desktop versions, such as you can’t change your username or delete your account on the mobile Twitter. Still, it does allow you to change your location in a few easy steps:
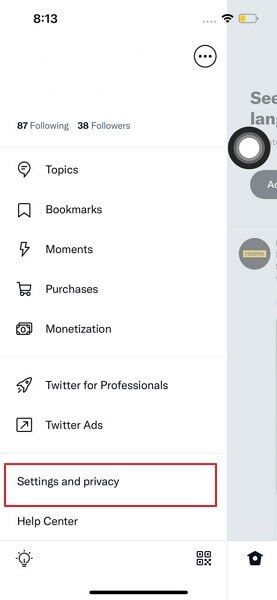
Step 1: First, open the Twitter app, visit your profile, and go to “Settings and Privacy.”

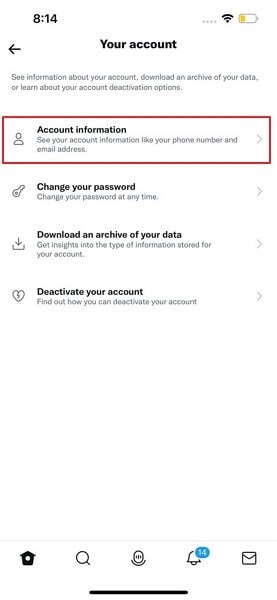
Step 2: Next, click on “Your Account” and later on “Account Info.” You have to access your “Account Information” by clicking on it.
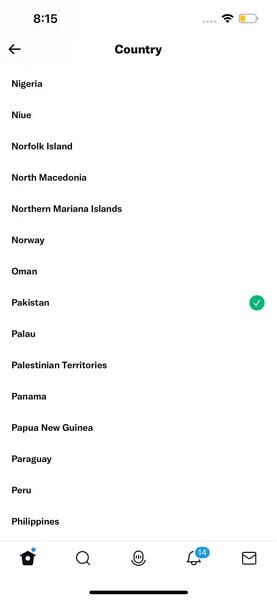
Step 3: Lastly, choose the “Country” and change the location according to your preference.
Parental Control Software
How to Change Twitter Location on a Computer
Unlike Twitter applications, the desktop version is efficient. For example, you can change the Twitter location to your desired region in just a few steps:
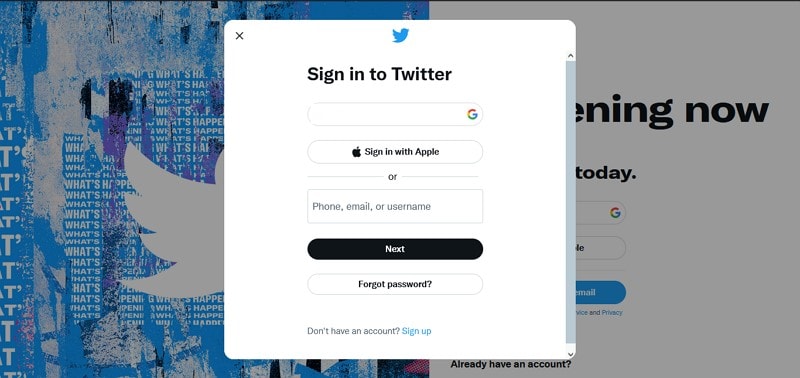
Step 1: First, go to the Twitter website and log in with your username and password.
Step 2: After logging in, go to “More” options from the Twitter home and click on “Settings and Privacy,” Now, select the option of “Account Information” from the “Your Account” settings.

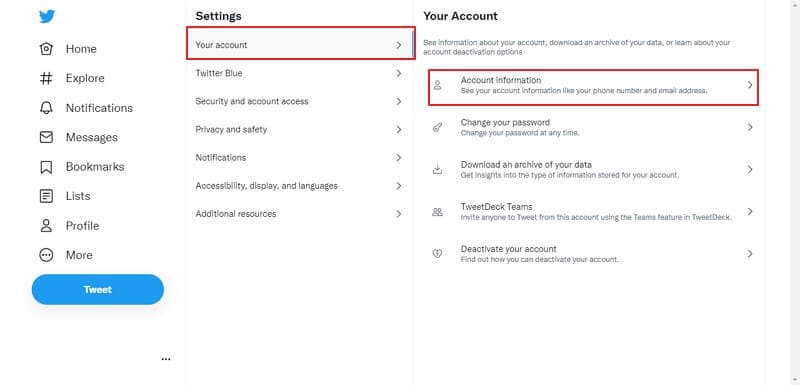
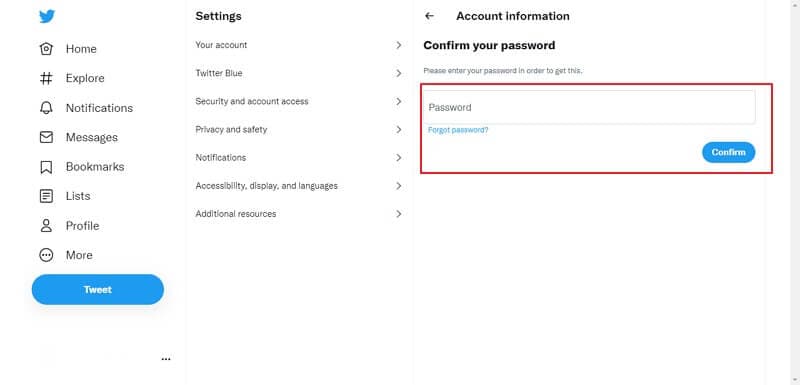
Step 3: You will be asked to enter your password. After confirming your password, click on the “Country” you wish to change your Location.

WPS Office Premium ( File Recovery, Photo Scanning, Convert PDF)–Yearly
What is the Difference between My Profile Location and My Country Setting on Twitter?
Country setting and profile location are both entirely different things. The country setting determines what trends and news will be displayed on your discovery page.
In contrast, profile location is your public location that other users can see when visiting your profile. Therefore, changing your country setting will not impact your original profile location unless you make a change yourself.
Part 2: How to Fake Location on Twitter
In this technological era, changing your location to the other end of the world is just a few clicks of tasks; various software is available on the market, such as Dr.Fone, which can easily spoof your location.
Dr.Fone – Virtual Location is a well-recognized software compatible with iOS and Android devices. It can easily change your area to your desired country in a few clicks without risking your privacy.
Why Do We Need to Fake Location on Twitter?
There are several reasons people want to learn how to change location on Twitter. Some of the reasons are mentioned below:
For Privacy Protection
Almost all social media platforms use your IP address and location to provide you with a genuine experience. Still, many people do not wish to risk their privacy, and for that reason, they use software and tools to fake their location.
For Tricking Friends and Family
You can spoof your location to prank or trick your friends and family into thinking that you’re on vacation or taking a trip when you’re not.
For Making New Friends
One of the reasons people prefer to spoof their location is to socialize and make friends with people other than their region; it’s the most innovative way by which you can easily have a chat with anyone from around the world without revealing your actual location.
Dr.Fone - Virtual Location
1-Click Location Changer for both iOS and Android
- Teleport from one location to another across the world from the comfort of your home.
- With just a few selections on your computer, you can make members of your circle believe you’re anywhere you want.
- Stimulate and imitate movement and set the speed and stops you take along the way.
- Compatible with both iOS and Android systems.
- Work with location-based apps, like Pokemon Go , Snapchat , Instagram , Facebook , etc.
3981454 people have downloaded it
How to Fake Twitter Location by Dr.Fone - Virtual Location
With Dr.Fone – Virtual Location, you can easily fake your Twitter location with a few simple steps:
Step 1: Download Dr.Fone Mobile Toolkit
Firstly, download and install the Dr.Fone – Virtual Location tool on your computer and launch it. Then, select the “Virtual Location” tool from the displayed Dr. Fone tools.

Step 2: Connect your Mobile
Connect your Nokia 105 Classic or Android device to the computer through a USB cable. Now, hit the “Get Started” button.

Step 3: Activate Teleport Mode
You can now see your actual location on the displayed maps and if the location is incorrect, click on the “Center On” icon. To fake the Twitter location, click on the “Teleport” icon at the upper right corner of the screen and search for the location where you want to spoof.

Step 4: Spoof Right Away
Finally, click on the “Move Here” icon in the popup box, and your GPS will be located at that particular location. Now launch the Twitter app, and it will directly display your selected spoof location.
 vMix Basic HD - Software based live production. vMix Basic HD includes 4 inputs, 3 cameras, streaming, recording, playlist.
 Nero Burning ROM:
The ultimate burning program for all your needs!
 safe & secure
 KoolReport Pro is an advanced solution for creating data reports and dashboards in PHP. Equipped with all extended packages , KoolReport Pro is able to connect to various datasources, perform advanced data analysis, construct stunning charts and graphs and export your beautiful work to PDF, Excel, JPG or other formats. Plus, it includes powerful built-in reports such as pivot report and drill-down report which will save your time in building ones.
 It will help you to write dynamic data reports easily, to construct intuitive dashboards or to build a whole business intelligence cockpit.
KoolReport Pro package goes with Full Source Code, Royal Free, ONE (1) Year Priority Support, ONE (1) Year Free Upgrade and 30-Days Money Back Guarantee.
Developer License allows Single Developer to create Unlimited Reports, deploy on Unlimited Servers and able deliver the work to Unlimited Clients.
Part 3: FAQs About Twitter Location
- Could your location be tracked via Twitter?
Yes, you can be tracked through Twitter only when set on default settings. As per Twitter privacy, it’s required to attain your IP address, location, and other details to offer you valid trends and news that are trending within your region.
- How do I enable and disable my location on Twitter?
Choose “Settings and Privacy,” then “Privacy and Safety.” Then, under “Data sharing and off Twitter activity,” head to “Location Info.” Now, hit on “Add Location Information to your Tweets.” If that box is already ticked, your location is enabled; now, uncheck it to disable it.
- What’s the reason behind Twitter having the wrong location?
If you want your Twitter location to be accurate and precise. Firstly, you should enable the location setting from your Twitter application, then go to your mobile settings and enable location services for Twitter. Keep in mind that if one of these settings is not enabled, your location won’t be correct.
- Why does Twitter hide worldwide trends?
In 2020, Twitter changed its privacy by removing worldwide trends. Still, few global trends can be seen on the explore page, directly or indirectly connected with your location or your preference of content to offer the best experience to you. But, if you wish to explore more of these worldwide trends, you can always spoof the location.
Conclusion
Twitter is one of the most content-consuming social platforms globally. Its users are always thirsty to debate and share their opinions on various topics, which can, unfortunately, be restricted because of the limited exposure to global trends. But with the help of this detailed article, anyone can easily change Twitter location to the desired region.

safe & secure
![]() FX PRO (Gold Robot + Silver Robot(Basic Package))
FX PRO (Gold Robot + Silver Robot(Basic Package))
Top 7 Skype Hacker to Hack Any Skype Account On your Nokia 105 Classic
The rise in social media and online apps to communicate has made it easy to exchange information, emotions, and much more stuff which were not possible in earlier times. But with that, it has also increased the scope of secrecy. It has become really difficult to make a person accountable. While you may be thinking that the other guy is using it for a useful purpose, the actual scenario will be somewhat different. Whether you want to snoop into your kids’ activity or you want to make sure that your employees are not wasting time, the Skype Hacker apps will be of great rescue to you.
The most obvious question that will flash to your mind is why even to care to use such apps. Well, these apps are specially created to handle the Skype apps and cater to the needs of the user who wants to snoop on the screen of other people. It is not only a useful tool regarding monitoring the activities of the targeted person but will also help to make them accountable for wrongdoings. So let us dive deep and explore the top 7 Skype hacking apps:
1. mSpy
One app that has gained a lot of reputation among the security industry is mSpy . It believes in practical yet straightforward features that will show results. And this fact is reflected in the simple yet intuitive interface of the application. The app can be accessed on all types of platforms which makes it easy to access it anywhere, wherever you want to. The Skype hacking app lets you keep track of all the calls, video chats and IM chats that the targeted user will do on an everyday basis.
Pros:
- Packed with lots of features that make it versatile.
- The app can be used on multi-platforms
Cons:
The software does not provide any provision to monitor video calls.
Price:
The premium version starts at $12.50 per month. It has various packages and accordingly the cost varies
URL:

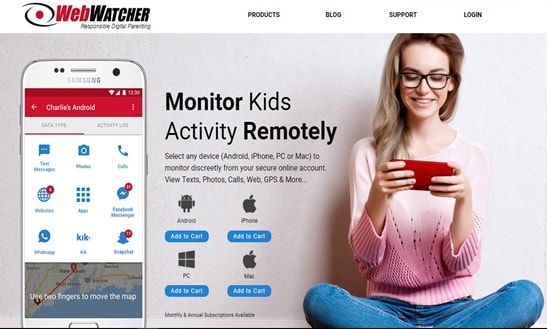
2. WebWatcher
Primarily targeted for parents who want to spy on their children’s activity. The WebWatcher has been one of the favorite apps of many Skype Hacker users. It is easy to use, intuitive interface and undetected background working in target’s mobile is what makes it ideal for any parent who is suspicious about the children. Other than just tracking Skype it also provides a lot of options to track down the messages on various other apps.
Pros:
- Easy to use and install without any massive setup.
- Can be used to track various social media sites
Cons:
The monthly subscriptions are way priced than yearly subscriptions.
Price:
around $99.99 per year and $39.95 per month
URL:
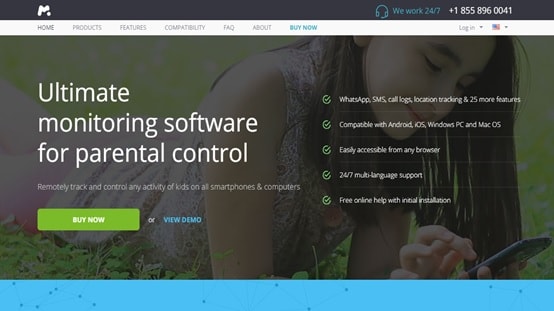
3. Mobile Spy
Mobile Spy proudly introduces a host of facilities that are useful not only for all the parents but also for couples, employers, and other personals who would like to keep a tab on the type of calls done on Skype. This Skype hack is very convenient to be used in Apple and Blackberry phones. It is even able to infiltrate the private messaging apps that come with additional security such as PIN or pattern lock.
Pros:
The Mobile Spy comes equipped with SnipperSPy which is aimed at activities like keylogging, password extractions, and a lot more.
Cons:
- The app is not so perfectly crafted for Windows or Android.
- No monthly trial. It begins with the 3-month purchase
Price:
Basic: $49.97 and Premium: $64.97
URL:
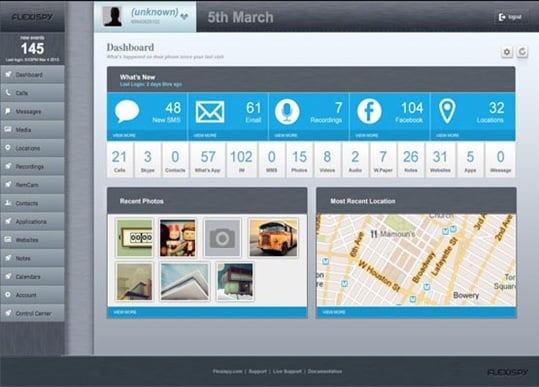
4. FlexiSpy
FlexiSpy is packed with a lot of features that can make some users overwhelmed at first look. Although one may never need all the features, they all are used to track and monitor the activities of the target. This Skype Hacker can be recommended for personal use.
Pros:
Packed with lots of features in a single clean package
Cons:
The package is a bit overpriced
Price:
Premium: $68 per month. Extreme: $199 per quarter
URL:
 Project Manager - Asset Browser for 3Ds Max
5. Skype Account Hacker
While all the apps mentioned above were multi-functional, this app is purely dedicated to Skype hacking. Skype Account Hacker comes with dedicated-hassle-free features that can only be used to hack Skype accounts. If your aim is solely to hack a Skype account then this application can be perfect for you. Such a Skype hacker makes it easy for the user to avoid the hassles of surfing through the app and instead get the work done straight.

Pros:
It is purely dedicated to stealing the Skype account password. This way you can get complete access.
Cons:
It cannot be used for other social media sites
Price:
Free
URL:
6. Highster Mobile
Highster Mobile has been one of the oldest apps that is available on the market. It not only hacks Skype but also helps to track other social media as well as carries out other monitoring activities which can be useful to monitor the target’s behavior. You will need to root your target device in order to spy on their Skype activities. Since this application runs in the background as well as hides under a pseudo name, it is difficult for the targeted user to find and delete it manually.
Pros:
It is packed with a lot of robust features, and it keeps updating on a timely basis.
Cons:
It is device-specific and for each device tracked you will need to pay separately
Price:
Starts from $75.00
URL:
7. Mobistealth
Mobistealth is a highly capable software that can hack any Skype account in a matter of minutes. With this software, not only can you read the Skype chats and texts but also, record the Skype video chats on all types of devices like Android, iPhone, Symbian, etc. Highly recommended by the IT experts, Mobistealth profits from the fact that it has a team of highly qualified technical experts who are always available to a walkthrough you through all the features and guide you on how to use each feature with perfection.
Pros:
Robust and extensive features
Cons:
It is not possible to install this software remotely
Price:
Starting from $33.50 for premium and $40 for premium plus
URL:
Although it is a fascinating fact that we can maintain a level of secrecy in the everyday task, we perform on the computer, it is equally important to keep track of the activities of the beloved ones and those who are working under you. This helps you to hold them accountable even in your absence. Not only that you can also have peace of mind as you can access the apps remotely anywhere. This makes it easy for the user to monitor the activities at their comfort. These Skype account hackers are not only legitimate but also come with customer service support. Service support will always take care of any technical problem, in case, anything goes wrong.
How to Send and Fake Live Location on Facebook Messenger Of your Nokia 105 Classic
Do you want to learn how to fake a live location on Messenger? Here’s the perfect learning spot. These days, many situations can compel you to spoof location on Facebook Messenger. But as simple as it sounds, you might need to invest in a costly VPN. Facebook requests permission to track your actual GPS location when installing the app or creating an account. But fret not because you don’t even need a VPN service to change your Facebook location. This post will show you several shortcuts on how to send a fake location on Messenger.

Part 1: The Benefits of Changing Location on Facebook Messenger
There are numerous reasons to learn how to send fake locations on Messenger, just as initially said. Here are some of them:
- Business awareness
Sometimes, you might want your customers to believe that your products or offices are in a specific location. In that case, spoofing your live location on Messenger is a great idea.
- Prank friends and have fun
There’s nothing wrong with fooling your Facebook friends about your location. You can show them that you’re in a unique spot when you’re just around them.
- Hide identity
Your online security is paramount. And one way to protect yourself from online sniffers is by spoofing live locations on Facebook Messenger.
- Make new friends
Often, Facebook will tailor its friend suggestions to people close to your proximity, thanks to the “Nearby Friends” feature. But you can start getting new and refreshing tips from people in your new location.
Part 2: How to Change Location on Facebook Messenger
After learning some reasons to fake location on Messenger, let’s now know how to do that with easy steps. You don’t need third-party help to mock live locations on Messenger on Android or iPhone. That’s because the app boasts its inbuilt location feature. Follow me:
Step 1. Open Facebook Messenger and launch the conversation with which you want to share the fake location.
Step 2. Click the “four dots” at the bottom-left corner and tap Location.

Step 3. Now tap Allow Location and choose a new location on the world map that appears.
Step 4. After choosing a location, tap Send Location to share it with your selected friend. It’s that easy!
Part 3: How to Change a Live Location on Facebook Messenger [iOS & Android]
As you can see, sending a pinned location directly on Messenger is only good if you want to share the place with a specific contact. In other words, you can’t natively spoof the location of multiple contacts on Messenger. So, if you want to fake live location on Messenger on iOS and Android, using a robust option like Wondershare Dr.Fone is a good idea.
With this virtual location tool, you can change your GPS location anywhere. That makes it helpful if you want to brag about your actual location with some tangible proof. Another thing, you can simulate location movements by choosing a particular route or transport. In addition to Facebook, Dr.Fone also works with apps like Pokemon Go , Instagram , Facebook , etc., etc.
You can check out the this video for further instruction.
Here’s how to fake live location on Messenger with Dr.Fone:
Step 1. Download Dr.Fone and fire it up.
Start by downloading and installing Dr.Fone from the official website and launch the software on your Mac or Windows PC. Then, connect your smartphone to the PC using a USB wire. Please ensure to select the “Transfer Files” option.
Step 2. Launch the Virtual Location tool and enable USB debugging.

On Dr.Fone’s home page, press the Virtual Location tab and click Get Started. Now enable USB debugging to connect your phone to Dr.Fone. On Android, click Additional Settings > Developer options >USB debugging. Also, remember to set Dr.Fone as the mock location app.
Step 3. Launch the map and choose a fake location for Messenger.
Once USB debugging is enabled, press Next to launch the map. Now enter your new location’s address or GPS coordinates and tap Move Here. And there is that!
Bonus tip: How to make your new Messenger location more believable
Want to make your new location more believable? Simple, Dr.Fone will help you with that. Just enter the new coordinates or location on Dr.Fone and take a screenshot of the new area. Of course, you can find dozens of free location pictures on Google. After that, open the image on Facebook and tap the “location” icon. Now search and select your new location and post the picture.
Up to this point, you shouldn’t have any qualms spoofing your live location on Facebook Messenger. For example, if you want to send a pinned GPS coordinate to a single contact on Messenger, then simply use the inbuilt function to change location. However, your new location might not be believable since your actual device location will remain the same. In other words, there’s no proof that you’re actually in that particular location.
So, use Dr.Fone to fake location on Messenger with unreal precision. This third-party location changer allows you to teleport your location to anywhere. You can even change Messenger location by walking, driving, or cycling. Then to make it more believable, you can share a post with a screenshot of your new location. Remember, your new location will be visible to all your Facebook friends.
Part 5. FAQ: What People Also Ask about Facebook Location Services
1. Why is my Facebook Messenger location wrong?
The issue of the wrong Facebook location is commonplace these days. Fortunately, it’s nothing complicated as it’s mainly about the incorrect GPS settings on your phone. So, go ahead and enable GPS tracking on your device.
Open Settings > Privacy > Location Services for iPhone users and then enable Location Services. On the other hand, Android users should click Settings > Security and Location > Locations > and enable Use Locations.

2. Can I fake my location on Facebook?
In a typical scenario, it’s impossible to lie about your location on Facebook. That’s because the app asks for permission to track your GPS location before you can use it. But as you’ve seen, Wondershare Dr.Fone makes it a cakewalk to a fake live location on Messenger.

3. How can I hide my location on Facebook?
As said earlier, the reason why Facebook gives the wrong location is because of disabled location settings. It’s the reverse! So, use this Settings feature to hide your actual location on Facebook.

Conclusion
Any queries regarding how to send a fake location on Messenger? Let us know if you have any. Meanwhile, use Messenger’s inbuilt location feature to share an artificial place with a friend or contact. But because this method only allows you to share fake locations with a single chat, use Wondershare Dr.Fone - Virtual Location instead. It’s simple, fast, and effective. Are you ready?
 safe & secure
- Title: How to Change your Nokia 105 Classic Location on Twitter | Dr.fone
- Author: Abigail
- Created at : 2024-07-24 18:00:35
- Updated at : 2024-07-25 18:00:35
- Link: https://location-social.techidaily.com/how-to-change-your-nokia-105-classic-location-on-twitter-drfone-by-drfone-virtual-android/
- License: This work is licensed under CC BY-NC-SA 4.0.