
How to Change/Fake Your Motorola Moto E13 Location on Viber | Dr.fone
How to Change/Fake Your Motorola Moto E13 Location on Viber
Viber is one of the most commonly used messenger apps. It allows you to send short messages like texts, videos, images, audio, and documents. Viber also has another exciting feature that will enable you to share your location. But sometimes, you might want to change location on Viber to prank your friends or for security purposes. So, read on to learn how to fake location on Viber with some simple solutions.

Part 1: What is the My Location feature on Viber?
If you’ve used WhatsApp’s location feature before, you’ll know what Viber’s “My Location” is all about. With this feature, you can share your live location for whatever reasons you may have. For example, you may want to share your live location with your kids or vice-versa. Or, you might simply want to share a fake location on Viber with your nosy friends.
But as good as it sounds, this live location feature is enabled by default on your Motorola Moto E13/Android browser. Therefore, you can send a location on Viber without knowing. This can be advantageous to stalkers or even cause misunderstanding in your relationship. What’s worse, it shares your actual location with every text you send. But fret not because this post will help you disable or enable My Location on Viber according to your needs.
Part 2: How to disable or enable My Location on Viber?
So, without wasting too much time, let’s find out the steps to disable/enable Viber location-sharing feature. It’s straightforward.
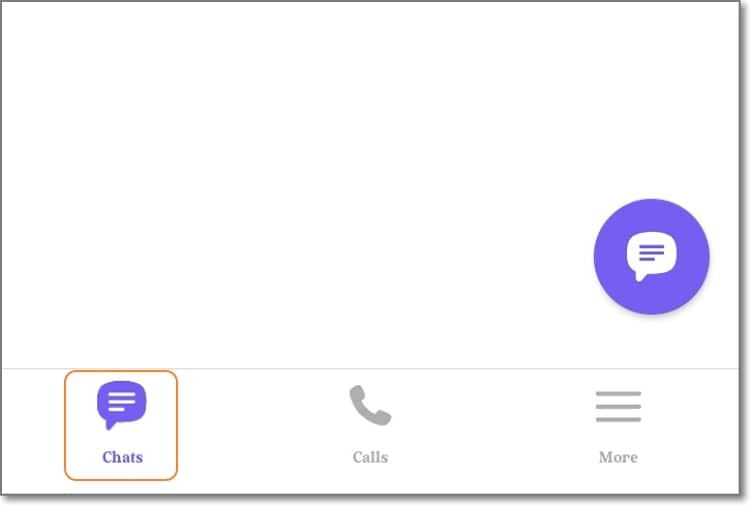
Step 1. Fire up your Viber app on mobile or PC and tap the Chats button. Here, proceed to open a chat that you want to enable/disable location sharing.
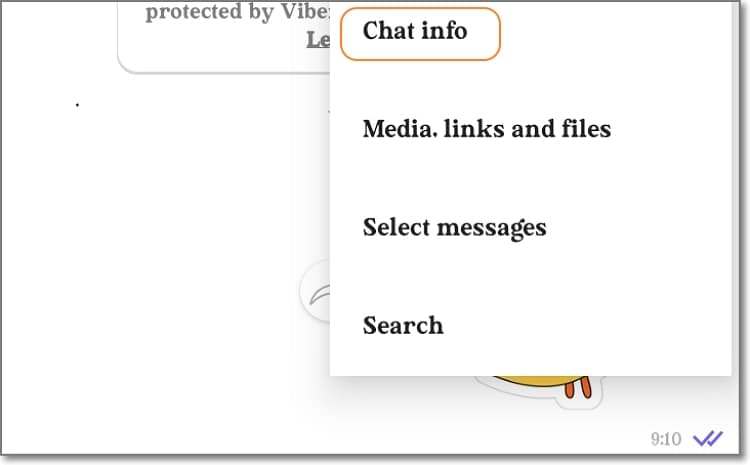
Step 2. Next, tap the Ellipsis (three dots) icon at the top-right corner of the screen and choose Chat Info. Alternatively, simply swipe the screen to the left.

Step 3. On the Chat Info window, simply enable or disable the Attach location always toggle. It’s done!

Pro tip: You might be wondering how to share your actual Viber location with a chat or group. Again, this is very straightforward. Simply open the conversation and tap the three dots on the text field. Then, click the Share Location button and choose your location on the Google map. Lastly, tap Send location to share the Viber location with your selected contact.
 vMix Pro - Software based live production. vMix Pro includes everything in vMix 4K plus 8 channels of Replay and 8 vMix Call
Part 3: Can I send a fake location on Viber, and How?
So, is it possible to Viber’s fake location? Unfortunately, Viber doesn’t allow users to share a different place from the real one. That’s because the app asks to automatically access your actual location data using Wi-Fi or GPS while signing up. Therefore, based on the permission you set yourself, the answer is NO.
But nothing is impossible in the tech world. You can easily instruct Viber to share a different location using a third-party app or service like Dr.Fone - Virtual Location . With this professional GPS tool, you teleport your Viber location to anywhere in the world with a simple mouse click.
It’s compatible with Android/iOS devices and boasts a simple-to-understand map. Interestingly, you can walk or drive to your new location and even stop between destinations to make it more believable. It’s nothing complex!
You can check out the this video for further instruction.
Key features of Dr.Fone - Virtual Location:
- Compatible with all Android and iOS versions.
- Teleport Viber location to anywhere in the world.
- Walk or drive to your new Viber location.
- Simulate Viber movements with custom speed.
- Works with Pokemon Go , Facebook, Instagram , Snapchat , Viber, etc.
Steps to change Viber location with Dr.Fone:
Step 1. Launch Dr.Fone Virtual Location.

Install and run Wondershare Dr.Fone on your Windows/Mac computer, and then tap the Virtual Location tab on the Home page.
Step 2. Connect your phone to Dr.Fone with a USB cable.
Connect your smartphone to your PC using a USB wire and tap Get Started on the new Dr.Fone pop-up window. Remember to enable the “File Transfer” option on your smartphone instead of “Charging.”
Step 3. Link your phone to Dr.Fone via USB debugging


Press the Next button to begin connecting your phone to Dr.Fone. If the connection fails, enable USB debugging on your phone by following the on-screen instructions. On Android phones, tap Settings > Additional settings > Developer options > USB debugging. In addition, set Dr.Fone as the mock location app on your phone.
Step 4. Enter the GPS coordinates or location address.

If the connection is successful, the Virtual Location map will launch automatically on Dr.Fone. Now enter the coordinates or address in the location field at the top-left corner. After finding the exact location that you want, simply tap Move Here before sharing your new location on Viber. That is easy, right?

Dr.Fone - Virtual Location
1-Click Location Changer for both iOS and Android
- Teleport from one location to another across the world from the comfort of your home.
- With just a few selections on your computer, you can make members of your circle believe you’re anywhere you want.
- Stimulate and imitate movement and set the speed and stops you take along the way.
- Compatible with both iOS and Android systems.
- Work with location-based apps, like Pokemon Go , Snapchat , Instagram , Facebook , etc.
3981454 people have downloaded it
Part 4: Why send fake location on Viber?
Now that you know how to spoof location on Viber. Let’s discuss some reasons to spoof location on this messaging app. Below are some common ones:
- Protect your privacy
Many people don’t want other online users to have a clue of their actual whereabouts. If you’re one of them, use a third-party tool to spoof your Viber location on your Motorola Moto E13 or Android.
- Prank your friends
Do you want to show your friends that you’re in London or New York when you’re in some remote village/town somewhere in reality? Yes, that sounds cool!
- Improve sales
If you’re a digital marketer, you might want to convince your potential clients that the goods are from a specific region or city close to them. Believe it or not, this can lead to more sales closures.
Wrap it Up
You can share your live location on Viber just like you would on Facebook, WhatsApp, and other social media apps. But because most of these apps don’t allow you to share fake locations, I recommend Dr.Fone - Virtual Location change your area to anywhere in the world. Give it a try!

WPS Office Premium ( File Recovery, Photo Scanning, Convert PDF)–Yearly
Why Your WhatsApp Location is Not Updating and How to Fix On Motorola Moto E13
WhatsApp is a free messaging app owned by Meta, initially Facebook. Currently, this platform boasts over two billion active users, even outshining Messenger and WeChat. One of the reasons WhatsApp is popular is letting users share their live location with individuals and group chats. However, sometimes you may experience the annoying WhatsApp location not updating issue. Luckily, this article has a solution to this problem. We’ll also address how to share my location on the WhatsApp issue. Let’s learn!
 SwifDoo PDF Perpetual (1 PC) Free upgrade. No monthly fees ever.
Part 1: Why is WhatsApp Live Location Not Updating?
First and foremost, let’s discuss some of the reasons why your WhatsApp live location is not updating on Android or iPhone. Below are some of them:
1. Weak internet connection
You should be conversant with the idea that WhatsApp can’t function without the internet. In other words, you can’t send or receive messages and calls without strong internet. And the same applies to updating your live location.
2. Disabled location feature
Here’s another reason why WhatsApp live location is not updating on iPhone or Android. While signing up, WhatsApp will request to access your phone’s GPS location. Therefore, disabling this feature by mistake can prevent WhatsApp from updating your location.
3. Inappropriate time and date
Although uncommon with modern phones, this can be another reason for a wrong live location on WhatsApp. Therefore, connect your phone to the internet to update your date and time. You might also want to restart your phone and see if it works.
Part 2. How to Fix WhatsApp Live Location Not Updating Problem?
Now that you already know why WhatsApp’s live location isn’t updating, it’s time to check out the solutions. Let’s go!
Step 1. Restart internet connection
Sometimes, it only takes a simple phone restart to get things back on track. Of course, this will also sort out any bugs in your WhatsApp app. Another thing, you can enable and disable “flight mode” to restart your data connection.
Step 2. Update the app and phone
When last did you update your system and apps? You should constantly update your apps and phone system to enjoy better performance and security. It is straightforward!
Step 3. Enable location service
You can also check if your location service is enabled on iPhone or Android settings. On iPhone, click Settings > Privacy > Location Service. It’s even easier on Android. Swipe down your screen, long-press the GPS button, and enable the Location toggle.
Step 4. Reset location service on iPhone
iPhone users can try to reset the Location & Service settings. To do that, open Settings > General > Reset > Reset Location & Privacy.
Step 5. Uninstall and reinstall WhatsApp
If all else fails, then it’s probably time to get handy. Simply uninstall your WhatsApp app and then get a newer version on Play Store or App Store. But often, this won’t be necessary after updating the app.
Part 3: [WhatsApp Tip] Fake WhatsApp Live Location with Unreal Accuracy
There have been multiple security concerns about WhatsApp before. But while the jury is still out, do yourself a favor and protect your live location from spyware and other users. Also, you might want to spoof WhatsApp location for business purposes and prank friends.
That said, learning to fake location on WhatsApp is super simple with Dr.Fone - Virtual Location . With this GPS app, you can teleport your WhatsApp live location to anywhere in the world. And to make your new location more believable, this program lets you simulate movements by foot, scooter, or car. Remember, it works with all iPhone/Android versions and other social media apps like Pokemon Go , Snapchat , Instagram , Facebook , etc.
Dr.Fone - Virtual Location
1-Click Location Changer for both iOS and Android
- Teleport GPS location to anywhere with one click.
- Simulate GPS movement along a route as you draw.
- Joystick to simulate GPS movement flexibly.
- Compatible with both iOS and Android systems.
- Work with location-based apps, like Pokemon Go , Snapchat , Instagram , Facebook , etc.
3981454 people have downloaded it
Below is how to spoof WhatsApp live location with Dr.Fone:
Step 1. Open the Virtual Location tool.

Install and launch Dr.Fone on PC, and then connect your phone to the PC with a USB firewire. Then, tap the Virtual Location button on the home page and click Get Started on the pop-up window.
Step 2. Connect your phone to Dr.Fone.
To connect your phone to this all-in-one software, enable “transfer files” instead of “charging” on your phone. Then, enable USB debugging under the settings tab. On Android, just click Settings >Additional Settings > Developer options > USB debugging.
Step 3. Choose a new WhatsApp live location to share.

After USB debugging is on, tap Next and enter the new location on the search field at the top-left corner. Now choose the area and tap Move Here. Interestingly, you can choose a movement route and customize the speed. And there is that!
Part 4. How to Send Live Location on WhatsApp?
Back in 2017, WhatsApp rolled out a brand-new feature that allows users to send their live location to family and friends. This location can come in handy if you want to meet up somewhere or let your friends and family know you’re safe and secure. And lest I forget, you can also use it to prank your friends.
Note, however, that WhatsApp only allows you to share your real-time location for 8 hours, 1 hour, or 15 minutes. In other words, this gives you control over how long users can see you on the map. Moreover, this information can’t be shared with anyone once you stop sharing.
So without wasting time, here’s how to send live location on WhatsApp for Android or iPhone:
Step 1. Enable the GPS service on your phone by clicking the GPS button on the control panel.
Step 2. Open WhatsApp and tap the group chat or individual chat with which you want to share the location.
Step 3. Now click the Attach button on the text field and click Location.

Step 3. Allow WhatsApp access to your device’s location and then press the Share Live Location button.

Step 3. Last but not least, set the duration your contact will view your location, add a comment, and tap the Send button. That’s it!
Note: As you can see, WhatsApp relies on your GPS location to share your actual location. So, use Wondershare Dr.Fone to change your device’s location and then share it on WhatsApp.
Part 5: How to Fix Common WhatsApp Issues on Android & iPhone
Wondershare Dr.Fone is the perfect tool to handle all your WhatsApp issues. Below are some common issues it can help you with:
- Lost Messages
Sometimes you might accidentally or intentionally delete WhatsApp chats or messages. Fortunately, Dr.Fone can help you dig out and recover those messages with a simple click. Just launch the Data Recovery tool, connect your phone to the software, and Dr.Fone will scan for all lost and current messages.
- Transfer WhatsApp data
Thanks to the fast-paced mobile technology, it’s inevitable to migrate to a new phone. But you’ll have to sacrifice all your WhatsApp data. Luckily, Dr.Fone allows you to backup, restore, and transfer all WhatsApp data.
- Backup WhatsApp Business chats
Having a WhatsApp Business account is vital if you’re an online marketer. Here, you can create a business profile and enjoy quick replies, automatic messaging, accurate statistics, etc. So, to avoid losing your invoices and other business chats, use Dr.Fone to back up and transfer your WhatsApp Business chats to a new phone.
Wrap it Up
See, there’s nothing complex about the WhatsApp live location not updating issue. Just update and restart the app or check your location settings if it’s enabled. And, of course, use Dr.Fone to share a fake location on WhatsApp and perform other WhatsApp tasks like backing up and transferring data. Thank me later!
How to Detect and Stop mSpy from Spying on Your Motorola Moto E13
In this era of smartphones and smart gadgets, our lives have been stored inside these devices. Privacy gets more important and urgent when so many apps can spy on you easily. Being concerned about your privacy is a very important thing to consider. We care about your privacy, and we have the tools to take proper measures for the mSpy parental control app.
There are many apps like mSpy that normal users can’t detect due to their stealth behavior. If you want to know how to detect and stop mSpy from spying on you, then you are in the right place. This article will show you how to detect and remove mSpy on Android and iPhone devices without being tech-savvy. Read all the guidelines below on removing mSpy from Android and iPhone without hassle.
Part 1: What is mSpy, and is mSpy detectable on Your Motorola Moto E13?
In this increasingly cynical world, people are using all sorts of monitoring software to monitor the phone activities of kids and employees. One such software is mSpy. Technically, mSpy is made as a business and parental monitoring app at first. But now, it is also used as a spy app that lets you look into someone else’s mobile phone or device.
Spying should not be misunderstood here as this app focuses mainly on checking employees’ devices or kids’ phones. It could be hard to discover since mSpy secretly works in the background. It monitors messages, phone calls, location, social media activity, and other device usages. Different features offered by mSpy are mSpy parental control, mSpy Instagram tracker, mSpy WhatsApp tracker, etc.
The process of detecting mSpy varies from different phone systems, Android or iPhone. Moreover, mSpy is a background app, so you can not normally see if it is installed on your phone or not. But don’t worry, we will help you out with how to detect mSpy. Below we have listed the two detection methods separately.
How to Detect mSpy on Android Devices
For detecting mSpy on an Android phone, that’ll be more direct if you check Update Service through the phone settings. Follow these steps:


- Step 1: Go to your Motorola Moto E13 phone settings.
- Step 2: Select Security.
- Step 3: Go to Device Administrators or Device Admin apps.
- Step 4: Navigate to Update Service (the name mSpy uses to run undetected). See if this service is enabled or disabled. If it is, you have spying software installed on your Motorola Moto E13s.
How to Detect mSpy on iPhone Devices
Apple users don’t have a way to tell for sure if mSpy is installed compared to Android users. But, there are some ways to tell if their devices are monitored.
1. Download history on the App Store
Certain apps masquerade as unharmful but turn out to be spyware. Recently, the malware was found in an app called System Update. That app was installed outside of App Store. After installation, the app hid and exfiltrated data from the users’ devices to the operators’ servers. It’s important to note which apps every user is hiding in their phone. Go to the App Store and download the history. This will help you figure out which apps have recently been downloaded on your Motorola Moto E13.
2. Unusually High Data Usage
There is a big sign that spyware is running in the background. To check the mobile data on your Motorola Moto E13, you need to go to Settings and click on Mobile Data. You will be to see your overall data usage. Scroll down to know how much mobile data individual apps are using. Suppose any user’s average internet usage is around 200 MB per day, and suddenly it increases rapidly to about 800MB per day with the exact usage of the internet. In that case, the user has to be aware as something is fishy.
3. Have Access to Your Device’s Microphone or Camera
When an app uses the microphone on iPhones, you will see an orange dot at the top of your screen and, similarly, a green dot for the camera. On Android phones, when an app starts, you will see a microphone or camera icon popup in the top right corner, which then turns into a green dot. These are healthy indicators that you should not ignore. Also, go to the list of apps that are allowed to access your Motorola Moto E13’s camera or microphone. If you see mSpy there, that means your phone is being spied on.
4. Increased Device Shut Down Time
If the Motorola Moto E13 device fails to turn off properly or takes an unusually long time to do so, it can point to the presence of spyware, or if the phone reboot without your command, then maybe someone is controlling your phone.
5. Jailbreak your own iPhone and download apps from untrusted sources
If you detect the presence of an app named Cydia, then consider it an alarm bell. This advanced package tool will further install apps from untrusted sources. To find out if your Motorola Moto E13 is jailbroken or not:
- Step 1: Drag your finger downward from the center of the iOS home screen.
- Step 2: Type “Cydia” in the Search field.
- Step 3: If you find Cydia, then your Motorola Moto E13 is jailbroken.
Some signs can come in handy when you want to ensure if someone is spying on you or not
Part 2: How to Stop Somebody Spying Using mSpy on the phone?
When you figure out that somebody is spying on your device, the first thing that comes to your mind is how to stop it. If someone has installed mSpy on your device, you can easily control the process. This section will mention the complete process of stopping mSpy on your device. Like the spying app detection process, the spying app removal process is also different in the case of iPhone and Android devices. Below we have mentioned the complete processes of removing mSpy from your Motorola Moto E13 and iPhone device. There are two ways that you can use to remove this app from your devices
Method 1: Prevent mSpy from Spying via Phone Settings App
To remove mSpy from your Motorola Moto E13 manually, one needs to activate two-factor authentication and change your iCloud password.

- Step 1: To change the password, you have to go to Settings.
- Step 2: Click on Profile.
- Step 3: Select Password & Security.
- Step 4: Change password and activate two-factor authentication.
For Android users, you can refer to the following steps to follow:
- Step 1: Go to your Motorola Moto E13 Settings.
- Step 2: Select Security.
- Step 3: Go to Device Administrators or Device admin apps.
- Step 4: Navigate to Update Service (the name mSpy uses to run undetected).
- Step 5: Select Deactivate.
- Step 6: Go back to Settings.
- Step 7: Select Apps.
- Step 8: Uninstall Update Service.
Method 2: Play Protect Feature on Google Play Store [Android only]
Another trick for removing mSpy from your device is by taking help from the Play Protect feature on Google Play Store. But one limitation of this method is that it does not work for iPhone. It is only useful for Android devices.


- Step 1: You can also go to the Google Play store.
- Step 2: Select your Profile.
- Step 3: Select Play Protect.
- Step 4: If it detects any harmful app, select Uninstall it.
- Step 5: Or scan the Motorola Moto E13 device for any harmful apps.
- Step 6: It will notify you if any risky app is found.
Method 3: Spoof Location to Prevent mSpy from Location Tracking [Recommended]
You can use one more method to remove the mSpy app from your device. This method works for both Android as well as iPhone devices. This method spoofs location to prevent the mSpy app from tracking your location. If you feel that someone is tracking your location, you can use third-party app software that helps fake your location. One such app is Dr.Fone - Virtual Location . It is a full mobile device solution for both Android and iPhone devices. It helps solve a wide range of problems ranging from data loss and system breakdowns to phone transfer and whatnot. Dr.Fone Virtual Location is a great thing that allows you to change and fake your location. It also lets you trick the location-based apps and mock GPS locations with customized speed.
Features of Dr.Fone - Virtual Location
- Teleport GPS location with one click to anywhere.
- For stimulation of GPS movement flexibility, the joystick is available.
- Export or import GPX files for saving created routes.
- Offers perfect gaming stability with no crashing risks.
- Support location-based and social media-sharing apps without jailbreak.
Take a look at the video below to quickly learn how to spoof location to stop mSpy from tracking you.
 safe & secure
Step-by-step Guideline to Spoof Location via Dr.Fone Virtual Location
Step 1: Download Dr. Fone and launch the program.


Step 2: Select “Virtual Location” among all the options.
Step 3: Connect your Motorola Moto E13/Android to your computer and click “Get Started”****.

Step 4: You will find your actual location on the map in the new window. If the spot is not inaccurate, tap the “Centre On” icon in the lower right to display the accurate location.

Step 5: Activate the “teleport mode” by touching the icon in the upper right corner. Enter the place you would like to teleport to in the upper corner left field, and tap on “Go.” Set Rome in Italy as an example.
Step 6: Click “Move Here” in the popup box.
 Greeting Card Builder
Step 7: The location is fixed to Rome, Italy, whether you tap the “Centre On” icon or try to locate yourself on your Motorola Moto E13 or Android phone. It will be the exact location in your location-based app as well.
 HD Video Converter Factory Pro

Method 4: Your Last Resort: Do a Factory Reset
Check phone settings app-reset options and clear out all the data from your phones if nothing works from all the above options, one last option is left, factory reset. For that,

- Step 1: Go to phone Settings.
- Step 2: Select System.
- Step 3: Chose Reset options.
- Step 4: Click on factory reset.
Or you can also make use of a third-party app - Dr.Fone - Data Eraser to wipe out data in some clicks
Dr.Fone - Data Eraser
Stop mSpy from Spying on You by Factory Reset
- Permanently erase all data, such as photos, videos, etc from your iOS device.
- It let you uninstall or delete useless applications from your device in batch.
- You can preview data before erasing it.
- Easy and click through the erase process.
- Provide support to all iOS versions and devices, which include the iPhone and iPad.
4,008,671 people have downloaded it
Not even professional identity thieves will be able to access your private data on iPhone or Android devices again. With the help of a third-party app, Dr.Fone – Data Eraser, you can erase all data permanently. This data eraser helps you render your data wholly unreadable and then cleans up the whole disk. It is a one-click solution to wipe all personal data like photos, contacts, messages, call logs, social app data, etc.

Part 3: How to Tell if Your Cell Phone is Being Tracked FAQ

Q1: Is it possible if someone remotely install surveillance software on My Motorola Moto E13?
Basically, it could be extremely hard to remotely install phone surveillance software on an iPhone or Android smartphone without having physical access to the Motorola Moto E13 device in advance. Some remote spying apps will allow you to track the location of an iPhone, but you’d require the user’s iCloud login and password to enable the tracking of the Motorola Moto E13 device. Anything more than that, and you’d need physical access.

Q2: Can Someone Spy on You When your Phone is Off?
Sadly yes. According to What Whistleblower Edward Snowden has said in a 2014 interview that the NSA could listen to and spy on conversations using the microphone on a smartphone, even if you turn off your devices. It makes it by using spyware that prevents your smartphone from actually turning off.
Q3: Can Someone Read My WhatsApp Chats on My Cell Phone?
Sadly, yes. While it isn’t possible on iOS devices, apps can intercept your WhatsApp messages on Android devices due to the operating system’s sandboxing security.
Q4: What Other Forms of Spyware Are There?
Other forms of Spyware include keyboard loggers, Adware, browser hijackers, and modem hijackers.
To Wrap it up
In the 21st century, when the world is connected through one device, almost everybody shares an undercurrent of worry. That is, is someone spying on me through my devices or not? And as much risky and fatal as this can be for a person who does not know if he is being tracked or not, there are solutions one can employ to safeguard himself. This article was all about how to detect and how to remove mSpy on iPhone and Android. Hopefully, now you are well aware of the different methods with their steps. With the help of Dr.Fone - Virtual Location , you can easily spoof or fake your location to hide the real one.
 safe & secure
- Title: How to Change/Fake Your Motorola Moto E13 Location on Viber | Dr.fone
- Author: Abigail
- Created at : 2024-07-24 17:14:17
- Updated at : 2024-07-25 17:14:17
- Link: https://location-social.techidaily.com/how-to-changefake-your-motorola-moto-e13-location-on-viber-drfone-by-drfone-virtual-android/
- License: This work is licensed under CC BY-NC-SA 4.0.