
:max_bytes(150000):strip_icc():format(webp)/GettyImages-667603173-fac0b8f4b1d9453c866d332dc73821f8.jpg)
How to Detect and Stop mSpy from Spying on Your Nokia XR21 | Dr.fone
How to Detect and Stop mSpy from Spying on Your Nokia XR21
In this era of smartphones and smart gadgets, our lives have been stored inside these devices. Privacy gets more important and urgent when so many apps can spy on you easily. Being concerned about your privacy is a very important thing to consider. We care about your privacy, and we have the tools to take proper measures for the mSpy parental control app.
There are many apps like mSpy that normal users can’t detect due to their stealth behavior. If you want to know how to detect and stop mSpy from spying on you, then you are in the right place. This article will show you how to detect and remove mSpy on Android and iPhone devices without being tech-savvy. Read all the guidelines below on removing mSpy from Android and iPhone without hassle.
Part 1: What is mSpy, and is mSpy detectable on Your Nokia XR21?
In this increasingly cynical world, people are using all sorts of monitoring software to monitor the phone activities of kids and employees. One such software is mSpy. Technically, mSpy is made as a business and parental monitoring app at first. But now, it is also used as a spy app that lets you look into someone else’s mobile phone or device.
Spying should not be misunderstood here as this app focuses mainly on checking employees’ devices or kids’ phones. It could be hard to discover since mSpy secretly works in the background. It monitors messages, phone calls, location, social media activity, and other device usages. Different features offered by mSpy are mSpy parental control, mSpy Instagram tracker, mSpy WhatsApp tracker, etc.
The process of detecting mSpy varies from different phone systems, Android or iPhone. Moreover, mSpy is a background app, so you can not normally see if it is installed on your phone or not. But don’t worry, we will help you out with how to detect mSpy. Below we have listed the two detection methods separately.
How to Detect mSpy on Android Devices
For detecting mSpy on an Android phone, that’ll be more direct if you check Update Service through the phone settings. Follow these steps:

- Step 1: Go to your Nokia XR21 phone settings.
- Step 2: Select Security.
- Step 3: Go to Device Administrators or Device Admin apps.
- Step 4: Navigate to Update Service (the name mSpy uses to run undetected). See if this service is enabled or disabled. If it is, you have spying software installed on your Nokia XR21s.
How to Detect mSpy on iPhone Devices
Apple users don’t have a way to tell for sure if mSpy is installed compared to Android users. But, there are some ways to tell if their devices are monitored.
1. Download history on the App Store
Certain apps masquerade as unharmful but turn out to be spyware. Recently, the malware was found in an app called System Update. That app was installed outside of App Store. After installation, the app hid and exfiltrated data from the users’ devices to the operators’ servers. It’s important to note which apps every user is hiding in their phone. Go to the App Store and download the history. This will help you figure out which apps have recently been downloaded on your Nokia XR21.
2. Unusually High Data Usage
There is a big sign that spyware is running in the background. To check the mobile data on your Nokia XR21, you need to go to Settings and click on Mobile Data. You will be to see your overall data usage. Scroll down to know how much mobile data individual apps are using. Suppose any user’s average internet usage is around 200 MB per day, and suddenly it increases rapidly to about 800MB per day with the exact usage of the internet. In that case, the user has to be aware as something is fishy.
3. Have Access to Your Device’s Microphone or Camera
When an app uses the microphone on iPhones, you will see an orange dot at the top of your screen and, similarly, a green dot for the camera. On Android phones, when an app starts, you will see a microphone or camera icon popup in the top right corner, which then turns into a green dot. These are healthy indicators that you should not ignore. Also, go to the list of apps that are allowed to access your Nokia XR21’s camera or microphone. If you see mSpy there, that means your phone is being spied on.
4. Increased Device Shut Down Time
If the Nokia XR21 device fails to turn off properly or takes an unusually long time to do so, it can point to the presence of spyware, or if the phone reboot without your command, then maybe someone is controlling your phone.
5. Jailbreak your own iPhone and download apps from untrusted sources
If you detect the presence of an app named Cydia, then consider it an alarm bell. This advanced package tool will further install apps from untrusted sources. To find out if your Nokia XR21 is jailbroken or not:
- Step 1: Drag your finger downward from the center of the iOS home screen.
- Step 2: Type “Cydia” in the Search field.
- Step 3: If you find Cydia, then your Nokia XR21 is jailbroken.
Some signs can come in handy when you want to ensure if someone is spying on you or not
Part 2: How to Stop Somebody Spying Using mSpy on the phone?
When you figure out that somebody is spying on your device, the first thing that comes to your mind is how to stop it. If someone has installed mSpy on your device, you can easily control the process. This section will mention the complete process of stopping mSpy on your device. Like the spying app detection process, the spying app removal process is also different in the case of iPhone and Android devices. Below we have mentioned the complete processes of removing mSpy from your Nokia XR21 and iPhone device. There are two ways that you can use to remove this app from your devices
Method 1: Prevent mSpy from Spying via Phone Settings App
To remove mSpy from your Nokia XR21 manually, one needs to activate two-factor authentication and change your iCloud password.

- Step 1: To change the password, you have to go to Settings.
- Step 2: Click on Profile.
- Step 3: Select Password & Security.
- Step 4: Change password and activate two-factor authentication.
For Android users, you can refer to the following steps to follow:
- Step 1: Go to your Nokia XR21 Settings.
- Step 2: Select Security.
- Step 3: Go to Device Administrators or Device admin apps.
- Step 4: Navigate to Update Service (the name mSpy uses to run undetected).
- Step 5: Select Deactivate.
- Step 6: Go back to Settings.
- Step 7: Select Apps.
- Step 8: Uninstall Update Service.
Method 2: Play Protect Feature on Google Play Store [Android only]
Another trick for removing mSpy from your device is by taking help from the Play Protect feature on Google Play Store. But one limitation of this method is that it does not work for iPhone. It is only useful for Android devices.

- Step 1: You can also go to the Google Play store.
- Step 2: Select your Profile.
- Step 3: Select Play Protect.
- Step 4: If it detects any harmful app, select Uninstall it.
- Step 5: Or scan the Nokia XR21 device for any harmful apps.
- Step 6: It will notify you if any risky app is found.
Method 3: Spoof Location to Prevent mSpy from Location Tracking [Recommended]
You can use one more method to remove the mSpy app from your device. This method works for both Android as well as iPhone devices. This method spoofs location to prevent the mSpy app from tracking your location. If you feel that someone is tracking your location, you can use third-party app software that helps fake your location. One such app is Dr.Fone - Virtual Location . It is a full mobile device solution for both Android and iPhone devices. It helps solve a wide range of problems ranging from data loss and system breakdowns to phone transfer and whatnot. Dr.Fone Virtual Location is a great thing that allows you to change and fake your location. It also lets you trick the location-based apps and mock GPS locations with customized speed.
Features of Dr.Fone - Virtual Location
- Teleport GPS location with one click to anywhere.
- For stimulation of GPS movement flexibility, the joystick is available.
- Export or import GPX files for saving created routes.
- Offers perfect gaming stability with no crashing risks.
- Support location-based and social media-sharing apps without jailbreak.
Take a look at the video below to quickly learn how to spoof location to stop mSpy from tracking you.
 safe & secure
Step-by-step Guideline to Spoof Location via Dr.Fone Virtual Location
Step 1: Download Dr. Fone and launch the program.

Step 2: Select “Virtual Location” among all the options.

Step 3: Connect your Nokia XR21/Android to your computer and click “Get Started”****.

Step 4: You will find your actual location on the map in the new window. If the spot is not inaccurate, tap the “Centre On” icon in the lower right to display the accurate location.

Step 5: Activate the “teleport mode” by touching the icon in the upper right corner. Enter the place you would like to teleport to in the upper corner left field, and tap on “Go.” Set Rome in Italy as an example.

Step 6: Click “Move Here” in the popup box.

Step 7: The location is fixed to Rome, Italy, whether you tap the “Centre On” icon or try to locate yourself on your Nokia XR21 or Android phone. It will be the exact location in your location-based app as well.

Method 4: Your Last Resort: Do a Factory Reset
Check phone settings app-reset options and clear out all the data from your phones if nothing works from all the above options, one last option is left, factory reset. For that,

- Step 1: Go to phone Settings.
- Step 2: Select System.
- Step 3: Chose Reset options.
- Step 4: Click on factory reset.
Or you can also make use of a third-party app - Dr.Fone - Data Eraser to wipe out data in some clicks
Dr.Fone - Data Eraser
Stop mSpy from Spying on You by Factory Reset
- Permanently erase all data, such as photos, videos, etc from your iOS device.
- It let you uninstall or delete useless applications from your device in batch.
- You can preview data before erasing it.
- Easy and click through the erase process.
- Provide support to all iOS versions and devices, which include the iPhone and iPad.
4,008,671 people have downloaded it
Not even professional identity thieves will be able to access your private data on iPhone or Android devices again. With the help of a third-party app, Dr.Fone – Data Eraser, you can erase all data permanently. This data eraser helps you render your data wholly unreadable and then cleans up the whole disk. It is a one-click solution to wipe all personal data like photos, contacts, messages, call logs, social app data, etc.
Part 3: How to Tell if Your Cell Phone is Being Tracked FAQ
Q1: Is it possible if someone remotely install surveillance software on My Nokia XR21?
Basically, it could be extremely hard to remotely install phone surveillance software on an iPhone or Android smartphone without having physical access to the Nokia XR21 device in advance. Some remote spying apps will allow you to track the location of an iPhone, but you’d require the user’s iCloud login and password to enable the tracking of the Nokia XR21 device. Anything more than that, and you’d need physical access.
Q2: Can Someone Spy on You When your Phone is Off?
Sadly yes. According to What Whistleblower Edward Snowden has said in a 2014 interview that the NSA could listen to and spy on conversations using the microphone on a smartphone, even if you turn off your devices. It makes it by using spyware that prevents your smartphone from actually turning off.
Q3: Can Someone Read My WhatsApp Chats on My Cell Phone?
Sadly, yes. While it isn’t possible on iOS devices, apps can intercept your WhatsApp messages on Android devices due to the operating system’s sandboxing security.
Q4: What Other Forms of Spyware Are There?
Other forms of Spyware include keyboard loggers, Adware, browser hijackers, and modem hijackers.
To Wrap it up
In the 21st century, when the world is connected through one device, almost everybody shares an undercurrent of worry. That is, is someone spying on me through my devices or not? And as much risky and fatal as this can be for a person who does not know if he is being tracked or not, there are solutions one can employ to safeguard himself. This article was all about how to detect and how to remove mSpy on iPhone and Android. Hopefully, now you are well aware of the different methods with their steps. With the help of Dr.Fone - Virtual Location , you can easily spoof or fake your location to hide the real one.
 safe & secure
Simple and Effective Ways to Change Your Country on YouTube App Of your Nokia XR21
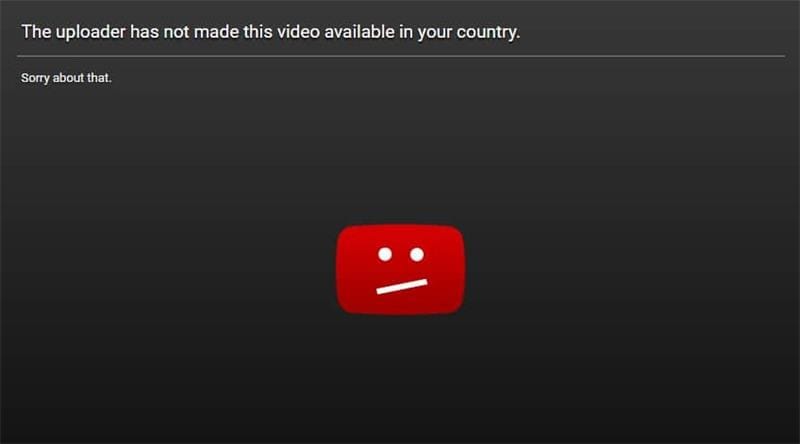
YouTube is easily the most popular video-sharing and media platform today. It’s where you can find free popular and trending videos across the globe to stream to your heart’s content. However, you’ll notice that some videos are blocked in some countries for several reasons, including copyright claims, legal requests, or licensing rights.
If you want to bypass these restrictions, simply read below to learn the simplest and most effective ways to change your location on YouTube. You’ll be able to access content that is otherwise restricted in your country by following our handy guide in no time.
Part 1: How to Change Location Settings on YouTube?
You can change your YouTube location settings if you want to make some videos available in your country. We’ll show you how to change your YouTube region, whether you’re on a computer, Android, iPhone, or iPad, by following these simple steps below.
Method 1: Change Your Location on YouTube from Computer
Here are the steps to change location on YouTube while using a computer.
Step 1: Click your Profile Picture.
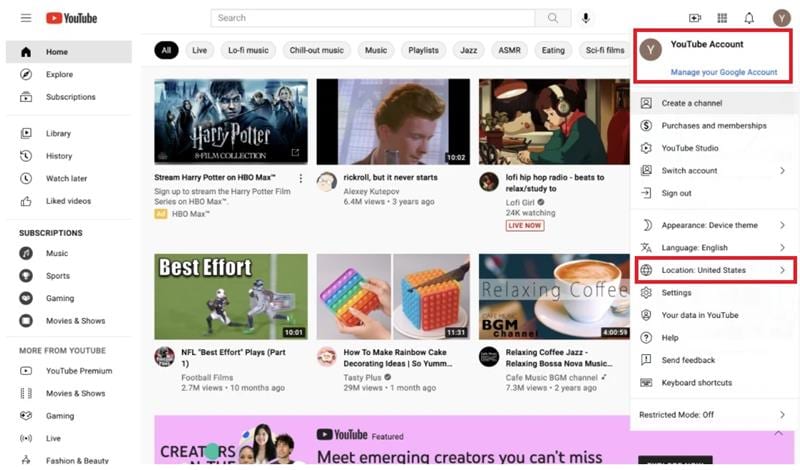
Step 2: Click Location.
Step 3: Choose the location you’d like to use.
Method 2: Change Your Location on YouTube from Android
Here’s how to change your country on YouTube if you’re on Android.
Step 1: Open YouTube on your Nokia XR21.
Step 2: Tap your Profile Picture and choose Settings > General > Location.
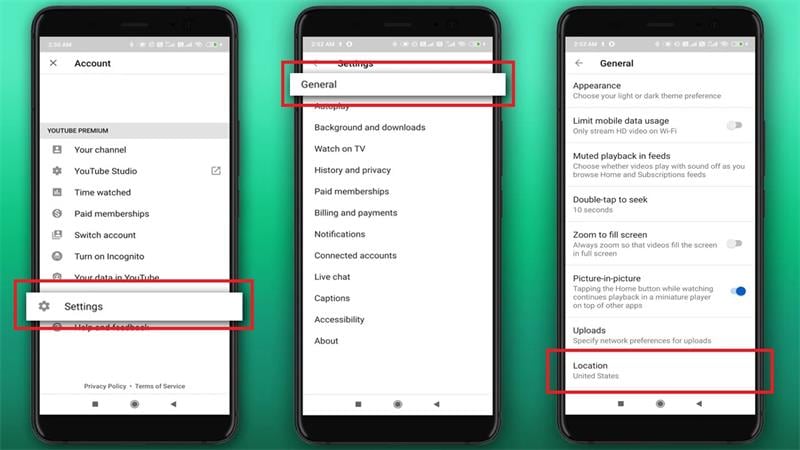
Step 3: Choose your desired country from the list of available options.
Method 3: Change Your Location on YouTube from iPhone and iPad
Lastly, if you’re using an iPhone or an iPad, simply follow the steps below to change your location on YouTube.
Step 1: Tap your Profile Picture.
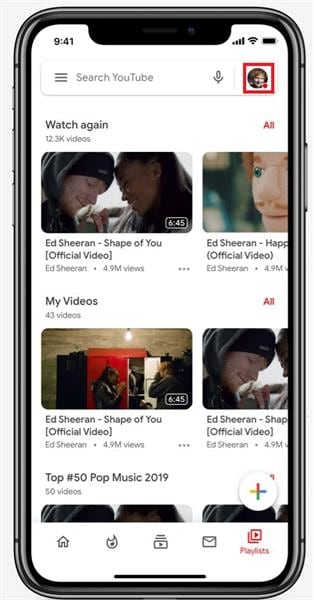
Step 2: Tap Settings > General > Location.
Step 3: Select your desired country.
Part 2: How to Change Your Country to Watch Blocked YouTube Videos?
There are generally no issues when watching YouTube videos anywhere you are. The only instance to have problems accessing YouTube is when you are in a country where the platform is blocked, such as in North Korea or China. Even then, some contents are still geo-restricted unless you’re in the right region.
In this part, we’re listing five different methods to access YouTube’s full library so you can stream all you want.
Method 1: Change Your Home Area on YouTube Manually
Here are the steps to manually manage your home area on YouTube to change your location.
Step 1: Sign up for YouTube TV and open the YouTube TV application.
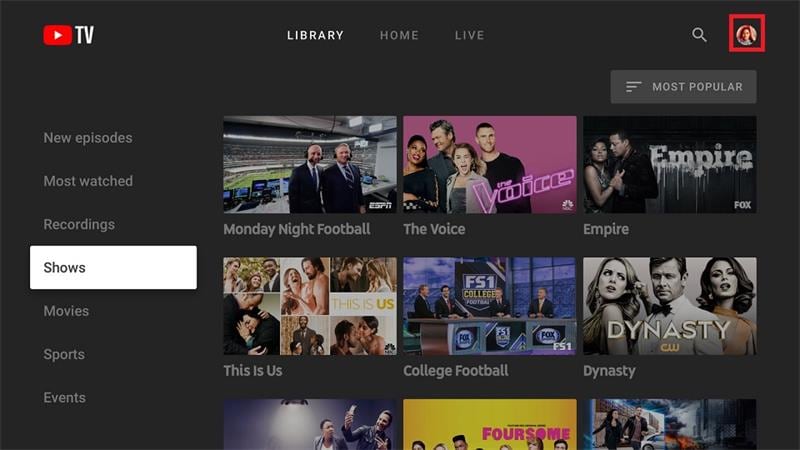
Step 2: Click your Profile Picture and click Location > Home Area.
Step 3: Update your home area.
Note
You can only change your location twice a year. You should also use YouTube at least once every three months in your country to ensure YouTube TV provides the correct local networks.
Method 2: Change Location on YouTube Using a VPN
The simplest and most effective way to unblock restricted content on YouTube is by using a VPN. In this example, we’ll be using NordVPN to change your location on YouTube using a VPN. Here are the steps.
Step 1: Download and install NordVPN. Sign in or create an account.
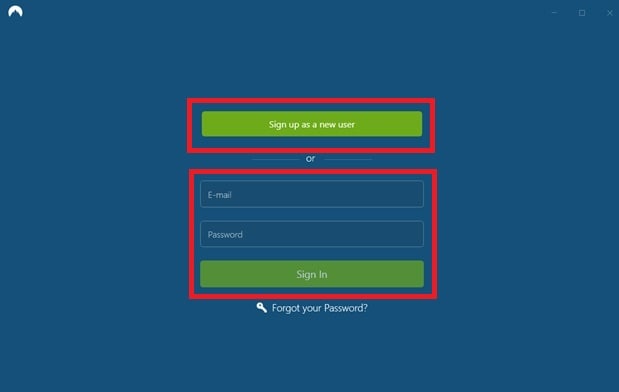
Step 2: Use Quick Connect or connect to a specific country by clicking on the pin on the map. You can click on Search here as well to find a specific server in the country of your choosing. There’s also a list of countries at the left sidebar so you can choose a server manually.

Step 3: Open YouTube and browse previously blocked content.
The Best VPNs for YouTube
Aside from NordVPN, there are other VPNs you can try to access content on YouTube, including ExpressVPN, CyberGhost, and Surfshark.
NordVPN utilizes up to 5,200 servers in 60 countries, with some servers optimized for ultra-fast streaming. It’s one of the fastest VPNs available today, where you can unblock geo-restricted content wherever you are, with a no-logs policy for unbreakable encryption.
Like NordVPN, ExpressVPN optimizes speed for downloading and streaming. It uses more than 3,000 servers in more than 90 countries to provide cutting-edge connectivity, which includes 256-bit AES encryption for perfect anonymity.
CyberGhost has over 7,000 servers in more than 80 countries to unblock geo-restricted content across YouTube, Netflix, Amazon Prime, and more. CyberGhost doesn’t keep logs of your activities as well, ensuring your activity is safe.
Lastly, Surfshark is another reliable VPN to unblock restricted content on YouTube and other platforms. It uses up to 3,200 servers in 65 countries to provide a high-speed and low-latency connection at all times. Surfshark has a no-logs policy like the three VPNs on the list, making your online activity safe and anonymous.
Here’s a handy table to compare the best VPNs available today in terms of ratings, number of servers, supported devices, prices, and more.
| NordVPN | ExpressVPN | CyberGhost | Surfshark | |
|---|---|---|---|---|
| Number of Servers | 5,200 Servers | 3,000 Servers | 7,000 Servers | 3,200 Servers |
| Streaming Reliability | Excellent | Good | Good | Excellent |
| Streaming Services | YouTube | |||
| Netflix | ||||
| HBO Go | ||||
| Amazon Prime | ||||
| SkyGo | ||||
| BBC iPlayer | ||||
| Etc. | YouTube | |||
| Netflix | ||||
| HBO Go | ||||
| Amazon Prime | ||||
| SkyGo | ||||
| BBC iPlayer | ||||
| Etc. | YouTube | |||
| Netflix | ||||
| Amazon Prime | ||||
| BBC iPlayer | YouTube | |||
| Netflix | ||||
| HBO Go | ||||
| Amazon Prime | ||||
| SkyGo | ||||
| BBC iPlayer | ||||
| Etc. | ||||
| Supported Devices | Windows, macOS, iOS, Android, Linux, Smart TVs, Routers | Windows, macOS, iOS, Android, Linux | Windows, macOS, Linux (command line), iOS, Android | Windows, macOS, iOS, Android, Linux |
| Average Speeds | 100+ MBPS | 100+ MBPS | 100+ MBPS | 100+ MBPS |
| 24/7 Support | Yes - with live chat | Yes - with live chat | Yes, but email only: [email protected] | Yes, but email only: [email protected] |
| Free Trial | None - but with a 30-day money-back guarantee | None - but with a 30-day money-back guarantee | 24-Hour free trial | 7-day free trial for Android, iOS, and macOS only |
| Prices | $11.99 - 1 Month | |||
| $59.88 - 1 Year | ||||
| $95.76 - 2 Years | $12.95 - 1 Month | |||
| $59.95 - 6 Months | ||||
| $99.95 - 1 Year | $12.99 - 1 Month | |||
| $41.94 - 6 Months | ||||
| $56.94 - 2 Years + 4 months free | $12.95 - 1 Month | |||
| $47.88 - 1 Year | ||||
| $59.76 - 2 Years |
Method 3: Change Your Country on YouTube Using a Proxy Server
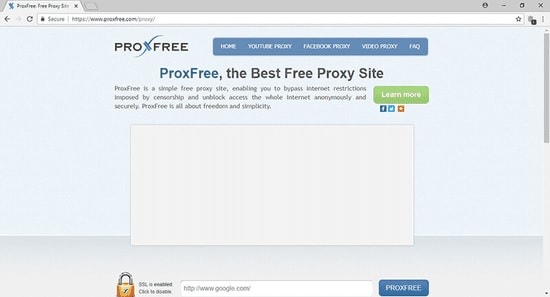
Using a Proxy to mask your location on the internet allows you to change your country on YouTube to access blocked content. In this example, we’ll use ProxFree YouTube Proxy to view locked YouTube content. Here are the steps to change your country on YouTube using a Proxy Server.
Step 1: Go to ProxFree YouTube Proxy .
Step 2: On the Server Location dialogue box, choose a country in the available options on the dialogue box.
Step 3: Enter the URL of the specific video you want to see unblocked and click PROXFREE to open YouTube in the proxy’s tab.
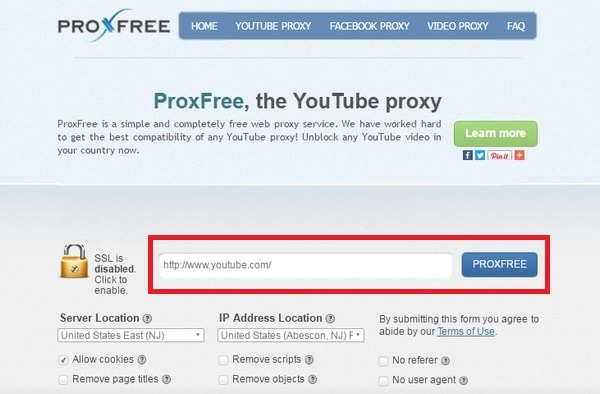
Note: You can also use YouTube’s search bar once YouTube’s tab is open on your proxy to search YouTube videos as usual.
Method 4: Change Your Country on YouTube Using a SmartDNS
Using SmartDNS to bypass YouTube geo-restrictions is useful for viewing blocked content in your country. This is because SmartDNS changes the Nokia XR21 device’s virtual location by editing its DNS address. Here are the steps to change your country on YouTube using SmartDNS.
Step 1: Find and select a DNS Server address from different DNS providers online. In this example, we’ll be using SurfShark .
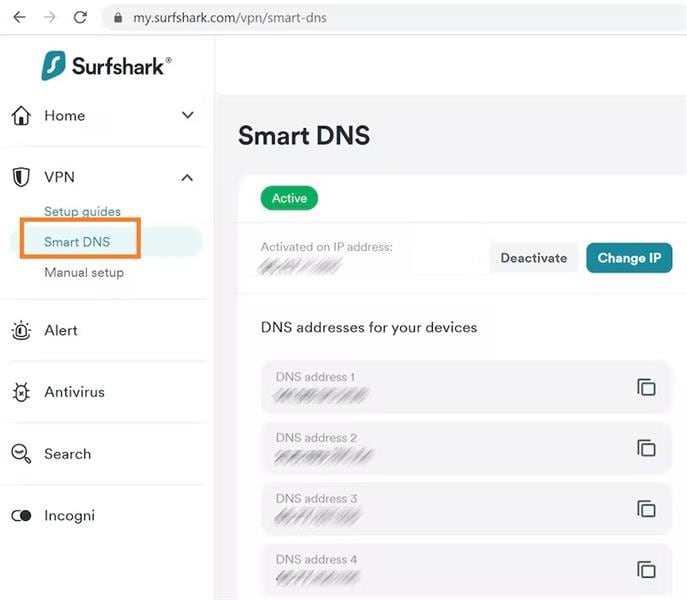
Step 2: Login or create an account. Click Smart DNS > Activate Smart DNS. Take note of the DNS address available to input on your computer’s Network Settings.
Step 3: Open Network Settings on your computer and find DNS Settings.
Step 4: Input your DNS Server address and click Ok once done. The DNS address should activate once you reconnect to the internet.
Note****_:_ Your IP address changes every 24 hours, which your ISP does. You’ll have to update your DNS address when it happens.
Method 5: Other Ways to Bypass YouTube’s Regional Filter
The easiest way to bypass YouTube’s regional filter is simply by downloading YouTube videos outright. Many websites are available online that allow you to download YouTube clips for free. In the step-by-step guide below, we’ll be using iTubeGo to download YouTube videos for viewing at a later time.
Step 1: Download and install iTubeGo . Launch the application on your computer.
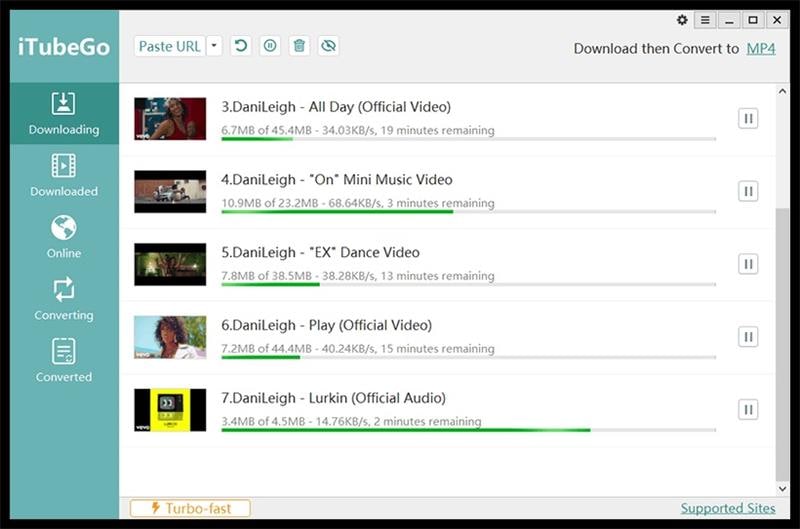
Step 2: Click Paste URL and paste the YouTube video’s URL on the dialogue box.
Step 3: Click Download to save the YouTube clip on your computer.
Here are the pros and cons of using each method to unblock geo-restricted content on YouTube.
| Pros & Cons | Manually on YouTube TV | Using VPNs | Using Proxy Servers | Using SmartDNS | Offline Downloads |
|---|---|---|---|---|---|
| Pros | You can easily change locations without downloading other applications. | Change countries on-the-fly to access even more content. | Some Proxy Servers don’t require downloading applications to use. | Unblocks geo-restricted content, much like VPNs. | You can always watch videos at a later time once downloaded. |
| Cons | You’re only allowed to change twice a month. | VPNs aren’t free, and you have to pay for a subscription. | Setting up Proxy Servers requires a little bit of technical know-how. | DNS is prone to manipulation by hackers. | You need to download a dedicated program to save YouTube videos. |
Part 3: Why Do Regions Block YouTube Content?
Although all YouTube videos are hosted on the same platform, a lot of them are geo-restricted to specific countries for various reasons. Many YouTubers sometimes lock their content in certain countries/regions due to licensing rights. YouTube may also block specific content to countries/regions to comply with local laws.
Conclusion
There are multiple ways to change your country on YouTube to access content that is otherwise unavailable in your location. You can change your country in settings on the YouTube app or use other methods, including using VPNs, SmartDNS, or Proxy Servers, to name a few. If all else fails, you can download an application that lets you save YouTube videos for offline viewing at a later time.
How to Send and Fake Live Location on Facebook Messenger Of your Nokia XR21
Do you want to learn how to fake a live location on Messenger? Here’s the perfect learning spot. These days, many situations can compel you to spoof location on Facebook Messenger. But as simple as it sounds, you might need to invest in a costly VPN. Facebook requests permission to track your actual GPS location when installing the app or creating an account. But fret not because you don’t even need a VPN service to change your Facebook location. This post will show you several shortcuts on how to send a fake location on Messenger.
Part 1: The Benefits of Changing Location on Facebook Messenger
There are numerous reasons to learn how to send fake locations on Messenger, just as initially said. Here are some of them:
- Business awareness
Sometimes, you might want your customers to believe that your products or offices are in a specific location. In that case, spoofing your live location on Messenger is a great idea.
- Prank friends and have fun
There’s nothing wrong with fooling your Facebook friends about your location. You can show them that you’re in a unique spot when you’re just around them.
- Hide identity
Your online security is paramount. And one way to protect yourself from online sniffers is by spoofing live locations on Facebook Messenger.
- Make new friends
Often, Facebook will tailor its friend suggestions to people close to your proximity, thanks to the “Nearby Friends” feature. But you can start getting new and refreshing tips from people in your new location.
Part 2: How to Change Location on Facebook Messenger
After learning some reasons to fake location on Messenger, let’s now know how to do that with easy steps. You don’t need third-party help to mock live locations on Messenger on Android or iPhone. That’s because the app boasts its inbuilt location feature. Follow me:
Step 1. Open Facebook Messenger and launch the conversation with which you want to share the fake location.
Step 2. Click the “four dots” at the bottom-left corner and tap Location.

Step 3. Now tap Allow Location and choose a new location on the world map that appears.
Step 4. After choosing a location, tap Send Location to share it with your selected friend. It’s that easy!
Part 3: How to Change a Live Location on Facebook Messenger [iOS & Android]
As you can see, sending a pinned location directly on Messenger is only good if you want to share the place with a specific contact. In other words, you can’t natively spoof the location of multiple contacts on Messenger. So, if you want to fake live location on Messenger on iOS and Android, using a robust option like Wondershare Dr.Fone is a good idea.
With this virtual location tool, you can change your GPS location anywhere. That makes it helpful if you want to brag about your actual location with some tangible proof. Another thing, you can simulate location movements by choosing a particular route or transport. In addition to Facebook, Dr.Fone also works with apps like Pokemon Go , Instagram , Facebook , etc., etc.
You can check out the this video for further instruction.
Here’s how to fake live location on Messenger with Dr.Fone:
Step 1. Download Dr.Fone and fire it up.
Start by downloading and installing Dr.Fone from the official website and launch the software on your Mac or Windows PC. Then, connect your smartphone to the PC using a USB wire. Please ensure to select the “Transfer Files” option.
Step 2. Launch the Virtual Location tool and enable USB debugging.
On Dr.Fone’s home page, press the Virtual Location tab and click Get Started. Now enable USB debugging to connect your phone to Dr.Fone. On Android, click Additional Settings > Developer options >USB debugging. Also, remember to set Dr.Fone as the mock location app.
Step 3. Launch the map and choose a fake location for Messenger.
Once USB debugging is enabled, press Next to launch the map. Now enter your new location’s address or GPS coordinates and tap Move Here. And there is that!
Bonus tip: How to make your new Messenger location more believable
Want to make your new location more believable? Simple, Dr.Fone will help you with that. Just enter the new coordinates or location on Dr.Fone and take a screenshot of the new area. Of course, you can find dozens of free location pictures on Google. After that, open the image on Facebook and tap the “location” icon. Now search and select your new location and post the picture.
Up to this point, you shouldn’t have any qualms spoofing your live location on Facebook Messenger. For example, if you want to send a pinned GPS coordinate to a single contact on Messenger, then simply use the inbuilt function to change location. However, your new location might not be believable since your actual device location will remain the same. In other words, there’s no proof that you’re actually in that particular location.
So, use Dr.Fone to fake location on Messenger with unreal precision. This third-party location changer allows you to teleport your location to anywhere. You can even change Messenger location by walking, driving, or cycling. Then to make it more believable, you can share a post with a screenshot of your new location. Remember, your new location will be visible to all your Facebook friends.
Part 5. FAQ: What People Also Ask about Facebook Location Services
1. Why is my Facebook Messenger location wrong?
The issue of the wrong Facebook location is commonplace these days. Fortunately, it’s nothing complicated as it’s mainly about the incorrect GPS settings on your phone. So, go ahead and enable GPS tracking on your device.
Open Settings > Privacy > Location Services for iPhone users and then enable Location Services. On the other hand, Android users should click Settings > Security and Location > Locations > and enable Use Locations.
2. Can I fake my location on Facebook?
In a typical scenario, it’s impossible to lie about your location on Facebook. That’s because the app asks for permission to track your GPS location before you can use it. But as you’ve seen, Wondershare Dr.Fone makes it a cakewalk to a fake live location on Messenger.
3. How can I hide my location on Facebook?
As said earlier, the reason why Facebook gives the wrong location is because of disabled location settings. It’s the reverse! So, use this Settings feature to hide your actual location on Facebook.
Conclusion
Any queries regarding how to send a fake location on Messenger? Let us know if you have any. Meanwhile, use Messenger’s inbuilt location feature to share an artificial place with a friend or contact. But because this method only allows you to share fake locations with a single chat, use Wondershare Dr.Fone - Virtual Location instead. It’s simple, fast, and effective. Are you ready?
safe & secure
Also read:
- In 2024, Change Location on Yik Yak For your Oppo Reno 11F 5G to Enjoy More Fun | Dr.fone
- In 2024, Does find my friends work on Samsung Galaxy A05 | Dr.fone
- In 2024, Top 7 Skype Hacker to Hack Any Skype Account On your Nubia Red Magic 9 Pro+ | Dr.fone
- How To Leave a Life360 Group On Realme 10T 5G Without Anyone Knowing? | Dr.fone
- In 2024, How to Change/Fake Your Apple iPhone XS Location on Viber | Dr.fone
- How to Hide/Fake Snapchat Location on Your Realme C55 | Dr.fone
- In 2024, How to Fake Snapchat Location without Jailbreak On Realme Narzo 60 5G | Dr.fone
- How to Change GPS Location on Realme 11 5G Easily & Safely | Dr.fone
- Does Nokia G22 Have Find My Friends? | Dr.fone
- How to Hide/Fake Snapchat Location on Your Sony Xperia 10 V | Dr.fone
- Proven Ways in How To Hide Location on Life360 For Poco C50 | Dr.fone
- In 2024, How to Send and Fake Live Location on Facebook Messenger Of your Vivo Y02T | Dr.fone
- Change Location on Yik Yak For your Honor X9a to Enjoy More Fun | Dr.fone
- In 2024, How to Fake Snapchat Location without Jailbreak On Oppo Reno 10 Pro 5G | Dr.fone
- How to Fake Snapchat Location without Jailbreak On Lava Yuva 3 Pro | Dr.fone
- Does Apple iPhone 6s Have Find My Friends? | Dr.fone
- How to Change Location On Facebook Dating for your OnePlus 12R | Dr.fone
- In 2024, Top 7 Skype Hacker to Hack Any Skype Account On your Apple iPhone 15 | Dr.fone
- In 2024, Does Samsung Galaxy XCover 6 Pro Tactical Edition Have Find My Friends? | Dr.fone
- In 2024, How to Change your Apple iPhone 6s Plus Location on Twitter | Dr.fone
- In 2024, Why Your WhatsApp Live Location is Not Updating and How to Fix on your Nokia C12 | Dr.fone
- How to Change/Fake Your Lava Blaze Curve 5G Location on Viber | Dr.fone
- In 2024, How to Change Vivo T2 5G Location on Skout | Dr.fone
- In 2024, Simple and Effective Ways to Change Your Country on YouTube App Of your Apple iPhone 14 Pro Max | Dr.fone
- Top 7 Skype Hacker to Hack Any Skype Account On your Oppo F23 5G | Dr.fone
- In 2024, Simple and Effective Ways to Change Your Country on YouTube App Of your Vivo Y77t | Dr.fone
- How to Change Location On Facebook Dating for your Apple iPhone 6 Plus | Dr.fone
- How to Change Your Vivo V29e Location on life360 Without Anyone Knowing? | Dr.fone
- Set Your Preferred Job Location on LinkedIn App of your Poco F5 5G | Dr.fone
- How to Change Oppo Find X7 Ultra Location on Skout | Dr.fone
- Set Your Preferred Job Location on LinkedIn App of your Apple iPhone 8 | Dr.fone
- In 2024, How to Fake Snapchat Location on OnePlus Nord N30 SE | Dr.fone
- How To Leave a Life360 Group On Oppo Reno 8T 5G Without Anyone Knowing? | Dr.fone
- How to Change Your Oppo K11 5G Location on life360 Without Anyone Knowing? | Dr.fone
- How to Change your Vivo Y77t Location on Twitter | Dr.fone
- In 2024, Simple and Effective Ways to Change Your Country on YouTube App Of your Poco C55 | Dr.fone
- In 2024, How to Change Location On Facebook Dating for your Motorola Moto E13 | Dr.fone
- In 2024, How to Send and Fake Live Location on Facebook Messenger Of your Samsung Galaxy A14 5G | Dr.fone
- Set Your Preferred Job Location on LinkedIn App of your Realme GT 5 Pro | Dr.fone
- In 2024, Set Your Preferred Job Location on LinkedIn App of your Lava Blaze 2 | Dr.fone
- In 2024, How To Leave a Life360 Group On Oppo Find X6 Without Anyone Knowing? | Dr.fone
- How to Change Location on TikTok to See More Content On your Realme 10T 5G | Dr.fone
- 4 Most-Known Ways to Find Someone on Tinder For Samsung Galaxy S24+ by Name | Dr.fone
- 3 Things You Must Know about Fake Snapchat Location On Apple iPhone 6s Plus | Dr.fone
- Change Location on Yik Yak For your Motorola G24 Power to Enjoy More Fun | Dr.fone
- In 2024, How to Change/Fake Your Oppo Find X6 Location on Viber | Dr.fone
- Simple and Effective Ways to Change Your Country on YouTube App Of your Oppo F23 5G | Dr.fone
- In 2024, How to Change your Samsung Galaxy S21 FE 5G (2023) Location on Twitter | Dr.fone
- How to Change Location On Facebook Dating for your Samsung Galaxy S23 FE | Dr.fone
- 4 Most-Known Ways to Find Someone on Tinder For Samsung Galaxy S23 by Name | Dr.fone
- In 2024, FRP Hijacker by Hagard Download and Bypass your Motorola Moto G14 FRP Locks
- Change Aspect Ratio of Video
- Updated In 2024, 26 Cool Anime Girl Names and Their Meanings
- How to Transfer Photos from Honor Magic 6 Lite to New Android? | Dr.fone
- LumaFusion – What Is It and the Best Alternative to Use for 2024
- How to Factory Reset OnePlus Ace 2 without Losing Data | Dr.fone
- In 2024, Preparation to Beat Giovani in Pokemon Go For Samsung Galaxy A15 5G | Dr.fone
- Three Solutions to Hard Reset Motorola Edge 2023? | Dr.fone
- Sign a PDF v1.2 document with digital signature software
- How to Hard Reset Nokia XR21 Without Password | Dr.fone
- In 2024, How to Unlock iPhone 7 Passcode without iTunes without Knowing Passcode? | Dr.fone
- In 2024, Your Account Has Been Disabled in the App Store and iTunes On Apple iPhone 12 Pro?
- In 2024, How to Unlock Apple iPhone 14 without Passcode or Face ID
- In 2024, How To Enable USB Debugging on a Locked ZTE Axon 40 Lite Phone
- In 2024, Forgot Your Apple ID Password and Email On Apple iPhone 14 Plus? Heres the Best Fixes
- In 2024, How To Unlock Apple iPhone XR Without Swiping Up? 6 Ways
- Easy steps to recover deleted call history from Realme GT 5 (240W)
- How To Convert Video Voice to Text Online for Free, In 2024
- 2024 Approved Do VHS Effect with Final Cut Pro in the Right Way
- In 2024, Best Ways on How to Unlock/Bypass/Swipe/Remove Realme 12+ 5G Fingerprint Lock
- In 2024, How to Change Google Play Location On Tecno Pop 8 | Dr.fone
- Thinking About Changing Your Netflix Region Without a VPN On Honor 90? | Dr.fone
- In 2024, Sim Unlock Vivo Y77t Phones without Code 2 Ways to Remove Android Sim Lock
- Unlock Your Samsung Galaxy S24+s Potential The Top 20 Lock Screen Apps You Need to Try
- Read This Guide to Find a Reliable Alternative to Fake GPS On Realme 11 Pro+ | Dr.fone
- Title: How to Detect and Stop mSpy from Spying on Your Nokia XR21 | Dr.fone
- Author: Abigail
- Created at : 2024-04-30 08:18:28
- Updated at : 2024-05-01 08:18:28
- Link: https://location-social.techidaily.com/how-to-detect-and-stop-mspy-from-spying-on-your-nokia-xr21-drfone-by-drfone-virtual-android/
- License: This work is licensed under CC BY-NC-SA 4.0.
