In 2024, Does find my friends work on Lava Yuva 3 Pro | Dr.fone
Does find my friends work on Lava Yuva 3 Pro
Find my friends app is becoming a norm for most people. The Smartphone and app developers are now aware of this. As a result, most Smartphone platforms are adding tools that allow users to share their whereabouts with others. Apple has its native Find my friends for their iPhone. The app works great for a group of iOS users, but you may need to share location with Android devices, which the built-in app can’t help you with. When you want to use the “find friends” app, they certainly need to add people from Android and iPhone users. And, you can’t dictate what people are choosing as their smartphone platform. While some prefer Android, many of us are dedicated to the iPhone too. Therefore, if you need to keep track of the real-time location of your family members or friends, you need the assistance of a third-party tool. These apps are the most logical way to create a link to find my friends app for Android and iPhone.
 PDF application, powered by AI-based OCR, for unified workflows with both digital and scanned documents.
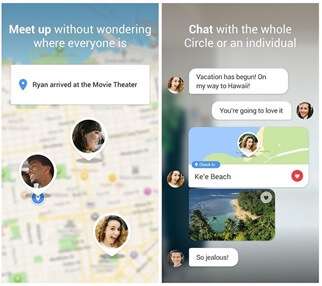

Part1: How to track friends using iPhone or Android
1.1 Tracking Friends using iPhone
As an Apple user, you might already know about the “Find my friends” app on your device. It is the most convenient way to share your location with your friends. You can also keep track of your peers with it. If you ever feel lost in a new area, you can use this app to notify your friends. You can use this app to create a route for all to meet in a selected location. If your friends are heading toward the destination, the app will notify you.
Let’s see how one can use the “find my friends” on the iPhone, shall we?
1.1.1 You will find the “Find Friend” on your Home screen. In IOS 13, you will have to launch the “Find MY” app.

1.1.2 Tap “Add Friends.”
1.1.3 Add a contact name from your list. You can add several contacts here.
1.1.4 Tap Send.


1.1.5 Now select a time option.
If you want to share your location, launch the app first. Then Tap “Me.” Then, keep your “Share My Location” switched on.

1.2 Tracking Friends Using Android
Android users can also use this find my friends app. Even if someone in your group does not use a smartphone (seriously?), you can track them. You can send an invite, and if they agree, you can find your friend anytime. Remember, iPhone or Android, whatever the platform, all the members of the group have to agree with location sharing; otherwise, you cannot track them.
You can use find my friends from iPhone to an android user via Google Maps. You need to download the app and activate location service by taping “Allow While Using App” Then you have to select” “Share your location” You can then send your location to your android user friend from the message icon of the Google map.

Part2: 3 best find my friends apps compatible both Android and iPhone
You have the preliminary idea of how one can find their friends using an iPhone or Android. But, how to keep track of all of your friends, while some of them are die-hard apple fanatics and others are android geeks? Well, you do not need to tell others about those anymore, as we are going to talk about three fabulous cross-platform apps for finding friends.
2.1 Find my friends
This app is straightforward and pretty simple to use. You can look at the map and find your friends at any time. Your friends also can keep track of you. SO, if security is your concern,” “Find my friend” is perfect for you. You can also chat with friends while they are on route.
You can also issue an alert to your friends whenever you are in an emergency. All your loved ones will get the address details, current time, and the remaining battery life. If your group has a mix of Android, iOS, and Blackberry, this app is excellent for you.

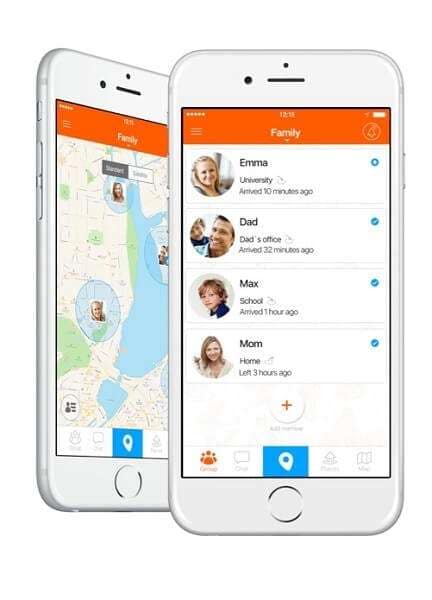
2.2 Familo
Familo is the best working “finding friend” app. The app is regularly updated, and you can sign up with a phone number. You don’t need Facebook or any username to use this app. You have to create a group and invite others. If they sign up, you will get their location details at any time of the day. Of course, they have to approve it first!
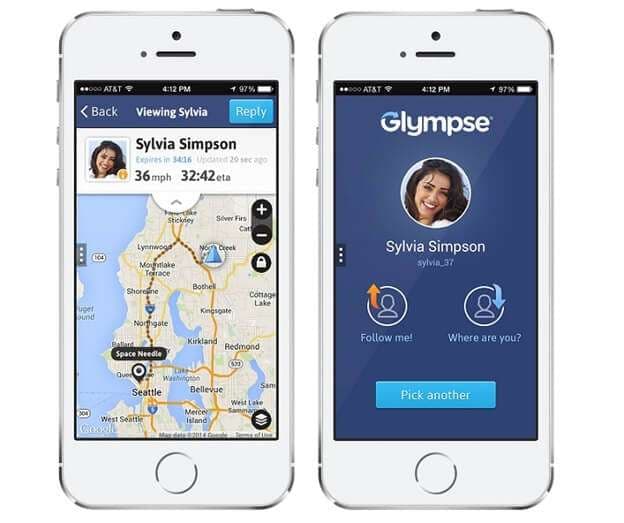
2.3 Glympse
What makes Glympse different from others is the fact that you don’t even need to sign up here! You can set up a group for a specific time, and share your location to anyone you want to. You can even share your places via the web. If you wish to track your friends temporarily or contact someone for a specific period, Glympse is the right choice for you. And, if someone is not comfortable with the idea of location sharing, you can send your location via the web. They can use the shared link to know your area without ever installing the app. But, if you want to check up on your loved ones continually, then Glympse cannot satisfy your demand. As a temporary service, your location sharing link will be activated for four hours at most.

company, user or members of the same household. Action! - screen and game recorder</a>
Conclusion
Remember, there are several other find my friends apps in the app store, which can entice you. Some of them have pretty neat features. But, they can drain your battery too fast; others can be pretty limited on their free version. And, many of find my friends apps are partial to either iPhone or Android. But, why not try them out yourself? Everybody’s needs and tastes are different. Give my three favorite find my friend apps for Android and iPhone a try, if they suit you, great. If not, there are more options. Find one for you and keep a “leash” on your loved ones!
How To Pause Life360 Location Sharing For Lava Yuva 3 Pro
Life360 has become a household name in location-sharing apps, renowned for its ability to connect family and friends seamlessly across Android and iOS platforms. This app enhances safety and fosters a sense of closeness among its users.
However, there are moments when you might crave a bit of privacy or a break from constant connectivity. Whether for a surprise, personal space, or a digital detox, the need to discreetly pause Life360 arises. This article delves into the nuances of how to pause Life360. It will also provide insightful tips on how to do it without alerting others.
 Easy GIF Animator is a powerful animated GIF editor and the top tool for creating animated pictures, banners, buttons and GIF videos. You get extensive animation editing features, animation effects, unmatched image quality and optimization for the web. No other GIF animation software matches our features and ease of use, that’s why Easy GIF Animator is so popular.
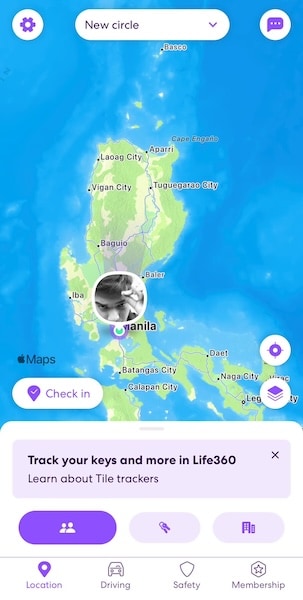

Part 1: What Is Life360 and How To Pause Life360 From the App
Life360 is not just an app; it’s a digital lifeline connecting people with their loved ones. It’s primarily designed for family and close friends. By offering real-time location sharing, it ensures that members of your “Circle” (a group within the app) know where you are at any given moment. This feature is handy for parents monitoring their children’s whereabouts or friends coordinating meet-ups.
The Purpose of Life360
At its core, Life360 is about safety and connectivity. The app includes features like location history, driving reports, and even crash detection, making it a versatile tool for modern families. It provides several benefits, like:
- Safety assurance. Knowing the whereabouts of your loved ones, especially in emergencies, can be invaluable.
- Convenience. Planning gatherings or ensuring a family member has arrived safely at a destination becomes more manageable.
- Emergency response. The app can alert users to potential emergencies involving Circle members.
Reasons of Pausing Life360
However, there are instances where learning how to pause Life360 becomes necessary:
- Battery health. Constant GPS tracking can drain your phone’s battery significantly. Temporarily pausing the app can help conserve battery life.
- Privacy. Sometimes, you might want some privacy about your location. Thus, some people would like to pause their Life360 location sharing.

Methods To Pause Life360 From the App
Now, the question is, can you pause your location on Life360? Pausing Life360 can be done for a specific circle or the entire app. This section will show you some general steps to pause your location for the app. You can do it only for a specific circle or the whole app. Here’s how you can do those.
Pausing Location for a Specific Circle
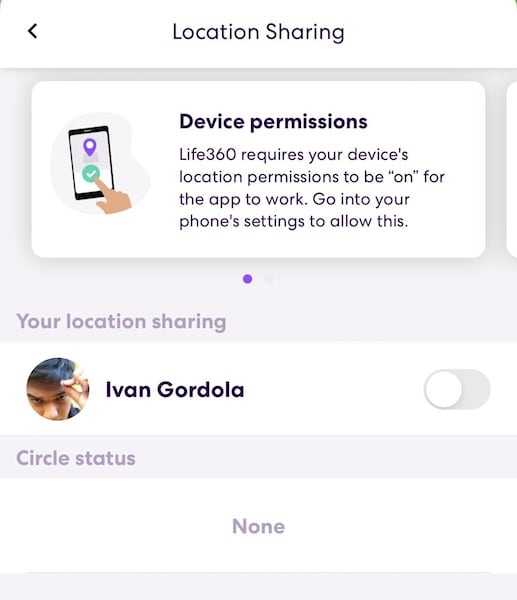
Open Life360 and go to the main screen. Select the Circle you want to pause. Then, tap on Settings (usually represented by a gear icon) in the upper-right corner. Look for an option like Location Sharing and toggle it off. This action pauses your location sharing only for the selected Circle.

Pausing the Whole App
Regarding this method, pausing the location sharing for all your circles usually involves going through your phone’s S ettings and disabling location services for Life360. If you don’t want to do that, you can turn off location sharing for all your circles through the steps provided above.
By understanding and utilizing these features wisely, you can maintain your connection with your loved ones while managing your digital boundaries and battery health effectively. Remember, the aim is to balance connectivity with personal needs.

Part 2: How To Pause Life360 From Settings
Life360 offers flexibility within its app and through your device’s settings. Understanding how to use these options can provide additional control over location sharing. Explore the various ways how to pause Life360 outside the app itself.
Pause Life360 From Android Settings
First, navigate to your Lava Yuva 3 Pro’s Settings. Then, look for the section listing all installed apps. This is usually named as “Apps.” Locate Life360 on the list of apps and open it. You should be able to see a Force Stop button at the bottom of the screen.
By selecting Force Stop, you temporarily halt the app’s function without uninstalling it. This operation stops location sharing until you open the app again.
Pause Life360 From iOS Settings
To pause the Life360 location on iOS, you’ll have to open the Settings app on your iOS device. Browse through your apps and select Life360. Alternatively, you can use the search bar and type “Life360”. Once in the app’s menu, change location services to While Using the App. Thus, it will not share your location unless you open the app.
 Software Update Pro - Check and update software installed on your computer.

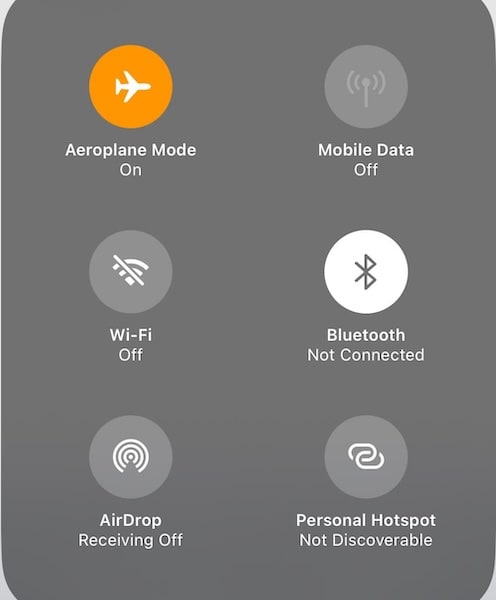
Pause by Using Airplane Mode
This can be done from the quick settings panel on both Android and iOS devices. Turning on Airplane Mode disables all wireless connections, including cellular data and GPS, effectively pausing Life360. The great thing is that Life360 will only show your last known location to your circles. It will not say that “location services are off,” unlike the first two methods.
 Glarysoft File Recovery Pro Annually - Helps to recover your lost file/data, even permanently deleted data.
Pause by Uninstalling
Removing the app from your device will stop it from sharing your location. The beauty of this method is that it won’t automatically notify your circles or remove you from them. However, some members might notice that your location updates are unavailable.
Each method serves a different purpose and offers varying levels of discretion. Whether conserving battery, seeking privacy, or temporarily disconnecting, these methods provide a way to pause Life360 location without drawing unwanted attention. Remember, communicating with your Circle members about your need for privacy to maintain trust is always a good idea.
## Part 3: How To Pause Life360 With a Virtual Location SpooferSometimes, pausing your location sharing on Life360 may raise questions or concerns among your circle members, particularly if they are close family or friends. If you’re planning a surprise or need private time without arousing suspicion, a virtual location spoofer can be handy. This method will teach you how to pause your location on Life360 without them knowing.
Wondershare’s Dr.Fone toolkit is more than just a data recovery solution. Among its various features, the Virtual Location changer is particularly useful for those looking to spoof their location. This feature allows you to simulate being in a specific location without actually being there. It’s a clever way to maintain privacy or plan a surprise without giving away your real whereabouts.
How To Use Dr.Fone To Spoof Your Location on Life360
To learn how to pause location on Life360 without them knowing using Dr.Fone, follow the steps below:
- Step 1: Download and install the Dr.Fone on your device. Connect your phone to your PC to begin the process. After launching the software, access Virtual Location from the Toolbox interface. Then, click Get Started to continue.
- Step 2: After launching the function, you’ll notice the One-Stop Route function at the top-right section. This feature is crucial for setting up your virtual movement.

- Step 3: To define how your virtual location behaves, you can decide how often the app simulates a Round trip or Loop trip. Once you’ve set parameters like Speed, click Move Here to start the simulation.
 WonderFox DVD Ripper Pro
Note: TheRound trip and Loop trip are particularly useful for creating the impression of movement in a specific area. Parameters can make your virtual movement more believable.
Conclusion
This article explored various methods of pausing location sharing on Life360. Life360 is essential for many who share their locations with friends and family. The options are diverse, from simple app-based methods to more advanced settings adjustments and even a virtual location spoofer like Dr.Fone.
While it’s always recommended to maintain open communication with your Circle about pausing location sharing, there are times when privacy or surprise plans necessitate discretion. For those moments, Dr.Fone - Virtual Location emerges as a reliable solution for location spoofing and other phone management needs. Remember, using these tools responsibly is key to maintaining trust in your relationships.
How to Fake Snapchat Location without Jailbreak On Lava Yuva 3 Pro
Snapchat users are very fond of using custom filters when sharing content on the app. It is a great way to ensure that your images and videos are only viewed by the people that you target. However, a new feature called Geo-filters has brought a lot of mixed feelings amongst Snachatters.
The filter is location-based, which makes any content that you share to be seen by people who are within your geographic fence.
Imagine that you are standing at the Niagara Falls and want to share with people who are in Europe; you will not be able to do this and this is why the filters are problematic to people in the Snapchat community.
Thankfully, there are ways in which you can spoof our device, allowing you to access Geofilters anywhere in the world. Today, you learn several ways in which you can achieve this objective with ease.
 vMix Pro - Software based live production. vMix Pro includes everything in vMix 4K plus 8 channels of Replay and 8 vMix Call
Part 1: Benefits that faking Snapchat brings to us
Snapchat comes with a lot of filters, both sponsored and crowdsourced, which you can use to interact with different people. When Geofilters was introduced, it meant that you could only access filters that were designed for specific locations.
Sponsored filters generally tend to target people in certain areas, and this can limit how you disseminate your content on Snapchat.
The main benefit that you get from faking Snapchat is getting access to these filters without even moving an inch.
When you spoof your device, Snapchat thinks that you are actually in the area that you have spoofed to. This virtual location will then allow you to access the filters that are available in that area.
Part 2: A free but complicated way to fake Snapchat location no jailbreak
One of the best ways to fake Snapchat without jailbreak is to use XCode. This is an app on your Lava Yuva 3 Pro that allows you to tweak certain aspects of the apps that you have on your device, including Snapchat.
Get XCode on your device and then launch it. Start by using the locations that are found to setup XCode. You can download XCode from Apple App Store. You will need your Apple ID and password to use XCode.


Here are the steps that you have to follow:
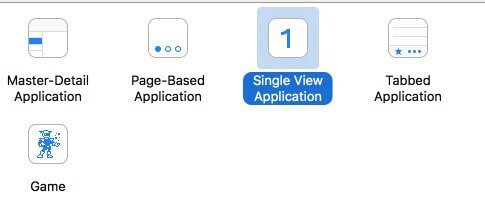
Step 1: Start by creating a basic single-view application
Launch XCode and then create a new project
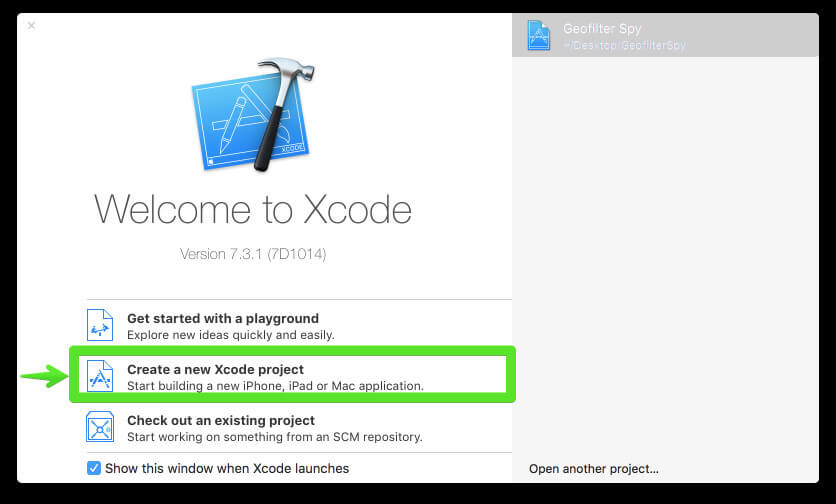
Then choose the option marked “Single View iOS application.
Now customize the project options and give it any name that you desire.

Now proceed and customize the Organization Name and the Identifier. The identifier works like a reverse domain name so you can use anything you desire.
Proceed and select swift as your preferred language and then click on “iPhone” as your device so the app will be small.
Any other options below this should be left in their default states.
Now go ahead and save the project to a location on your computer. Since the version control does not apply in this case, make sure that you uncheck the option before you save the app.

Step 2: transfer and run the created app on your iOS device
People who do not have the latest version of XCode will run into the error shown below.
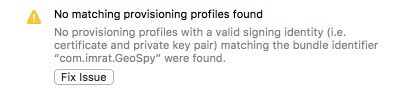
IMPORTANT: do NOT click on “Fix Issue” until you do the following tasks:
- Access the preferences on your XCode
- Choose the accounts tab
- Click on the add (+) icon at the bottom left side of your screen
- Now choose “Add Apple ID”.
- Type in your Apple ID and password
You should now have an accounts screen similar to the one shown in the image below.
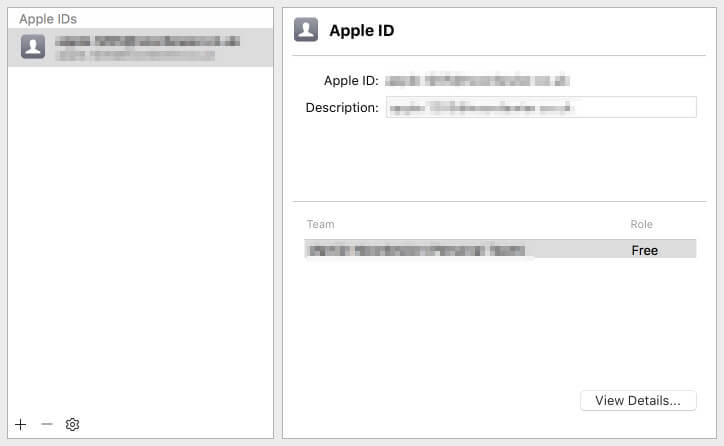
Now close the window and click on the “team” dropdown menu. You may now select the Apple ID that you just created.
Now you can go ahead and click on the “Fix Issue” button.
Now the error will be resolved and you should have a screen that is similar to the image below.
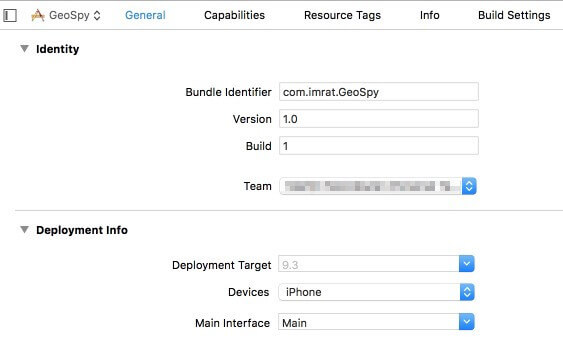
You may now run the app that you created before on your iOS device.
Use an original USB cable to connect the iOS device to your computer.
Towards the top right-hand corner of your screen, click on the button that is displaying your project name and then click on the iOS device.

WPS Office Premium ( File Recovery, Photo Scanning, Convert PDF)–Yearly

Now your iOS device will be showing at the top. Select it and proceed.
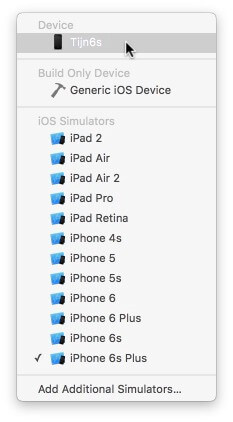
Hit the “Play” icon that is found at the top left side of your screen.
Wait for the process to be complete. You might as well get a cup of coffee as this can take quite a while.

When the process is complete, XCode will install the app on your iOS device. You will get the following error if your device has not been unlocked; unlocking the iOS device will put off the error message.
 WinUtilities Pro
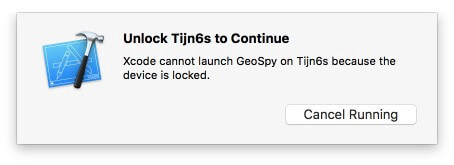
Now you should be viewing a blank screen on your iOS device. Do not worry; your device has not been ruined. This is the app that you have just created and installed. Pressing the “Home” button will dismiss the blank screen.
Step 3: It’s time to spoof your location
Go to Google Maps or iOS maps which will now show your current location.
Go to XCode and then choose “Simulate Location” from the “Debug” menu and then select a different location to test.
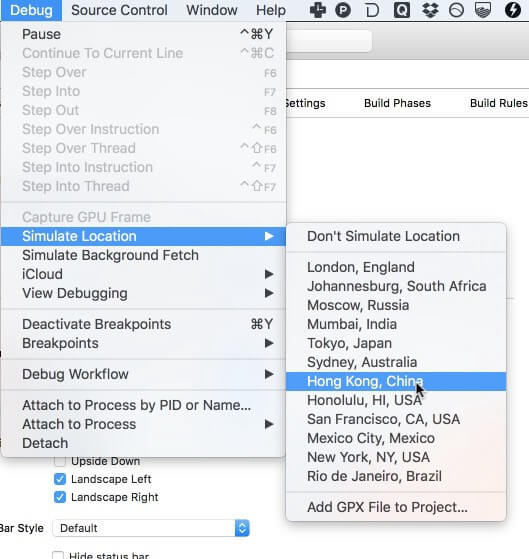
If you have done all that you need to do, then the location of your iOS device should instantly jump to the location that you have chosen.

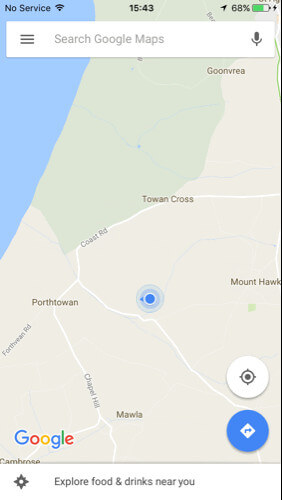
Now you can proceed and see if you have access to Geo-filters in the new location.
Step 4: Spy Geo-Filters on Snapchat
Now you can launch Snapchat and then access the filters in the area that you have teleported to. Remember that you can move from one location to the next on XCode without having to close Snapchat. Just cancel the current snap after changing the location and create a new snap to see the filters in the new location. If this fails to respond, then go back to Google maps or iOS map app and then ensure that you are in the desired location. Once you have done so, close Snapchat and restart it again, and you will be in the new location once more.
Part 3: A paid but easy way to fake Snapchat location without jailbreak
You can also fake your Snapchat GPS location using a premium app such as iTools. This is a popular application, used to spoof many other apps that require geo-location data to work. Another point to note is that the latest iPhone models cannot be jailbroken. The iOS version today is very secure and you cannot tweak it like before.
Thankfully, you can use a premium, not free, iTools to change your virtual location without jailbreaking the Lava Yuva 3 Pro device. You can get iTools on a trial basis, but after the period expires, you will have to pay $30.95 to continue using it.
Step 1: Download and install iTools on your computer and then launch it. Connect your iOS device to your computer using the original USB cable that came with the Lava Yuva 3 Pro device.
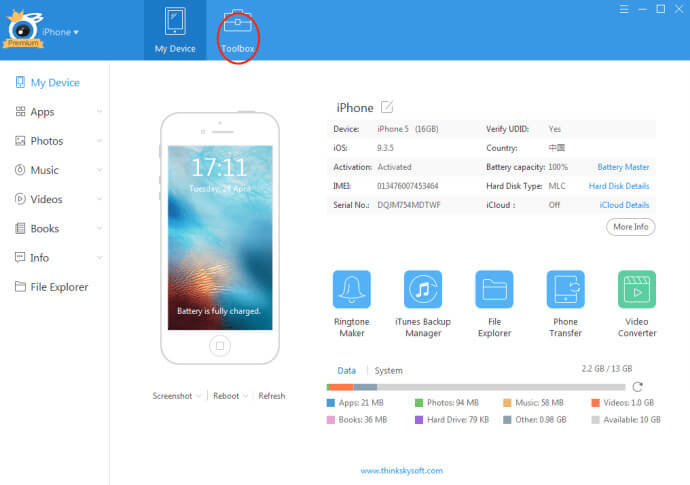
Step 2: Go to the iTools panel and click on “toolbox”.
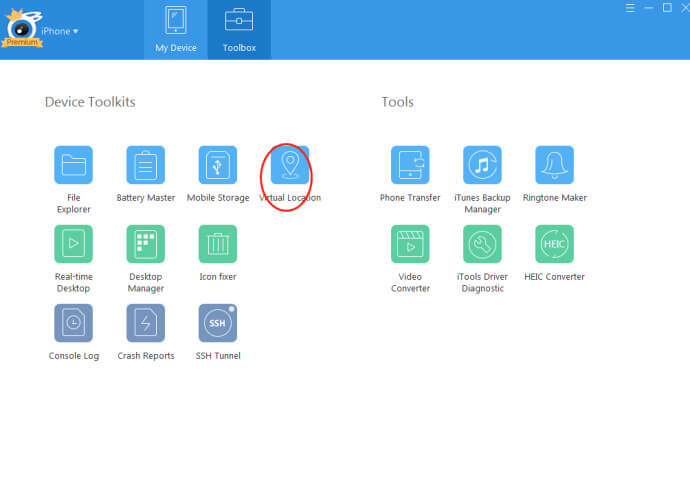
Step 3: Select the Virtual Location button within the Toolbox Panel
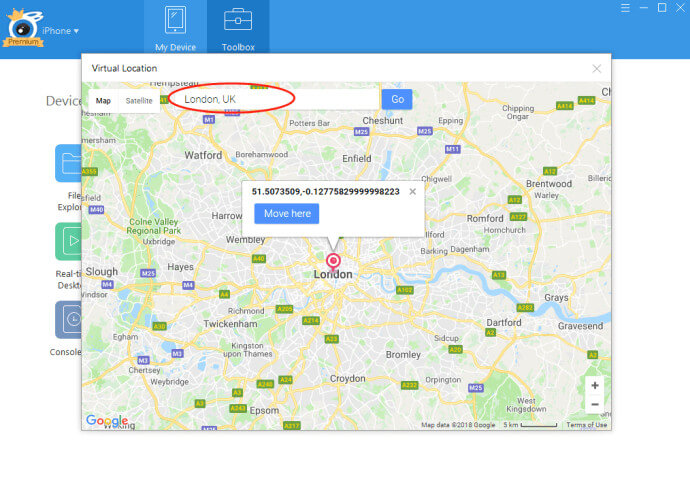
Step 4: Type in the location that you want to teleport to and then click on ‘Move Here”.
 Power Tools add-on for Google Sheets, Lifetime subscription
Step 5: Now open your Snapchat and you will be able to access the filters found in the location that you typed in.
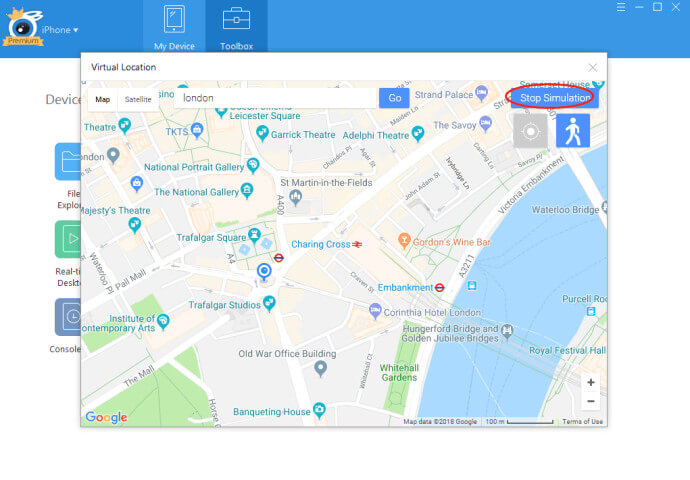
Once you are finished with this spoofed location, you can simply select “Stop Simulation” in iTools. This is a premium tool, but very simple to use. It is the best tool to use, especially if you are having a device with the latest iOS version.
Part 4: A brief comparison of XCode vs. iTools to fake Snapchat GPS location
From the steps used in both methods, it is very clear that iTools is the best app to use to fake your Snapchat GPS location for several reasons. Here are some of them:
- Ease of use - Using XCode to fake your Snapchat GPS location is a long and complicated process, whereas using iTools is simple and clean.
- Price – Although XCode is free while iTools is not, the benefits of using iTools surpass the cost. This makes it less-costly when it comes to performance and convenience.
- Security – XCode may not be very secure, especially when it comes to avoiding detection by Snapchat. You may have to keep going back to XCode, and changing the location, switching off Snapchat, and restating it again. However, when using iTools, your location is fixed until you stop the simulation.
- Versatility – XCode cannot be used on the latest iOS devices without posing problems, while iTools is a simple and effective tool for all iOS versions.
In conclusion
When you want to spoof Snapchat to access Geo-Filters in any part of the world, you can use the complicated XCode or pay a fee and use the simpler iTools. There are various benefits that you gain from teleporting using these tools, with Geo-Filters access being the biggest benefit. If you want to use Snapchat all over the world without moving out of your home, then these are the ways that you can go about it.
- Title: In 2024, Does find my friends work on Lava Yuva 3 Pro | Dr.fone
- Author: Abigail
- Created at : 2024-07-24 17:07:47
- Updated at : 2024-07-25 17:07:47
- Link: https://location-social.techidaily.com/in-2024-does-find-my-friends-work-on-lava-yuva-3-pro-drfone-by-drfone-virtual-android/
- License: This work is licensed under CC BY-NC-SA 4.0.