
In 2024, How to Change GPS Location on Asus ROG Phone 8 Pro Easily & Safely | Dr.fone
How to Change GPS Location on Asus ROG Phone 8 Pro Easily & Safely
Change GPS Location iPhone and everything else will be alright! - Did you hear your friends suggest this to you? Whenever you cannot access the content of your choice or when you want to play some games, they must have asked you to change your location or spoof it. Creating a fake location iOS will not just help you with games and content, but also hide your identity and keep stalkers away.


The changed location will reflect in all of your social media databases and other everyday apps. No one can track you down using the over-smart softwares that pry on user locations on different apps they use. By doing so, you are enhancing your online security, protecting your privacy, and, in some cases, also keeping your personal information a secret. Trust us when we say that certain apps need your information worth plenty of bucks but get away with procuring it without your permission.
There is no harm in changing your GPS location, especially when the world wide web is eager to monetize your information. A proper iOS Fake GPS will keep you safe virtually. Then you might wonder, - How do I use apps to navigate the roads or track down that pub in the locality? Well, you can always revert to your original location whenever you want to just that these tricks will help you stay in the safe bubble most of the time.
Part 1: What is iPhone Location Settings for?
The iPhone Location settings are useful for providing optimum and smooth services to iPhone users. Several in-built apps and other installed apps use the iPhone location to make the user experience better. The settings help the iPhone owner decide which app gets to use his location and which one shouldn’t. It is quite easy to make the call and enable the settings under this section.
The in-built apps like ‘Camera’ use Location to add the time and date stamp to your images. They also detect where the photo is taken and provide appropriate tags to pinpoint the location.


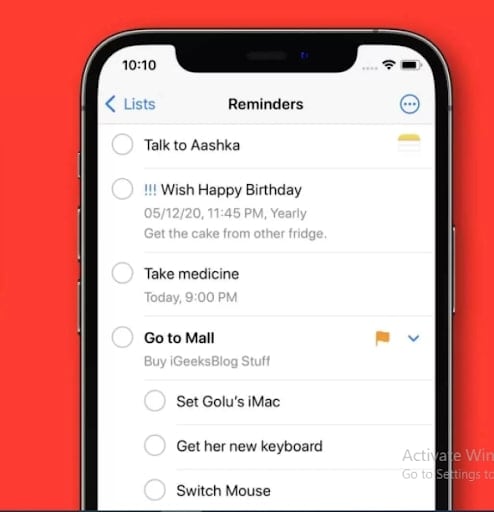
Your ‘Reminder or Alarm’ apps also use location to send you notifications and pop-ups to intimate you that you’ve reached a specific location. If you have somewhere to be, they can also tell you how long it will take to be there. It completely depends on the type of app you are using.
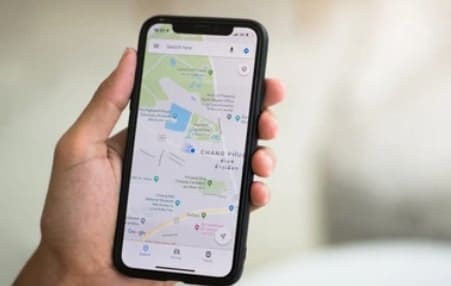
The Maps is one of the main apps that desperately rely on Location Settings. It tells where your favorite pub is, where the closest bookstore is and how to find the nearest Pharmacy in the locality. Name the necessity, and the Maps will find it for you. Letting this app access Location is important to get accurate results.

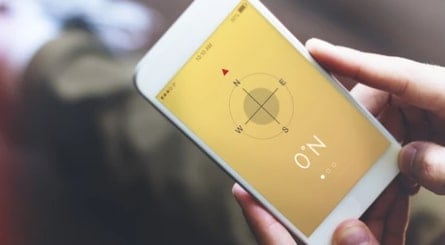
Compass is another app that needs access to the location to tell you which direction the sun sets in. You want to know the true south, enable your location, sync with the Compass app, and you’ll have the answers.
So, to sum that up, the Location Settings will determine which app gets to access your location and which does not. Whenever you install a new app, the phone will ask you if it’s okay to share the Location. If you accept, that’s how it goes. If you deny, the apps cannot access your GPS. When you spoof iPhone Location, then these apps will register this fake location.

Part 2: Change GPS location on iPhone using a PC program
The GPS Spoofing iPhone is very easy, especially when you go for a quick PC Program. These are easily available and do a better job than VPNs. There is no data logging, so your security and privacy are not at risk.
Wondershare’s Dr. Fone is one of the best applications if you are looking for a PC Program. It is going to get your work done in just four steps. This is what you should be doing -
Step 1: You have to download the Dr. Fone - Virtual Location (iOS) . It is easily available for everyone. Launch the application, and the options will display on your screen. Choose the ‘Virtual Location’ option.

Step 2: Connect your phone to your computer and click on ‘Get Started’.

Step 3: A Map displaying the entire world will appear on your screen. On the top right corner, the third icon represents the ‘Teleport Mode’. Click on that and enter the name of the place in the search box.
 vMix HD - Software based live production. vMix HD includes everything in vMix Basic HD plus 1000 inputs, Video List, 4 Overlay Channels, and 1 vMix Call
Step 4: Then click on ‘Move Here’ when you are completely sure that this is the place you want to be in ‘Virtually’. The map makes the shift for you, and the same will mirror in your Asus ROG Phone 8 Pro too.

This is the simplest way to change iPhone Location without Jailbreak. We will discover some other methods in the following Parts.
Part 3: Change GPS location on iPhone using an external device
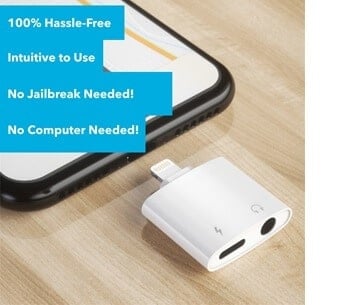
The external devices connect to the Lightning port of your device and create a secondary GPS that your apps and iPhone will detect. These are not completely software-based. You need to buy these mini-devices first, and then you can proceed with the location spoofing. These areas reliable as any softwares and much more than VPNs.
One of the best devices that we can suggest is Double Location.
Step 1: Buy the Double Location device and install the companion iOS app that is needed to change/ alter the location of your device. Then connect Double Location Dongle to your phone.
Keep in mind - The iOS companion apps are not available on the App Store, and you need to download them from their websites. The installation and launch procedure will differ depending upon the iOS model you are using. You have to follow the Double Location Manufacturer’s guidelines keenly not to jailbreak your phone.
Step 2: Open the Double Location iOS app and open the Map Tab.
Step 3: Move the pin to the location that you want to shift to virtually. If you cannot pinpoint the exact location, there is nothing much we can do about it. You have to settle for a little compromise. Adjust any other settings that you want to (Gaming).
Step 4: On the bottom of the screen, hit the lock position option, and your iOS Spoof Location will reflect everywhere.

Part 4: Change GPS location on iPhone using Xcode
XCode is a computer program. It is very useful for those who have sound coding language knowledge. It works well with Mac devices, and it is a good Gps changer for iPhone.
Step 1: Firstly, Install the App from the App Store (on Mac) And then Launch it.

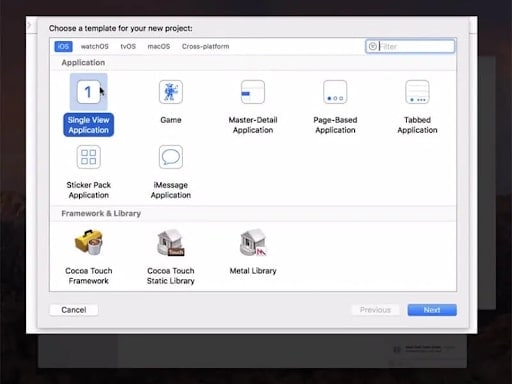
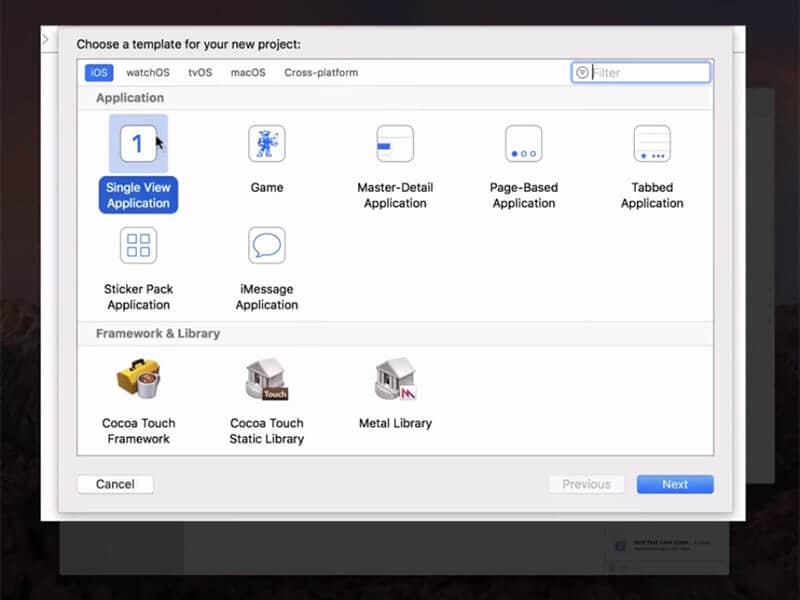
Step 2: Once you launch the app, the Xcode Window will open. Click on ‘Single View Application’ to start a new Project and proceed by clicking on ‘Next’. Set up a name and then proceed.
Step 3: A pop-up will appear asking you who you are, and you need to apply some GIT commands to this particular part of the process.

Step 4: Launch the terminal on your Mac device and enter these commands - git config –global user.email “[email protected]“ and git config –global user. name “your name”. (Add your information)
Step 5: At this stage, you have to set up the Development Team and proceed to connect your Asus ROG Phone 8 Pro device to the Mac Device.
 Software Update Pro - Check and update software installed on your computer.

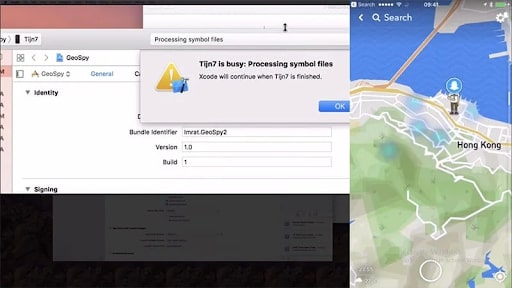
Step 6: Now, you need to select your device from the ‘Build Device’ option and while you do this, keep your phone unblocked for quick detection. Then the program will process the Symbol Files.

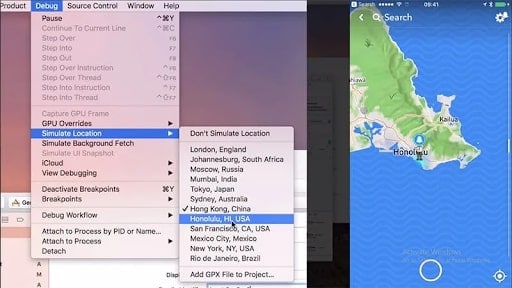
Step 7: Go to the Debug Menu and select Simulate Location. From there, you can choose any location that you want to, proceed with it, and the new spoofed location will appear on your Asus ROG Phone 8 Pro device.
 PDF application, powered by AI-based OCR, for unified workflows with both digital and scanned documents.
 Part 5: Change GPS location on iPhone using Cydia
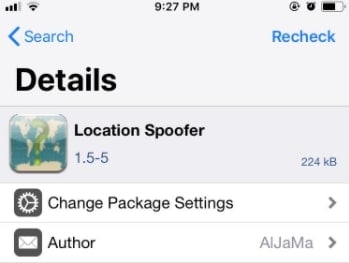
Cydia offers an app named Location Spoofer. This one is a very good option for those ready/okay with jailbreaking their iPhone devices. You can change the Phone Location iPhone without jailbreak in the previous suggestions, but that is not possible here. This is how you do it -
Step 1: Download the Cyndia LocationSpoofer app from their website. You will find LocationSpoofer8 if you are using the iOS 8.0 model.
Step 2: Launch the app and enter your virtual address into the search box at the top.
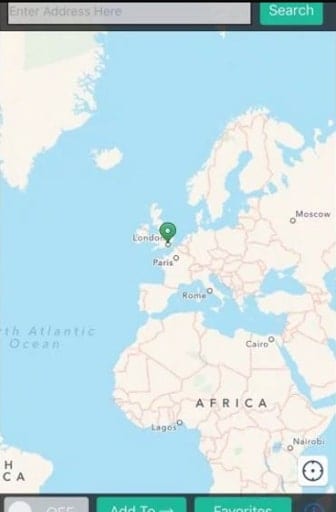
Step 3: Once you are sure about your location, change the toggle from ‘OFF’ to ‘ON’ at the bottom of the page.
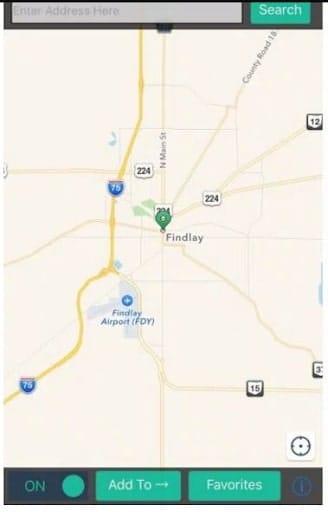
Step 4: Then, right at the end of this bottom line, you will find an ‘i’ icon. Click on that and then go with the wishlist. There you can choose the apps that can access your virtually changed location. Then Click on ‘Done’ when you are finished.
The problem with this method is that certain apps downright refuse to function when they detect that you have jailbroken your Asus ROG Phone 8 Pro device. So, keep that in mind when you are making your choice.
Conclusion
If you’ve been wondering how can I change my location on iPhone, then I am sure this article must have at least given you one suitable way to do that. Weighing your necessities, choose the most suitable option that will safely transfer you from one place to another - Virtually, Of course! You can settle on the best location changer for iPhone.
How to Hide/Fake Snapchat Location on Your Asus ROG Phone 8 Pro
The GPS functionality is very prominent these days. Especially when various apps or websites are making use of your geological location to deliver more relevant content. Be it, social networking apps or gaming apps, for instance, Snapchat, and Pokemon Go respectively.
Talking about Snapchat, this app offers you different badges and filters depending upon your Geographical location. It actually utilizes the GPS feature of your device to determine where you are located. This can sometimes be annoying as you may wish to access a filter or badge that is not available at your Geological location. Now, this is where you need the Snapchat spoof location app. You not only can hide your actual location from Snapchat. Instead, cast a fake location on Snapchat map, and eventually, you can easily access the badges/filters at your convenience!
Sounds interesting, right? Let’s understand more about the tutorials on how to hide/fake location on Snapchat map.

Part 1. What Snapchat is using your location for?
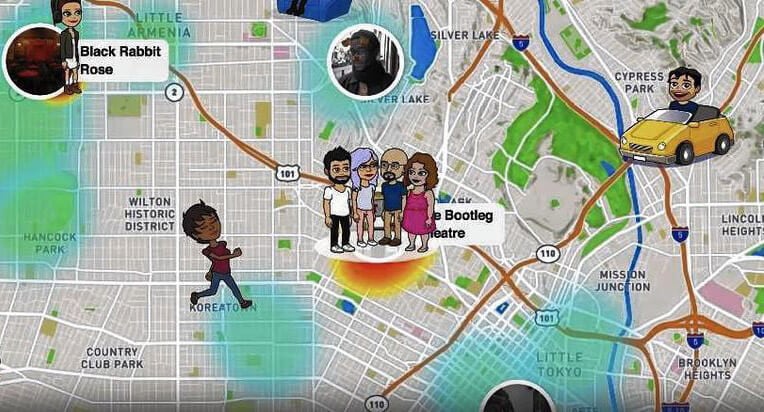
Snapchat basically utilizes your location for the SnapMap feature that furnishes the location-based filters etc. over your device. This SnapMap feature was unveiled in 2017. If you haven’t deliberately enabled it yet or you’re unaware of this feature, implies that you’re still “off the grid”. If you wish to enable this feature, you literally need to authorize Snapchat “3x times” and the last, fourth one to authorize your device.
With the SnapMap feature enabled, you can easily get to know about the whereabouts of your friends, and in turn, there’re allowed to know yours. As long as the Snapchat app is running over your screen, the SnapMap location of your Bitmoji gets updated dynamically. But as soon as you quit the app, the last known location of your Bitmoji is displayed over the SnapMap.


Part 2. Why people want to hide/fake location on Snapchat?
When it comes to fake Snapchat location there can be several reasons behind that. Here are some scenarios where people do wish to hide/fake location on Snapchat. Let’s explore.
- Sometimes, you may wish to utilize the cute filter that you saw your favorite celebrity putting up when he/she was in Sydney, Australia (or any other location).
- Or, you may wish to simply spoof location Snapchat for fun and be popular among your friends that you know some really cool tricks.
- Perhaps, you wish to stay ahead one step ahead in the dating game. For instance, you’re planning to move to a location a hundred miles away, and wish to have a person to spend quality time with when you reach there.
- Another reason is that is absolutely fun to trick people into believing that you’re spending your leisure time on an expensive tour. For instance, you can check in to a classy restaurant (you’ve never been to in real) in Dubai by mocking the GPS location.
- Even better for the kids who wish to fake GPS location to hide their real location over the location-sharing SnapMap feature from their parents, family, or friends.
Part 3. How to hide location on Snapchat
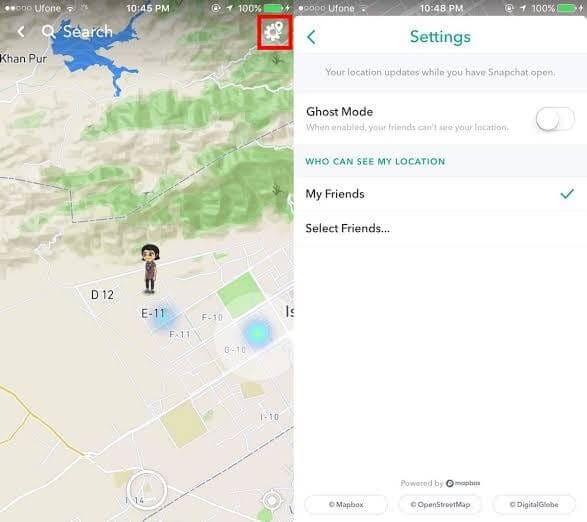
When it comes to disabling or hiding the location on Snapchat, the tutorial is extremely easy. Snapchat itself offers you a setting called Ghost mode. You just need to enable it. Here’s how to get it done.
First, get into the Snapchat app and then visit either the Discover screen or the Camera or Friends. Next, tap on the magnifying glass and hit on Map.
As soon as the SnapMap screen loads up, you need to access the settings by hitting the Gear icon on the top right corner.
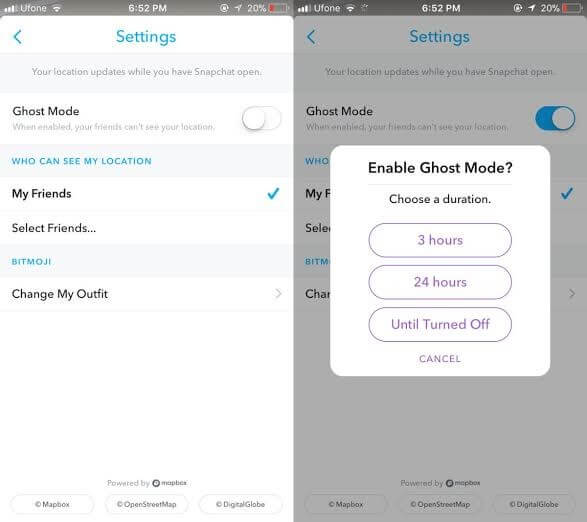
Then, make use of the settings to set up your privacy and hit on the “Ghost Mode” toggle switch to turn it on. A pop-up window will appear with 3 different settings:
- 3 hours : Ghost mode is turned on for 3 straight hours.
- 24 hours : Ghost mode is turned on for 24 straight hours.
- Until Turned Off : Ghost mode is turned on until you manually turn it off.
- Selecting either of the aforementioned settings will hide your location from SnapMap. Implies, other than you no one will be able to locate you over SnapMap.
 Nero Burning ROM:
The ultimate burning program for all your needs!
Part 4. How to fake Snapchat location on iPhone
4.1. Change Snapchat location to anywhere using a Smart Tool (easy)
You can easily spoof location on Snapchat using the tool Dr.Fone - Virtual Location (iOS) . This tool is easy to operate and works perfectly when it comes to spoofing any location. Here is how to fake GPS Snapchat iPhone without jailbreak.
Step 1: To begin with this Snapchat location spoofer, simply head to the official website of Dr.Fone – Virtual Location (iOS). Download the software package from there and then install it afterwards.
Step 2: After successful downloading, open the tool. Now, you need to opt for the “Virtual Location” module from the main interface. Post doing this, click on the “Get Started” button.
 WonderFox DVD Ripper Pro
Step 3: You can notice your current virtual location on the map in the next window. If you can’t, simply go to the “Current Virtual Location” icon available on the lower right side of the screen. Click on it and it will show your current virtual location.

Step 4: It’s time to activate the “Teleport Mode”. To do this, all you need is to click on the first icon given on the upper right side. After this, you need to enter the location where you desire to teleport in the blank field given on the upper left. Hit on “Go” when you’re done.
Step 5: A few moments later, the system will perceive the desired location you have entered. A pop-up box will come up where the distance will be shown. Click on the “Move Here” option in the box.

Step 6: This is it! The location has been changed to the desired one now. Now, whenever you click the “Current Virtual Location” icon, you will see the new location.

Also, on your iOS device, you can now Fake Snapchat location or in any other location-based app.
4.2. Change Snapchat Location using Xcode (complex)
Now, if we talk about fake location for Snapchat map on iPhone, it’s not as easy as it looks. You need to be an extremely tech-savvy person to fake Snapchat location without jailbreaking your Asus ROG Phone 8 Pro. You simply can’t download a Snapchat location spoofer app over your Asus ROG Phone 8 Pro and fake it. But fret not, we’re glad to bring you a detailed tutorial with which you can easily perform location spoofing on Snapchat and that too, without jailbreaking your Asus ROG Phone 8 Pro.
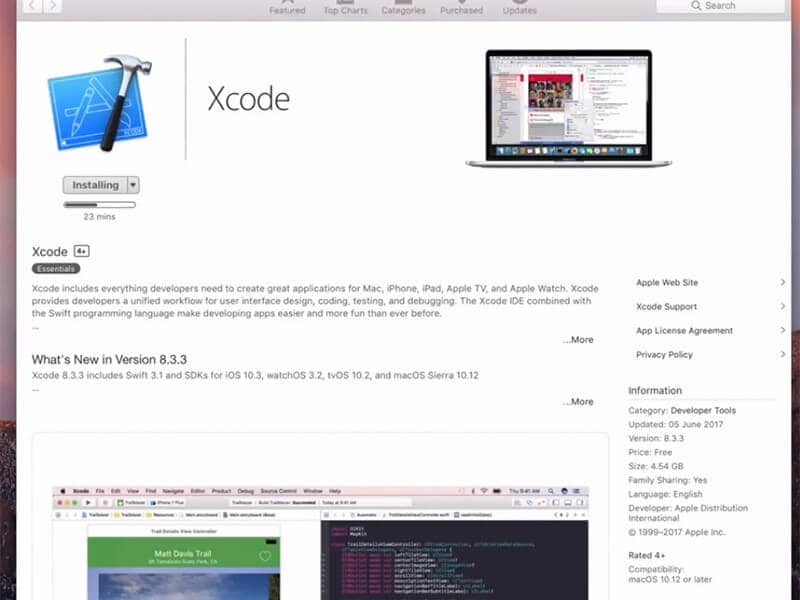
Step 1: Install Xcode and Set up a Dummy app
Grab your Mac computer first and then head over to the App Store. Now, look for the Xcode application and get it installed on your computer.
Once the application is installed, launch it over. The Xcode window will come up over your screen. Now, set up a new project and select “single view application” followed by hitting “Next”.
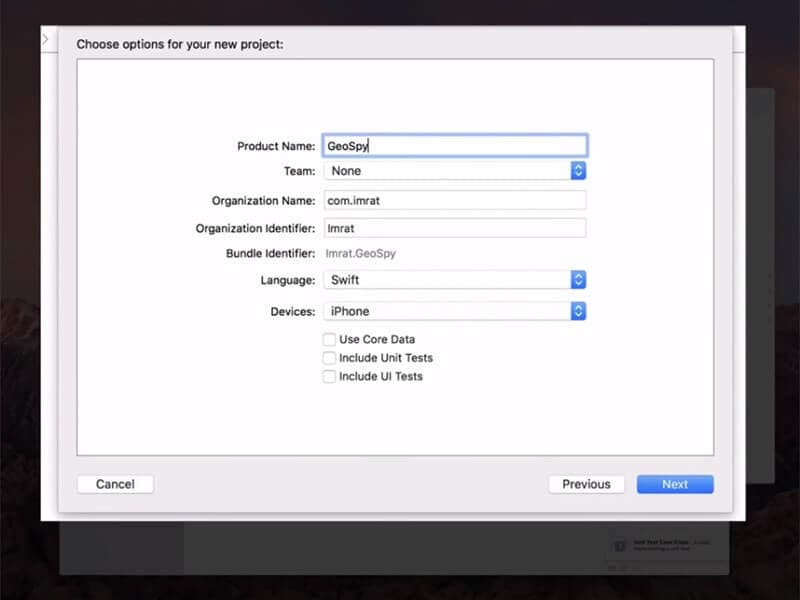
Then, give a name to your project, for instance, “GeoSpy” and hit on the “Next” button.
Step 2: Setup GIT on Xcode
- On the upcoming screen, Xcode will throw up a pop-up message stating “Please tell me who you are” and some GIT commands that you need to execute.
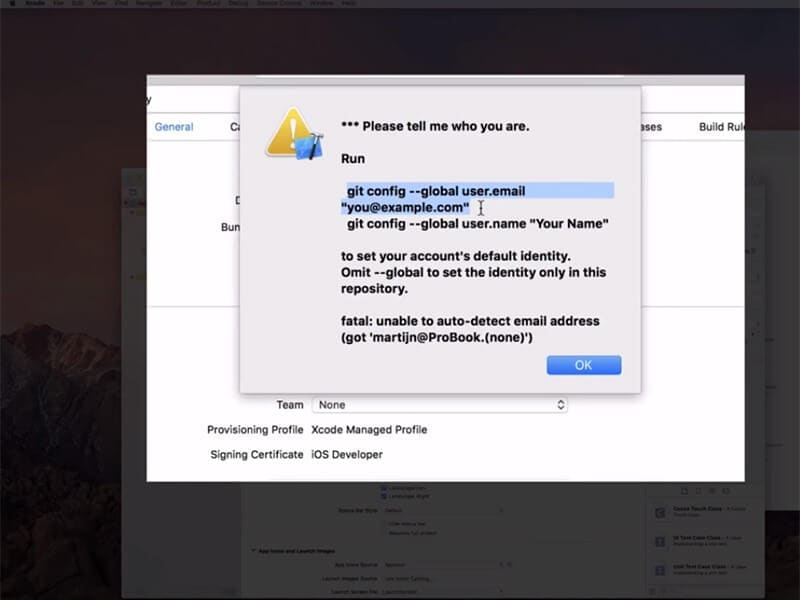
- For this, fire up the “Terminal”over your Mac and then execute the commands as follows:
- git config –global user.email “you@example.com “
- git config –global user.name “your name”
Note: Change the values for “you@example.com ”and “your name” with your information.

WPS Office Premium ( File Recovery, Photo Scanning, Convert PDF)–Yearly

- Next, you need to make sure that to set up a development team and meanwhile, connect your Asus ROG Phone 8 Pro to your Mac computer.

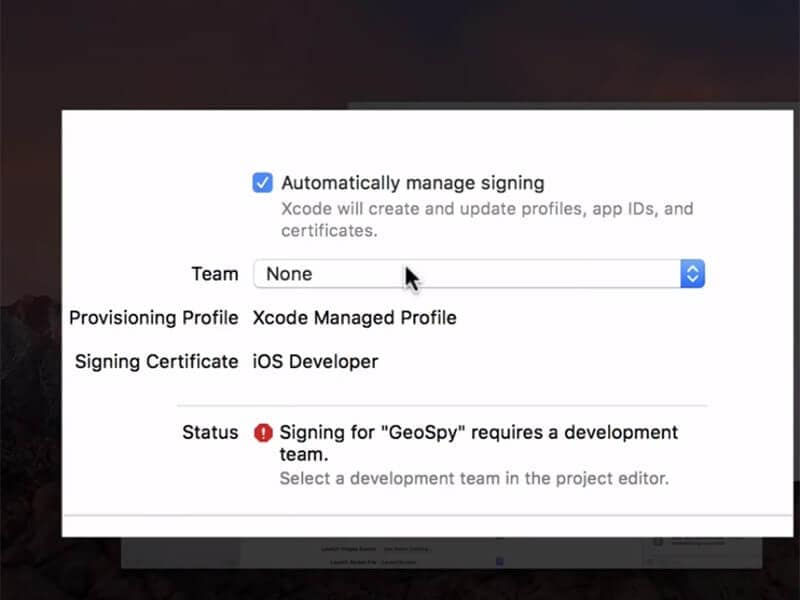
- Once done, opt it in as the build device and while you do it, ensure to keep it unlocked.
- Lastly, if everything is performed correctly, Xcode will now process some symbol files, please be patient and wait for it to complete.

Step 3: Move Bitmoji
Now, you’re all set to fake location for Snapchat map. For this, simply hit on the “Debug” menu and then opt for “Simulate Location” from the drop-down window. Lastly, select the location from the list as per your preference and you’re done.
 Screensaver Factory, Create stunning professional screensavers within minutes. Create screensavers for yourself, for marketing or unlimited royalty-free commercial distribution. Make screensavers from images, video and swf flash, add background music and smooth sprite and transition effects. Screensaver Factory is very easy to use, and it enables you to make self-installing screensaver files and CDs for easy setup and distribution. Screensaver Factory is the most advanced software of its kind.
Part 5. How to fake Snapchat location on Android
Last but not least, the next method to fake Snapchat location is for Android devices. For this, you need to download a Snapchat spoof app (easily available over Google Play Store) on your Asus ROG Phone 8 Pro. Here’s all that you need to do.
Head to the Google Play Store and then look for the “fake GPS” app. You may be provided with several similar options, be it free or paid. If you get along with any other app, it may require your Asus ROG Phone 8 Pro to be rooted.
You need to opt for the “Fakegps free” app for Snapchat. This app doesn’t require you to root your Android. But ensure that you are running on Android version 6.0 or higher.
Install the Fake GPS Free app for Snapchat and then launch it afterwards. On the main screen, you’ll be asked to“ENABLE MOCK LOCATIONS”. Hit on it and you’ll be redirected to the“Developer options” screen.
Here, you need to simply tap on the “Select Mock Location App” option and opt for “FakeGPS Free” from the list of options appearing.

Note: You may need to enable the “Developer options” first to access these settings. For this, head to the “Settings”>“About Phone”> hit on “Build Number” – x7 times.
Once done with enabling mock location, hit the back button on your touch screen to retreat back to the Fake GPS Free app.
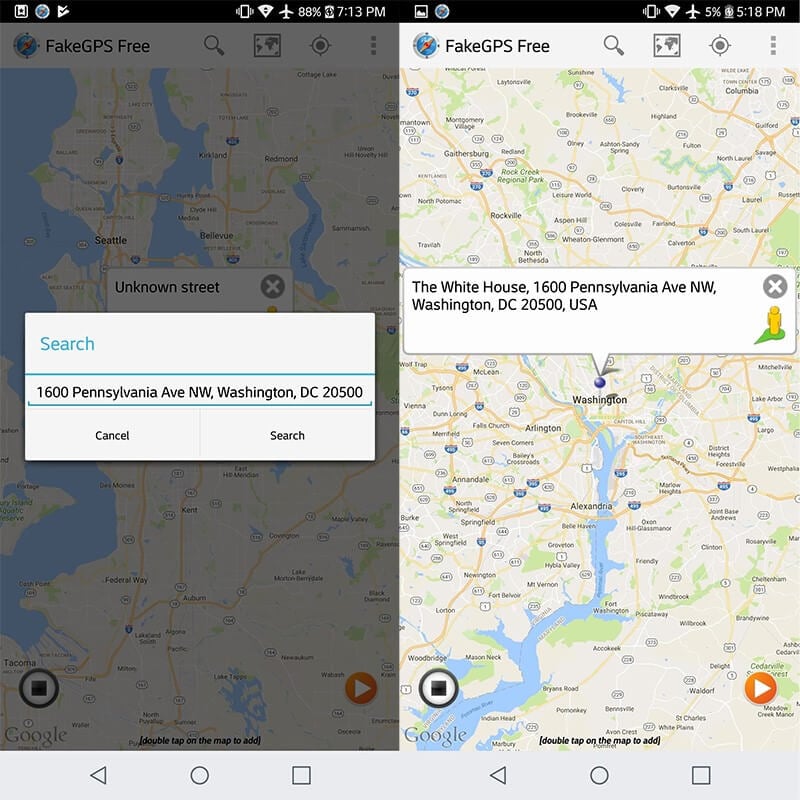
Now, hit on the “Search” icon over the top to find the desired location. Or, simply double tap over the map on your desired location to drop the pin.
Lastly, hit the “play” button available over the right bottom of your screen to activate the fake GPS location for Snapchat.
Final Words
While reaching towards the end of the article, we are pretty sure that you now fully understand what it takes to fake Snapchat location on Android or iPhone. The aforementioned ways are fully tested and work even without rooting or jailbreaking your devices respectively. Happy Spoofing!
How to Change/Add Location Filters on Snapchat For your Asus ROG Phone 8 Pro
Snapchat is an Android/iOS messaging app developed in 2011. Currently, this app is home to 350+ users who share photos, videos, audio, texts, emojis, GIFs, and documents. But one of the most exciting Snapchat features is allowing users to share locations, whether fake or real. For instance, you might want to protect your privacy or simply prank your friends with a new location. So, whichever the reason, we’ll show you how to add a location filter on Snapchat effortlessly. You’ll also know how to add a fake location filter on Snapchat. Let’s learn!
Part 1: What are Location Filters on Snapchat?
If you’re an avid Snapchatter, you must have heard of “Snapchat Location Filters” before. So, what exactly is this? A Snapchat location filter or geofilter is simply a creative and interactive way to add a location to your posts. In a nutshell, Snapchat users can search and add a location filter to their videos or photo before posting on the platform. Just think of it as a Snapchat location tag.
Having said that, Snapchat is famous for its myriad of filters, including geofilters. So, before sharing a post, you can choose an overlay design describing your location. Just remember that some places can have more filter options than others. So, keep reading to know how to get a location filter on Snapchat.
Part 2: How to enable/disable and share Location Filters on Snapchat posts?
First and foremost, creating a Snapchat location filter on Android or iPhone is super-duper easy. However, to share your location on Snapchat posts, you must activate this setting within the app. Also, enable the location service on your smartphone. On Android, open Settings > Location, whereas on iPhone, click Settings > Privacy > Location Services.
Here’s how to enable or disable the Location Filter settings:
Step 1. Fire up Snapchat on your Asus ROG Phone 8 Pro or Android phone and tap your Profile icon.
Step 2. Then, press the Settings button and find and press the Additional Services option.

Step 3. Lastly, tap Manage and then enable the Filters to toggle, and that’s it!
Now that this setting is enabled on Snapchat, you can add your location filter effect. Follow me:
Step 1. Open Snapchat and take a video or a photo.
Step 2. Next, swipe the screen to the left until you find the location effect. Remember, Snapchat uses your actual GPS location.
Step 3. You can also tag a location on Snapchat by clicking the Sticker icon on the right rail. Then, tap the Location button and then choose your GPS location. Interestingly, you can spoof a location with this feature.


Step 4. Finally, customize your video further and then click Send To. Your selected location filter will be added to your Snapchat post.

Part 3: How to Change or Add a Fake Location on Snapchat Filters?
The thing is that Snapchat uses your phone’s GPS or Wi-Fi connection to determine your actual location and add it to the location filter. Therefore, it’s virtually impossible to spoof Snapchat’s location unless you’re using a VPN service.
Fortunately, you don’t need those overpriced VPNs if you can get Dr.Fone . This smartphone utility program allows you to change your Snapchat location to anywhere in the world with a simple mouse click on your PC. In addition, you can simulate Snapchat location movements to make it look more realistic. And apart from Snapchat, you can spoof location on WhatsApp, Viber, Facebook, Facebook Messenger, Instagram, etc.
So, without dilly-dallying much, here’s how to fake a Snapchat location tag with Dr.Fone:
Dr.Fone - Virtual Location
1-Click Location Changer for both iOS and Android
- Teleport GPS location to anywhere with one click.
- Simulate GPS movement along a route as you draw.
- Joystick to simulate GPS movement flexibly.
- Compatible with both iOS and Android systems.
- Work with location-based apps, like Pokemon Go , Snapchat , Instagram , Facebook , etc.
3981454 people have downloaded it
Here is the complete guide for you to refer to while you use the Dr.Fone - Virtual Location.
Step 1. First, grab a USB cable and connect your smartphone to the PC. Remember to enable “Transfer Files” on your phone.
Step 2. Next, install and run Dr.Fone on your computer. Then, tap the Virtual Location button on the home window, and tap Get Started.
Step 3. Now allow USB debugging on your Asus ROG Phone 8 Pro before clicking Next on Dr.Fone. Don’t know how to do that? Open Settings > Additional Settings > Developer options > USB debugging. Also, choose Dr.Fone as the mock location app.


Step 4. The Virtual Location map will launch immediately. Enter the GPS coordinates or location address on the field in the top-left corner and select the new location. If satisfied, press Move Here.
Step 5. Finally, open your Snapchat app, create a photo, and choose the location filter with your new location. It’s that simple!
Part 4: FAQs about Snapchat
Q1: What is Ghost Mode on Snapchat?
Snapchat comes with an inbuilt Snap Map introduced in 2017. Besides sharing Snaps by the Our Story feature, Snap Maps lets other Snapchatters see your real-time location using Bitmojis. That said, Ghost Mode makes you invisible on the Snap Map. In other words, no one can know where you are. Cool!
Q2: What are the differences between Ghost Mode and disabling Location Filters?
The Ghost Mode makes you invisible for a specific duration or until you disable it. To use this feature, you don’t have to turn off the location feature on your smartphone. On the other hand, you just need to disable the Location Filters settings on Snapchat to turn off sharing your location tag on posts.
Q3: How accurate is the Snapchat map?
Very accurate! Snapchat uses your GPS coordinates to determine your actual location on the map. However, this map gives a location based on where you were last seen when you logged into the app. So, if you stay for a long without opening the app, it won’t update your location. But if you log in and your location service is enabled, this app will auto-update it.

Q4: How does Snapchat Get Information on Your Location?
While installing the Snapchat app and creating an account, the app will practically ask you to allow it to access your location. The app will use your phone’s GPS coordinates to determine your actual location. Also, your Wi-Fi connection will tell Snapchat exactly where you are.
Q5: How to find someone in Ghost Mode on Snapchat?
Sometimes you might want to urgently find a friend on Snapchat when you are in Ghost Mode. To do that, deactivate Ghost Mode on Snapchat by clicking Profile > Settings > See My Location and disabling Ghost Mode. Now open the Snap Map, and you’ll see your location with a red Bitmoji. You’ll also see your nearby friends with enabled Snapchat locations on the map. If you can’t find them, tap the Search icon, choose or enter their name, and see them on the map or send a text.
Wrap it Up
Now you have a complete idea of what the Snapchat location filter is. In short, it is simply a creative way to share your Snapchat location tag on a post. But because you can’t spoof your location on Snapchat, I recommend using Dr.Fone - Virtual Location to teleport your Snapchat location to anywhere in the world. This tool also works with other social media apps like Facebook, WhatsApp, and Telegram. Enjoy!
- Title: In 2024, How to Change GPS Location on Asus ROG Phone 8 Pro Easily & Safely | Dr.fone
- Author: Abigail
- Created at : 2024-07-24 16:52:10
- Updated at : 2024-07-25 16:52:10
- Link: https://location-social.techidaily.com/in-2024-how-to-change-gps-location-on-asus-rog-phone-8-pro-easily-and-safely-drfone-by-drfone-virtual-android/
- License: This work is licensed under CC BY-NC-SA 4.0.