
In 2024, How to Change GPS Location on OnePlus 11 5G Easily & Safely | Dr.fone
How to Change GPS Location on OnePlus 11 5G Easily & Safely
Change GPS Location iPhone and everything else will be alright! - Did you hear your friends suggest this to you? Whenever you cannot access the content of your choice or when you want to play some games, they must have asked you to change your location or spoof it. Creating a fake location iOS will not just help you with games and content, but also hide your identity and keep stalkers away.


The changed location will reflect in all of your social media databases and other everyday apps. No one can track you down using the over-smart softwares that pry on user locations on different apps they use. By doing so, you are enhancing your online security, protecting your privacy, and, in some cases, also keeping your personal information a secret. Trust us when we say that certain apps need your information worth plenty of bucks but get away with procuring it without your permission.
There is no harm in changing your GPS location, especially when the world wide web is eager to monetize your information. A proper iOS Fake GPS will keep you safe virtually. Then you might wonder, - How do I use apps to navigate the roads or track down that pub in the locality? Well, you can always revert to your original location whenever you want to just that these tricks will help you stay in the safe bubble most of the time.
Part 1: What is iPhone Location Settings for?
The iPhone Location settings are useful for providing optimum and smooth services to iPhone users. Several in-built apps and other installed apps use the iPhone location to make the user experience better. The settings help the iPhone owner decide which app gets to use his location and which one shouldn’t. It is quite easy to make the call and enable the settings under this section.
The in-built apps like ‘Camera’ use Location to add the time and date stamp to your images. They also detect where the photo is taken and provide appropriate tags to pinpoint the location.

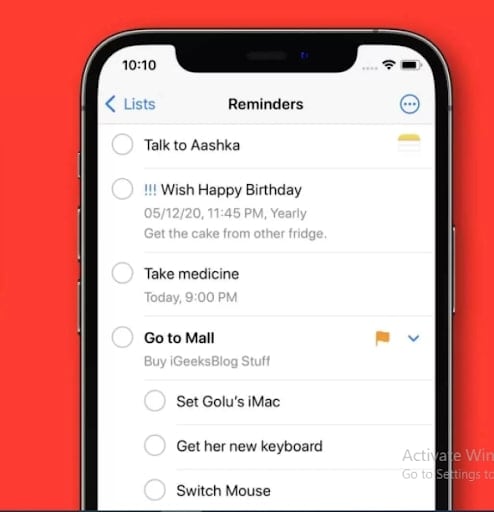
Your ‘Reminder or Alarm’ apps also use location to send you notifications and pop-ups to intimate you that you’ve reached a specific location. If you have somewhere to be, they can also tell you how long it will take to be there. It completely depends on the type of app you are using.
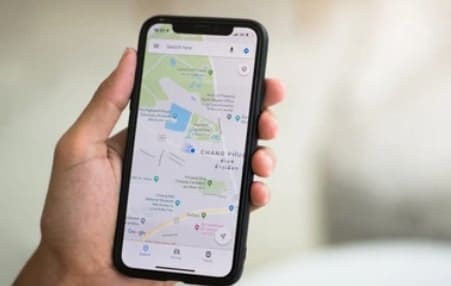
The Maps is one of the main apps that desperately rely on Location Settings. It tells where your favorite pub is, where the closest bookstore is and how to find the nearest Pharmacy in the locality. Name the necessity, and the Maps will find it for you. Letting this app access Location is important to get accurate results.

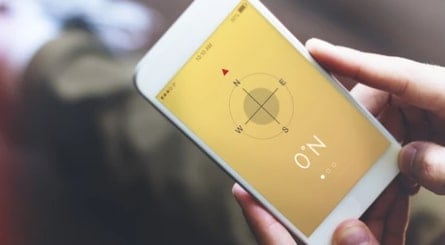
Compass is another app that needs access to the location to tell you which direction the sun sets in. You want to know the true south, enable your location, sync with the Compass app, and you’ll have the answers.
So, to sum that up, the Location Settings will determine which app gets to access your location and which does not. Whenever you install a new app, the phone will ask you if it’s okay to share the Location. If you accept, that’s how it goes. If you deny, the apps cannot access your GPS. When you spoof iPhone Location, then these apps will register this fake location.
Part 2: Change GPS location on iPhone using a PC program
The GPS Spoofing iPhone is very easy, especially when you go for a quick PC Program. These are easily available and do a better job than VPNs. There is no data logging, so your security and privacy are not at risk.
Wondershare’s Dr. Fone is one of the best applications if you are looking for a PC Program. It is going to get your work done in just four steps. This is what you should be doing -
Step 1: You have to download the Dr. Fone - Virtual Location (iOS) . It is easily available for everyone. Launch the application, and the options will display on your screen. Choose the ‘Virtual Location’ option.

Step 2: Connect your phone to your computer and click on ‘Get Started’.

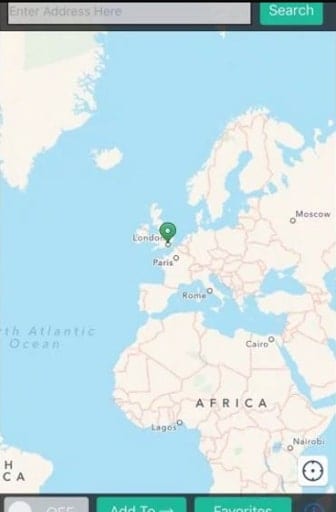
Step 3: A Map displaying the entire world will appear on your screen. On the top right corner, the third icon represents the ‘Teleport Mode’. Click on that and enter the name of the place in the search box.

Step 4: Then click on ‘Move Here’ when you are completely sure that this is the place you want to be in ‘Virtually’. The map makes the shift for you, and the same will mirror in your OnePlus 11 5G too.

This is the simplest way to change iPhone Location without Jailbreak. We will discover some other methods in the following Parts.
Part 3: Change GPS location on iPhone using an external device
The external devices connect to the Lightning port of your device and create a secondary GPS that your apps and iPhone will detect. These are not completely software-based. You need to buy these mini-devices first, and then you can proceed with the location spoofing. These areas reliable as any softwares and much more than VPNs.
One of the best devices that we can suggest is Double Location.
Step 1: Buy the Double Location device and install the companion iOS app that is needed to change/ alter the location of your device. Then connect Double Location Dongle to your phone.
Keep in mind - The iOS companion apps are not available on the App Store, and you need to download them from their websites. The installation and launch procedure will differ depending upon the iOS model you are using. You have to follow the Double Location Manufacturer’s guidelines keenly not to jailbreak your phone.
Step 2: Open the Double Location iOS app and open the Map Tab.

Step 3: Move the pin to the location that you want to shift to virtually. If you cannot pinpoint the exact location, there is nothing much we can do about it. You have to settle for a little compromise. Adjust any other settings that you want to (Gaming).
Step 4: On the bottom of the screen, hit the lock position option, and your iOS Spoof Location will reflect everywhere.

Part 4: Change GPS location on iPhone using Xcode
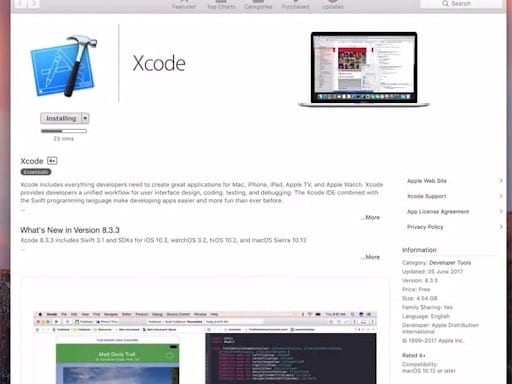
XCode is a computer program. It is very useful for those who have sound coding language knowledge. It works well with Mac devices, and it is a good Gps changer for iPhone.
Step 1: Firstly, Install the App from the App Store (on Mac) And then Launch it.
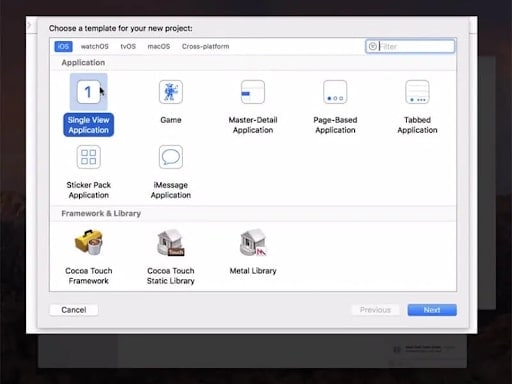
Step 2: Once you launch the app, the Xcode Window will open. Click on ‘Single View Application’ to start a new Project and proceed by clicking on ‘Next’. Set up a name and then proceed.
Step 3: A pop-up will appear asking you who you are, and you need to apply some GIT commands to this particular part of the process.


Step 4: Launch the terminal on your Mac device and enter these commands - git config –global user.email “[email protected]“ and git config –global user. name “your name”. (Add your information)
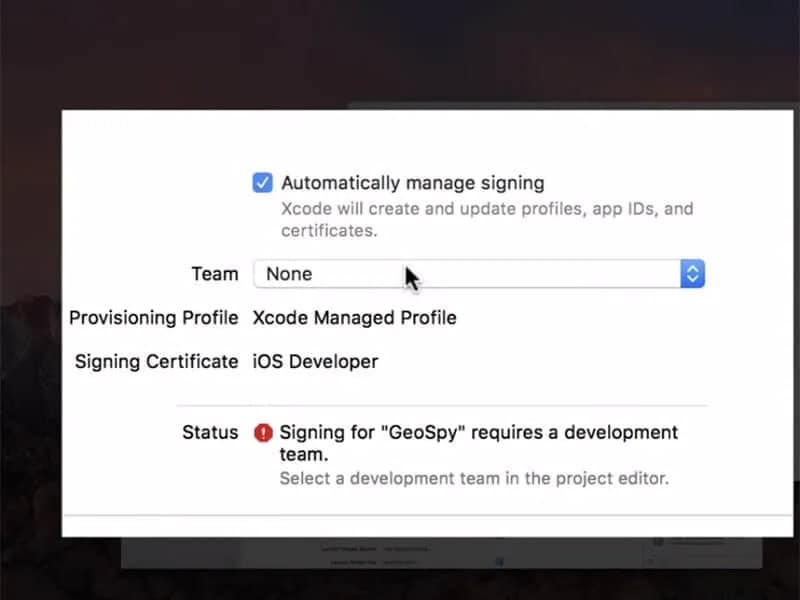
Step 5: At this stage, you have to set up the Development Team and proceed to connect your OnePlus 11 5G device to the Mac Device.
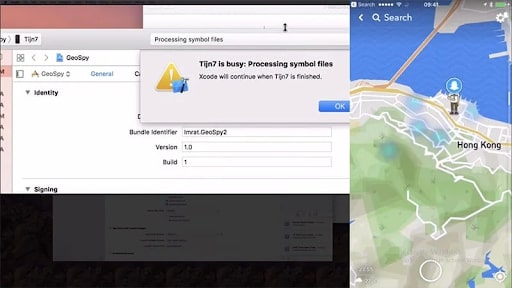
Step 6: Now, you need to select your device from the ‘Build Device’ option and while you do this, keep your phone unblocked for quick detection. Then the program will process the Symbol Files.
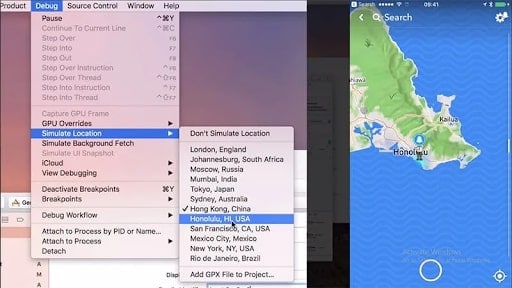
Step 7: Go to the Debug Menu and select Simulate Location. From there, you can choose any location that you want to, proceed with it, and the new spoofed location will appear on your OnePlus 11 5G device.
Part 5: Change GPS location on iPhone using Cydia
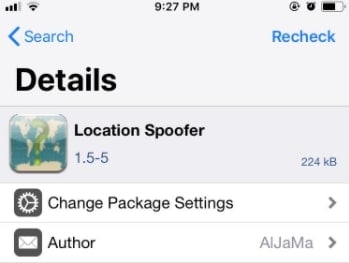
Cydia offers an app named Location Spoofer. This one is a very good option for those ready/okay with jailbreaking their iPhone devices. You can change the Phone Location iPhone without jailbreak in the previous suggestions, but that is not possible here. This is how you do it -
Step 1: Download the Cyndia LocationSpoofer app from their website. You will find LocationSpoofer8 if you are using the iOS 8.0 model.
Step 2: Launch the app and enter your virtual address into the search box at the top.
Step 3: Once you are sure about your location, change the toggle from ‘OFF’ to ‘ON’ at the bottom of the page.
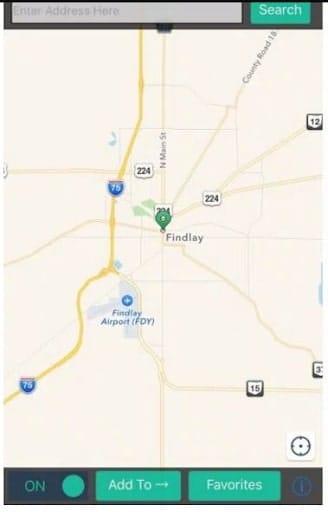
Step 4: Then, right at the end of this bottom line, you will find an ‘i’ icon. Click on that and then go with the wishlist. There you can choose the apps that can access your virtually changed location. Then Click on ‘Done’ when you are finished.
The problem with this method is that certain apps downright refuse to function when they detect that you have jailbroken your OnePlus 11 5G device. So, keep that in mind when you are making your choice.
Conclusion
If you’ve been wondering how can I change my location on iPhone, then I am sure this article must have at least given you one suitable way to do that. Weighing your necessities, choose the most suitable option that will safely transfer you from one place to another - Virtually, Of course! You can settle on the best location changer for iPhone.

How To Leave a Life360 Group On OnePlus 11 5G Without Anyone Knowing?
Do you keep asking yourself how do I leave a Life360 group? If so, you’re on the right page. In a world where connectivity is key, Life360 has emerged as a trusted family safety app. It provides a digital reach through its innovative location tracking “Circle.” However, sometimes, you might want to leave it without raising eyebrows.
Whether it’s a matter of privacy or a brief escape, the art of leaving a Life360 group unnoticed is subtle. The article will show you how to leave a Life360 Circle without anyone knowing. Read to learn more.


Part 1. How To Leave a Life360 Circle
Life360 has become a household name. It’s a digital haven for families to stay connected through its “Circle.” The Circle functions as a virtual space where family members’ locations are shared. While this can be beneficial, there are times when you wish to leave a Circle for personal reasons.
 Glarysoft File Recovery Pro Annually - Helps to recover your lost file/data, even permanently deleted data.
How To Leave a Life360 Circle You Created
The default method of leaving a Life360 Circle is straightforward but comes with a catch. All members within the Circle are notified when someone leaves. The notification serves as a built-in transparency feature. It keeps everyone aware of any changes in the group dynamics. Follow the steps on how to leave Circle in Life360 when you created it yourself:
- Step 1: Launch the Life360 app on your device and go to Settings. Tap on Circle Management and select the Circle you intend to exit.

- Step 2: Choose the option Leave Circle. If you were the admin, ensure that you designated a new admin before leaving. Apart from that, the process is straightforward. Follow the on-screen instructions.

How To Leave a Life360 Circle You’re a Part Of
Here’s how to leave a circle in Life360 that you’re a part of. Here are the detailed steps:
- Step 1: Open your Life360 on your smartphone. Log in if necessary. Tap the Circle Switcher located at the top of your screen. Choose the specific Circle you wish to exit. Afterward, access the Gear icon positioned in the upper left corner.

- Step 2: Choose Circle Management from the list. Tap on Leave Circle at the bottom of the screen. Confirm your decision by selecting Yes in the popup. You’ll no longer be associated with the Circle, and it won’t appear in your Circles list. If you wish to rejoin, you’ll need a new invitation from the Circle Admin.
 Software Update Pro - Check and update software installed on your computer.

Part 2. How To Leave a Life360 Circle Without Anyone Knowing
Leaving a Life360 Circle through the standard method may not align with your preference in certain scenarios. In such cases, there are many methods you can use to maintain your privacy without alerting fellow Circle members. Here are some strategic approaches:
Method 1: Using an App To Spoof Your Location
One of the most effective and safe ways to trick Life360 without triggering notifications is by using Wondershare Dr.Fone - Virtual Location. The tool offers a seamless solution for location spoofing with the following key features:
- **One-click location changer.**Change your location with one click.
- **Simulate GPS movement along your usual route.**Mimic your typical movements without being physically present.
- **Cross-platform compatibility.**Compatible with both iOS and Android devices.
- **Easy 3-step process.**Easy and intuitive steps for hassle-free location manipulation.
How To Spoof Your Life360 Circle Location Using Dr.Fone
Follow the steps below to learn how to leave a Life360 Circle without anyone knowing using Dr.Fone’s Virtual Location tool:
- Step 1: Download and install Dr.Fone, then connect your OnePlus 11 5G via USB cable. Launch the tool from Toolbox > Virtual Location. Click Get Started to proceed.

- Step 2: Activate Developer Mode on your smartphone by following on-screen instructions in Settings > Privacy & Security > Developer Mode. Restart the OnePlus 11 5G device, unlock it, and select Turn On. Enter your password.
 HD Video Converter Factory Pro

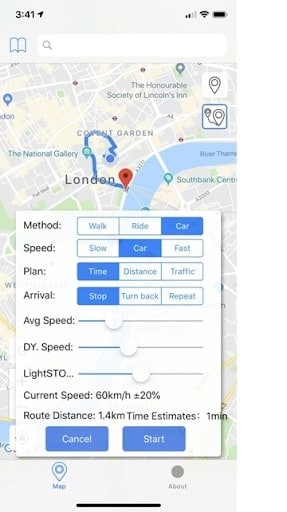
- Step 3: On the map, enter the number of movements and select Round or Loop trip. Adjust the speed, then click Move Here to start the simulation. Pause or clear to revert.

- Step 4: To activate Teleport Mode, click the Search bar. Type a location and hit Enter. Click Move Here to change the smartphone location on the map. Verify on your smartphone’s maps application. Once done, you spoofed a Life360 circle without anyone knowing.
 SwifDoo PDF 2-Year Plan
The next method can serve as a last resort if using Dr.Fone is impossible. Be aware that they come with the trade-off of notifying other Circle members. Maintaining open communication within the Circle is crucial. Do these alternatives only when it’s necessary for your privacy.
Method 2: Turning Off Mobile Data and Wi-Fi
If Dr.Fone is unavailable, a simple tactic is to disable both mobile data and Wi-Fi.
- Step 1: Open your device settings. Go to Connections or Network & Internet.
- Step 2: Disable both mobile data and Wi-Fi. Life360 will lose real-time tracking capability, but be cautious, as this may raise suspicion.
Method 3: Switching To Airplane Mode
Another option is to activate Airplane Mode, severing all connections, including location sharing. Again, this method may alert Circle members to your departure.
- Step 1: Access your device settings. Look for Connections or Network & Internet.

- Step 2: Toggle on Airplane Mode. The method severs all connections, including location sharing.
Method 4: Turning Off Your OnePlus 11 5G
A straightforward yet noticeable method involves turning off your device. While it suspends location tracking on Life360, frequent use may draw attention.
Method 5: Disabling Background App Refresh
In your device settings, disable Background App Refresh for Life360. Although this may impact location accuracy, it’s an option to consider if Dr.Fone isn’t accessible.
- Step 1: Go to your device Settings. Look for Apps or Application Manager.

- Step 2: Locate Life360 and disable Background App Refresh for the app. Alternatively, you can disable Background App Refresh as a whole.
Method 6: Enabling Battery Saving Mode
Switching to “Battery saving” or “Power saving” mode can affect the frequency of Life360 updates. While it offers a subtle way to limit location sharing, it may not provide foolproof privacy. Follow the steps:
- Step 1: Go to your device Settings. Look for the Battery option.

- Step 2: Enable Battery saving or Power saving mode.
 Lyric Video Creator Professional Version
Method 7: Getting a Burner Phone
Acquiring a secondary, inexpensive phone for Life360 use may be an alternative if all else fails. This method involves monetary considerations and may not be practical for everyone.
![]() FX PRO (Gold Robot + Silver Robot(Basic Package))
FX PRO (Gold Robot + Silver Robot(Basic Package))
Part 3. A Deep Dive on Life360’s Circle Feature
Life360’s Circle feature serves as the cornerstone of the app. It fosters connectivity and safety among its users. After diving into how to leave a Circle on Life360 in the above parts, it’s time to have a comprehensive look at essential aspects of the Circle feature:

Can You Remove Someone From a life360 Circle?
As the admin, you have the authority to remove someone from a Life360 Circle. The control ensures that you can manage the group dynamics and permissions.
How To Know if Someone Leaves the Circle?
Life360 notifies Circle members when someone leaves. The transparency feature aims to keep everyone informed about changes within the group.
Can You Include Non-Family Members in a Circle?
While Life360 is designed for family safety, you can include non-family members in a Circle. The flexibility caters to scenarios where close friends or caregivers need to be part of the safety network.
Is Circle Place Alerts Really That Useful?
The Circle Place Alerts feature proves valuable for users. It allows predefined locations to trigger alerts when members enter or leave those areas. While useful for safety monitoring, its practicality may vary depending on individual preferences and needs.
 DEX 3 RE is Easy-To-Use DJ Mixing Software for MAC and Windows Designed for Today’s Versatile DJ.
Mix from your own library of music, iTunes or use the Pulselocker subsciprtion service for in-app access to over 44 million songs. Use with over 85 supported DJ controllers or mix with a keyboard and mouse.
DEX 3 RE is everything you need without the clutter - the perfect 2-deck mixing software solution for mobile DJs or hard-core hobbiests.
PCDJ DEX 3 RE (DJ Software for Win & MAC - Product Activation For 3 Machines)
What if People in the Circle Feel Micromanaged?
Knowing the feeling of being micromanaged, especially among kids and teens, Life360 introduces the Bubble feature. The Bubble feature allows users to set a custom safety zone. It balances monitoring and granting a sense of autonomy within a designated area.
Conclusion
Leaving a Life360 Circle can be achieved through the standard method. However, it alerts other members, which can be annoying. While alternative methods exist, they often trigger notifications. If you want to know how to leave a Life360 circle without anyone knowing, Dr.Fone is recommended as the optimal tool.
The platform is proficient in location spoofing without alerting the Circle. Whether addressing privacy concerns or aiming for a quick escape, Dr.Fone proves its worth. It’s the preferred choice if you google the question, “How do I leave a life360 group online.” Ensure a seamless alone time without notifying other members.
## 4 Feasible Ways to Fake Location on Facebook For your OnePlus 11 5GThere are many reasons to fake location on Facebook. For example, you may want to hide your ideal address and protect your safety. Also, you might want to change the Facebook location to get better search results for products, friends, groups, and so on. But whichever the case, creating a fake GPS on Facebook is relatively easy. So, in this post, I want to introduce you to several methods to spoof your Facebook location quickly and easily.
Method 1: Spoof Facebook Location on Computer
You can easily fake your Facebook location by spoofing the town or city in the profile settings. This way, anyone who views your profile bio will see your new Facebook location.
So, without wasting much time, here’s how to spoof Facebook location on PC:
Step 1. Launch the Facebook app on your web browser and tap your profile icon.
Step 2. Here, click Edit details under the Intro section. After that, you’ll land on the Posts window by default.
Step 3. Now tap the Pencil icon to change the current city/town. You can also change your hometown, relationship status, and when you joined Facebook.
Step 4. Finally, tap the Save button, and Facebook will automatically update your current location. To see if the changes have been applied, tap the About tab to see your new profile.

Note: Although you can successfully change your bio, Facebook will still access your actual location. Now this means your Facebook recommendations and adverts will still be based on your locality. So, keep reading to learn other reliable ways to spoof your Facebook location.
Method 2: Change Facebook Location on Android phone
Unlike the strict iPhones, Android allows you to install a third-party app to change the GPS location of your device and Facebook, to be precise. This means you don’t need to fork out some serious money for a VPN service. So, in this section, you’ll learn to fake a Facebook location on Android using the Fake GPS location app. It is a free program for teleporting your phone IP address to new places with a simple screen tap. Let’s see how to do that:
Step 1. Install and launch the Fake GPS location app on Android.
Step 2. Next, “allow mock locations” in your Android’s developer settings. To do that, open Settings >Additional Settings >Developer options. Then, click “Select mock location app“ before choosing Fake GPS.

Step 3. Now go to the Fake GPS location app and choose a new location for your device. If satisfied, tap Ok to save the added area you’d like your device to appear on.
Step 4. Finally, head to Facebook and change your location settings.
Method 3: Create A Fake Check-In Location on Facebook
Sometimes you might want to prank your Facebook friends with a new location announcement. In other words, you can make them believe that you’re in a particular location when in reality, you’re not. In that case, the Facebook Check-In feature will come in handy. It’s a simple but highly effective feature that adds your fake location to a Facebook post. Just think of it as a status update.
So, below is how to fake location on Facebook with the Check-In feature:
Step 1. Open Facebook on your favorite browser and tap the “What’s on your mind“ field.
Step 2. Next, tap the GPS icon. You’ll see all the locations near you. Or, key in a fake address and select it on the suggestions.

Step 3. Now write whatever is on your mind and add the location to your latest post. It’s that easy!
 Jet Profiler for MySQL, Enterprise Version: Jet Profiler for MySQL is real-time query performance and diagnostics tool for the MySQL database server. Its detailed query information, graphical interface and ease of use makes this a great tool for finding performance bottlenecks in your MySQL databases.
 Method 4: Fake Location for Facebook’s Nearby Friends via a Tool
While signing up on Facebook, you’ll be requested to allow the platform access to your actual GPS location. This will enable Facebook to correctly tailor adverts, friends, and other recommendations based on your location. But unfortunately, it can be challenging to change the actual location unless you’re willing to spend top dollar on a VPN service. Put, you’ll need to spoof your IP address to change the exact location.
For this reason, I recommend using a fake location tool like Dr.Fone - Virtual Location . It’s an all-in-one software that provides multiple solutions for your OnePlus 11 5G or Android phone. It allows you to teleport your current location to anywhere in the world without jailbreaking your OnePlus 11 5G or spending top dollar on a VPN service. This lets you take full advantage of the “Nearby Friends” Facebook feature that needs your actual GPS location.
Below are the key features:
- Transfer phone location to any place in the world.
- Intuitive and detailed zoom-in and zoom-out map.
- Compatible with all iOS and Android versions.
- Move to new locations on the map via different routes and means.
- Compatible with location-based apps like Telegram, Facebook, Twitter, etc.
Here is a video tutorial for you to learn and preview how to fake location on Facebook via Dr.Fone - Virtual Location
 safe & secure
Below is how to fake location on Facebook for Android and iPhone using Dr.Fone:
Step 1. Download and open Dr.Fone.
Install and run Dr.Fone on your Mac or Windows PC and then connect your phone to your computer using a USB cable. After that, select the file transfer option on your phone and then tap Virtual Location on Dr.Fone.
Step 2. Connect your phone to the software.
You’ll see a new Dr.Fone window, where you’ll click the Get Started button. Then, enable USB debugging on your phone before clicking Next.
Step 3. Choose a location and start moving.
The Virtual Location map will launch after successfully connecting your smartphone to Dr.Fone. Now enter and select a location you wish to move to and click Move Here. Alternatively, you can tap an area to move to on the map and choose whether to move by foot, bicycle, scooter, or car. Your iPhone and Android device will save your new location automatically.
Wrap it up
See, you don’t need an expensive VPN service to fake your GPS location on Facebook convincingly. With Dr.Fone, you can easily change your OnePlus 11 5G or iPhone location, which will immediately reflect on apps like Facebook, Google Maps, Telegram, and so on. And guess what? There are a host of other phone management features to exploit. You should try it!

safe & secure
- Title: In 2024, How to Change GPS Location on OnePlus 11 5G Easily & Safely | Dr.fone
- Author: Abigail
- Created at : 2024-07-24 18:04:42
- Updated at : 2024-07-25 18:04:42
- Link: https://location-social.techidaily.com/in-2024-how-to-change-gps-location-on-oneplus-11-5g-easily-and-safely-drfone-by-drfone-virtual-android/
- License: This work is licensed under CC BY-NC-SA 4.0.