
In 2024, Why Your WhatsApp Live Location is Not Updating and How to Fix on your Nokia XR21 | Dr.fone
Why Your WhatsApp Live Location is Not Updating and How to Fix on your Nokia XR21
WhatsApp is a free messaging app owned by Meta, initially Facebook. Currently, this platform boasts over two billion active users, even outshining Messenger and WeChat. One of WhatsApp is popular is letting users share their live Location with individuals and group chats. However, sometimes you may experience the annoying WhatsApp location not updating issue. Luckily, this article has a solution to this problem. Let’s learn! We’ll also address how to share my Location on the WhatsApp issue.
First and foremost, let’s discuss some of the reasons why your WhatsApp live location is not updating on Android or iPhone. Below are some of them:
- Reason 1: Weak internet connection
You should be conversant with the idea that WhatsApp can’t function without the internet. In other words, you can’t send or receive messages and calls without a strong internet. And the same applies to updating your live Location.
- Reason 2: Disabled location feature
Here’s another reason why WhatsApp live Location is not updating on iPhone or Android. While signing up, WhatsApp will request to access your phone’s GPS location. Therefore, disabling this feature by mistake can prevent WhatsApp from updating your Location.
- Reason 3: Inappropriate time and date
Although uncommon with modern phones, this can be another reason for a wrong live location on WhatsApp. Therefore, connect your phone to the internet to update your date and time. You might also want to restart your phone and see if it works.
Part 2. How to Fix WhatsApp Live Location Not Updating Problem?
Now that you already know why WhatsApp’s Live Location isn’t updating, it’s time to check out the solutions. Let’s go!
1. Restart internet connection
Sometimes, it only takes a simple phone restart to get things back on track. Another thing, you can enable and disable “flight mode” to restart your data connection. Of course, this will also sort out any bugs in your WhatsApp app.

2. Update the app and phone
When last did you update your system and apps? It is very easy! You should constantly update your apps and phone system to enjoy better performance and security.
 PCDJ Karaoki is the complete professional karaoke software designed for KJs and karaoke venues. Karaoki includes an advanced automatic singer rotation list with singer history, key control, news ticker, next singers screen, a song book exporter and printer, a jukebox background music player and many other features designed so you can host karaoke shows faster and easier!
3. Enable location service
You can also check if your location service is enabled on iPhone or Android settings. On iPhone, click Settings > Privacy > Location Service. It’s even easier on Android. Swipe down your screen, long-press the GPS button, and enable the Location toggle.
 The Tube Sites Submitter is a fast and efficient tool for anyone who needs to upload videos quickly, easily and automatically to hundreds of tube sites in mere minutes .
 4. Reset location service on iPhone/Android
iPhone users can try to reset the Location & Service settings. To do that, open Settings > General > Reset > Reset Location & Privacy. And for Android users, please try to take the refer the steps below to follow:
- Swipe down from the top of the screen
- Tap the Location icon;
- If you can’t find the Location icon, please go to settings, or tap the “Edit” icon to go on;
- Turn Google Location Accuracy on or off**.**
5. Uninstall and reinstall WhatsApp
If all else fails, then it’s probably time to get handy. Uninstall your WhatsApp app and then get a newer version on Play Store or App Store. But often, this won’t be necessary after updating the app.
Part 3: [WhatsApp Tip] Fake WhatsApp Live Location with Unreal Accuracy
There have been multiple security concerns about WhatsApp before. But while the jury is still out, do yourself a favor and protect your live Location from spyware and other users. Also, you might want to spoof WhatsApp location for business purposes and prank friends.
That said, learning to fake Location on WhatsApp is super simple with Wondershare Dr.Fone . With this GPS app, you can teleport your WhatsApp live location to anywhere in the world. And to make your new Location more believable, this program lets you simulate movements by foot, scooter, or car. It works with all iPhone/Android versions and other social media apps like Instagram, Facebook, Telegram, and Twitter.
You can check out this video for further instruction.
 safe & secure
Below is how to spoof WhatsApp live location with Dr.Fone:
Step 1. Open the Virtual Location tool.

Install and launch Dr.Fone on PC and connect your phone to PC with a USB firewire. Then, tap the Virtual Location button on the home page and click Get Started on the pop-up window.
Step 2. Connect your phone to Dr.Fone.

WPS Office Premium ( File Recovery, Photo Scanning, Convert PDF)–Yearly

To connect your phone to this all-in-one software, first, enable “transfer files” instead of “charging” on your phone. Then, enable USB debugging under the settings tab. On Android, just click Settings >Additional Settings > Developer options > USB debugging.
Step 3. Choose a new WhatsApp live location to share.

After USB debugging is on, tap Next and enter the new location on the search field at the top-left corner. Now choose the area and tap Move Here. And there is that! Interestingly, you can choose a movement route and customize the speed.
 Allavsoft Batch Download Online Videos, Music Offline to MP4, MP3, MOV, etc format

Part 4. How to Send Live Location on WhatsApp?
In 2017, WhatsApp rolled out a brand-new feature that allows users to send their live location to family and friends. This location can come in handy if you want to meet up somewhere or let your friends and family know you’re safe and secure. And lest I forget, you can also use it to prank your friends.
Note, however, that WhatsApp only allows you to share your real-time location for 8 hours, 1 hour, or 15 minutes. In other words, this gives you control over how long users can see you on the map. Moreover, this information can’t be shared with anyone once you stop sharing.
So without wasting time, here’s how to send live Location on WhatsApp for Android or iPhone:
Step 1. Enable the GPS service on your phone by clicking the GPS button on the control panel.
Step 2. Open WhatsApp and tap the group chat or individual chat with which you want to share the Location.
Step 3. Now click the Attach button on the text field and click Location.

Step 3. From there, allow WhatsApp access to your device’s location and then press the Share Live Location button.
 DLNow Video Downloader
Step 3. Last but not least, set the duration your contact will view your Location, add a comment, and tap the Send button. That’s it!
Note: As you can see, WhatsApp relies on your GPS location to share your actual location. So, use Wondershare Dr.Fone to change your device’s location and then share it on WhatsApp.
Part 5: How to Fix Common WhatsApp Issues on Android & iPhone
Wondershare Dr.Fone is the perfect tool to handle all your WhatsApp issues. Below are some common issues it can help you with:

1. Lost Messages
Sometimes you might accidentally or intentionally delete WhatsApp chats or messages. Fortunately, Dr.Fone can help you dig out and recover those messages with a simple click. Just launch the Data Recovery tool , connect your phone to the software, and Dr.Fone will scan for all lost and current messages.
2. Transfer WhatsApp data
Thanks to the fast-paced mobile technology, it’s inevitable to migrate to a new phone. But you’ll have to sacrifice all your WhatsApp data. Luckily, Dr.Fone allows you to backup, restore, and transfer all WhatsApp data .
3. Backup WhatsApp Business chats
Having a WhatsApp Business account is vital if you’re an online marketer. Here, you can create a business profile and enjoy quick replies, automatic messaging, accurate statistics, and so on. So, to avoid losing your invoices and other business chats, use Dr.Fone to back up and transfer your WhatsApp Business chats to a new phone.
Final Words
See, there’s nothing complex about the WhatsApp live location not updating issue. Just edit and restart the app or check your location settings if it’s enabled. And, of course, use Dr.Fone - Virtual Location to share a fake location on WhatsApp and perform other WhatsApp tasks like backing up and transferring data. Thank me later!
safe & secure
How To Pause Life360 Location Sharing For Nokia XR21
Life360 has become a household name in location-sharing apps, renowned for its ability to connect family and friends seamlessly across Android and iOS platforms. This app enhances safety and fosters a sense of closeness among its users.
However, there are moments when you might crave a bit of privacy or a break from constant connectivity. Whether for a surprise, personal space, or a digital detox, the need to discreetly pause Life360 arises. This article delves into the nuances of how to pause Life360. It will also provide insightful tips on how to do it without alerting others.


Part 1: What Is Life360 and How To Pause Life360 From the App
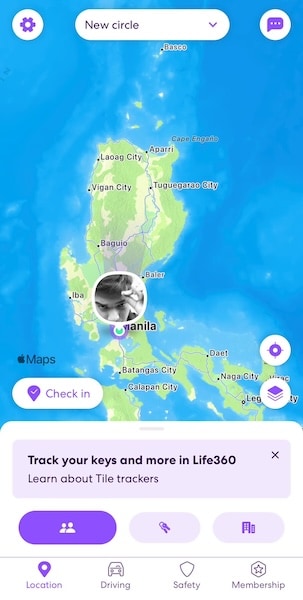
Life360 is not just an app; it’s a digital lifeline connecting people with their loved ones. It’s primarily designed for family and close friends. By offering real-time location sharing, it ensures that members of your “Circle” (a group within the app) know where you are at any given moment. This feature is handy for parents monitoring their children’s whereabouts or friends coordinating meet-ups.
The Purpose of Life360
At its core, Life360 is about safety and connectivity. The app includes features like location history, driving reports, and even crash detection, making it a versatile tool for modern families. It provides several benefits, like:
- Safety assurance. Knowing the whereabouts of your loved ones, especially in emergencies, can be invaluable.
- Convenience. Planning gatherings or ensuring a family member has arrived safely at a destination becomes more manageable.
- Emergency response. The app can alert users to potential emergencies involving Circle members.
Reasons of Pausing Life360
However, there are instances where learning how to pause Life360 becomes necessary:
- Battery health. Constant GPS tracking can drain your phone’s battery significantly. Temporarily pausing the app can help conserve battery life.
- Privacy. Sometimes, you might want some privacy about your location. Thus, some people would like to pause their Life360 location sharing.
Methods To Pause Life360 From the App
Now, the question is, can you pause your location on Life360? Pausing Life360 can be done for a specific circle or the entire app. This section will show you some general steps to pause your location for the app. You can do it only for a specific circle or the whole app. Here’s how you can do those.
Pausing Location for a Specific Circle
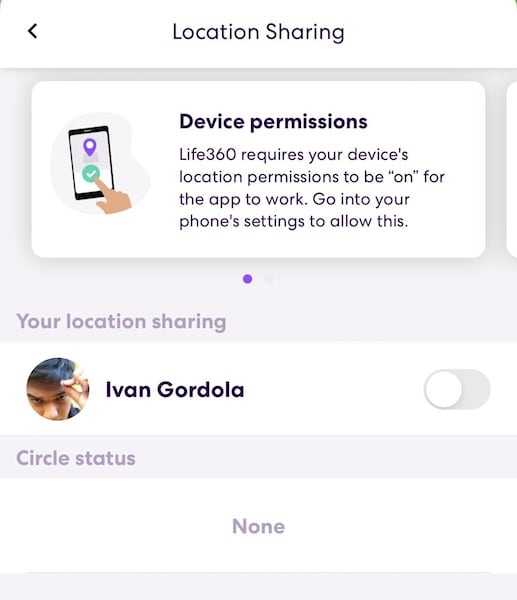
Open Life360 and go to the main screen. Select the Circle you want to pause. Then, tap on Settings (usually represented by a gear icon) in the upper-right corner. Look for an option like Location Sharing and toggle it off. This action pauses your location sharing only for the selected Circle.
Pausing the Whole App
Regarding this method, pausing the location sharing for all your circles usually involves going through your phone’s S ettings and disabling location services for Life360. If you don’t want to do that, you can turn off location sharing for all your circles through the steps provided above.
By understanding and utilizing these features wisely, you can maintain your connection with your loved ones while managing your digital boundaries and battery health effectively. Remember, the aim is to balance connectivity with personal needs.

Part 2: How To Pause Life360 From Settings
Life360 offers flexibility within its app and through your device’s settings. Understanding how to use these options can provide additional control over location sharing. Explore the various ways how to pause Life360 outside the app itself.
Pause Life360 From Android Settings
First, navigate to your Nokia XR21’s Settings. Then, look for the section listing all installed apps. This is usually named as “Apps.” Locate Life360 on the list of apps and open it. You should be able to see a Force Stop button at the bottom of the screen.
By selecting Force Stop, you temporarily halt the app’s function without uninstalling it. This operation stops location sharing until you open the app again.
Pause Life360 From iOS Settings
To pause the Life360 location on iOS, you’ll have to open the Settings app on your iOS device. Browse through your apps and select Life360. Alternatively, you can use the search bar and type “Life360”. Once in the app’s menu, change location services to While Using the App. Thus, it will not share your location unless you open the app.

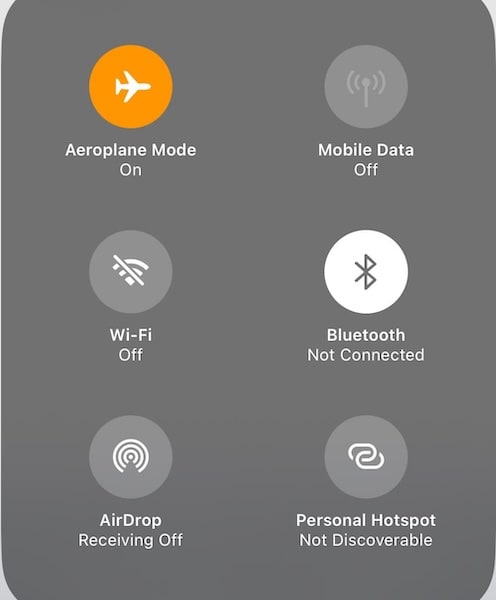
Pause by Using Airplane Mode
This can be done from the quick settings panel on both Android and iOS devices. Turning on Airplane Mode disables all wireless connections, including cellular data and GPS, effectively pausing Life360. The great thing is that Life360 will only show your last known location to your circles. It will not say that “location services are off,” unlike the first two methods.
Pause by Uninstalling
Removing the app from your device will stop it from sharing your location. The beauty of this method is that it won’t automatically notify your circles or remove you from them. However, some members might notice that your location updates are unavailable.
Each method serves a different purpose and offers varying levels of discretion. Whether conserving battery, seeking privacy, or temporarily disconnecting, these methods provide a way to pause Life360 location without drawing unwanted attention. Remember, communicating with your Circle members about your need for privacy to maintain trust is always a good idea.
Part 3: How To Pause Life360 With a Virtual Location Spoofer
Sometimes, pausing your location sharing on Life360 may raise questions or concerns among your circle members, particularly if they are close family or friends. If you’re planning a surprise or need private time without arousing suspicion, a virtual location spoofer can be handy. This method will teach you how to pause your location on Life360 without them knowing.
Wondershare’s Dr.Fone toolkit is more than just a data recovery solution. Among its various features, the Virtual Location changer is particularly useful for those looking to spoof their location. This feature allows you to simulate being in a specific location without actually being there. It’s a clever way to maintain privacy or plan a surprise without giving away your real whereabouts.
How To Use Dr.Fone To Spoof Your Location on Life360
To learn how to pause location on Life360 without them knowing using Dr.Fone, follow the steps below:
- Step 1: Download and install the Dr.Fone on your device. Connect your phone to your PC to begin the process. After launching the software, access Virtual Location from the Toolbox interface. Then, click Get Started to continue.
- Step 2: After launching the function, you’ll notice the One-Stop Route function at the top-right section. This feature is crucial for setting up your virtual movement.


- Step 3: To define how your virtual location behaves, you can decide how often the app simulates a Round trip or Loop trip. Once you’ve set parameters like Speed, click Move Here to start the simulation.

Note: TheRound trip and Loop trip are particularly useful for creating the impression of movement in a specific area. Parameters can make your virtual movement more believable.
Conclusion
This article explored various methods of pausing location sharing on Life360. Life360 is essential for many who share their locations with friends and family. The options are diverse, from simple app-based methods to more advanced settings adjustments and even a virtual location spoofer like Dr.Fone.
While it’s always recommended to maintain open communication with your Circle about pausing location sharing, there are times when privacy or surprise plans necessitate discretion. For those moments, Dr.Fone - Virtual Location emerges as a reliable solution for location spoofing and other phone management needs. Remember, using these tools responsibly is key to maintaining trust in your relationships.
4 Feasible Ways to Fake Location on Facebook For your Nokia XR21
There are many reasons to fake location on Facebook. For example, you may want to hide your ideal address and protect your safety. Also, you might want to change the Facebook location to get better search results for products, friends, groups, and so on. But whichever the case, creating a fake GPS on Facebook is relatively easy. So, in this post, I want to introduce you to several methods to spoof your Facebook location quickly and easily.
Method 1: Spoof Facebook Location on Computer
You can easily fake your Facebook location by spoofing the town or city in the profile settings. This way, anyone who views your profile bio will see your new Facebook location.
So, without wasting much time, here’s how to spoof Facebook location on PC:
Step 1. Launch the Facebook app on your web browser and tap your profile icon.
Step 2. Here, click Edit details under the Intro section. After that, you’ll land on the Posts window by default.
Step 3. Now tap the Pencil icon to change the current city/town. You can also change your hometown, relationship status, and when you joined Facebook.
Step 4. Finally, tap the Save button, and Facebook will automatically update your current location. To see if the changes have been applied, tap the About tab to see your new profile.


Note: Although you can successfully change your bio, Facebook will still access your actual location. Now this means your Facebook recommendations and adverts will still be based on your locality. So, keep reading to learn other reliable ways to spoof your Facebook location.
Method 2: Change Facebook Location on Android phone
Unlike the strict iPhones, Android allows you to install a third-party app to change the GPS location of your device and Facebook, to be precise. This means you don’t need to fork out some serious money for a VPN service. So, in this section, you’ll learn to fake a Facebook location on Android using the Fake GPS location app. It is a free program for teleporting your phone IP address to new places with a simple screen tap. Let’s see how to do that:
Step 1. Install and launch the Fake GPS location app on Android.
Step 2. Next, “allow mock locations” in your Android’s developer settings. To do that, open Settings >Additional Settings >Developer options. Then, click “Select mock location app“ before choosing Fake GPS.

Step 3. Now go to the Fake GPS location app and choose a new location for your device. If satisfied, tap Ok to save the added area you’d like your device to appear on.
Step 4. Finally, head to Facebook and change your location settings.
Method 3: Create A Fake Check-In Location on Facebook
Sometimes you might want to prank your Facebook friends with a new location announcement. In other words, you can make them believe that you’re in a particular location when in reality, you’re not. In that case, the Facebook Check-In feature will come in handy. It’s a simple but highly effective feature that adds your fake location to a Facebook post. Just think of it as a status update.
So, below is how to fake location on Facebook with the Check-In feature:
Step 1. Open Facebook on your favorite browser and tap the “What’s on your mind“ field.
Step 2. Next, tap the GPS icon. You’ll see all the locations near you. Or, key in a fake address and select it on the suggestions.

Step 3. Now write whatever is on your mind and add the location to your latest post. It’s that easy!
Method 4: Fake Location for Facebook’s Nearby Friends via a Tool
While signing up on Facebook, you’ll be requested to allow the platform access to your actual GPS location. This will enable Facebook to correctly tailor adverts, friends, and other recommendations based on your location. But unfortunately, it can be challenging to change the actual location unless you’re willing to spend top dollar on a VPN service. Put, you’ll need to spoof your IP address to change the exact location.
For this reason, I recommend using a fake location tool like Dr.Fone - Virtual Location . It’s an all-in-one software that provides multiple solutions for your Nokia XR21 or Android phone. It allows you to teleport your current location to anywhere in the world without jailbreaking your Nokia XR21 or spending top dollar on a VPN service. This lets you take full advantage of the “Nearby Friends” Facebook feature that needs your actual GPS location.
Below are the key features:
- Transfer phone location to any place in the world.
- Intuitive and detailed zoom-in and zoom-out map.
- Compatible with all iOS and Android versions.
- Move to new locations on the map via different routes and means.
- Compatible with location-based apps like Telegram, Facebook, Twitter, etc.
Here is a video tutorial for you to learn and preview how to fake location on Facebook via Dr.Fone - Virtual Location
safe & secure
Below is how to fake location on Facebook for Android and iPhone using Dr.Fone:
Step 1. Download and open Dr.Fone.
Install and run Dr.Fone on your Mac or Windows PC and then connect your phone to your computer using a USB cable. After that, select the file transfer option on your phone and then tap Virtual Location on Dr.Fone.
Step 2. Connect your phone to the software.
You’ll see a new Dr.Fone window, where you’ll click the Get Started button. Then, enable USB debugging on your phone before clicking Next.
Step 3. Choose a location and start moving.
The Virtual Location map will launch after successfully connecting your smartphone to Dr.Fone. Now enter and select a location you wish to move to and click Move Here. Alternatively, you can tap an area to move to on the map and choose whether to move by foot, bicycle, scooter, or car. Your iPhone and Android device will save your new location automatically.

Wrap it up
See, you don’t need an expensive VPN service to fake your GPS location on Facebook convincingly. With Dr.Fone, you can easily change your Nokia XR21 or iPhone location, which will immediately reflect on apps like Facebook, Google Maps, Telegram, and so on. And guess what? There are a host of other phone management features to exploit. You should try it!
safe & secure
- Title: In 2024, Why Your WhatsApp Live Location is Not Updating and How to Fix on your Nokia XR21 | Dr.fone
- Author: Abigail
- Created at : 2024-07-24 17:51:29
- Updated at : 2024-07-25 17:51:29
- Link: https://location-social.techidaily.com/in-2024-why-your-whatsapp-live-location-is-not-updating-and-how-to-fix-on-your-nokia-xr21-drfone-by-drfone-virtual-android/
- License: This work is licensed under CC BY-NC-SA 4.0.