
Top 7 Skype Hacker to Hack Any Skype Account On your Oppo Reno 9A | Dr.fone
Top 7 Skype Hacker to Hack Any Skype Account On your Oppo Reno 9A
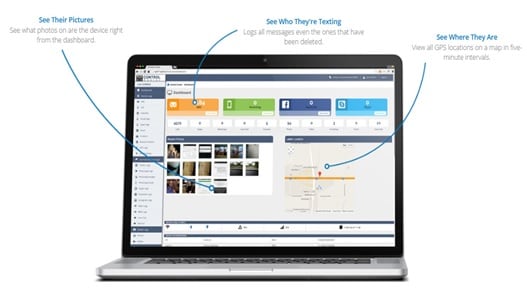
The rise in social media and online apps to communicate has made it easy to exchange information, emotions, and much more stuff which were not possible in earlier times. But with that, it has also increased the scope of secrecy. It has become really difficult to make a person accountable. While you may be thinking that the other guy is using it for a useful purpose, the actual scenario will be somewhat different. Whether you want to snoop into your kids’ activity or you want to make sure that your employees are not wasting time, the Skype Hacker apps will be of great rescue to you.
The most obvious question that will flash to your mind is why even to care to use such apps. Well, these apps are specially created to handle the Skype apps and cater to the needs of the user who wants to snoop on the screen of other people. It is not only a useful tool regarding monitoring the activities of the targeted person but will also help to make them accountable for wrongdoings. So let us dive deep and explore the top 7 Skype hacking apps:
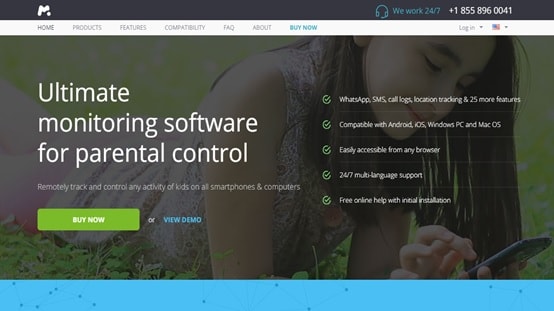
1. mSpy
One app that has gained a lot of reputation among the security industry is mSpy . It believes in practical yet straightforward features that will show results. And this fact is reflected in the simple yet intuitive interface of the application. The app can be accessed on all types of platforms which makes it easy to access it anywhere, wherever you want to. The Skype hacking app lets you keep track of all the calls, video chats and IM chats that the targeted user will do on an everyday basis.

Pros:
- Packed with lots of features that make it versatile.
- The app can be used on multi-platforms
Cons:
The software does not provide any provision to monitor video calls.
Price:
The premium version starts at $12.50 per month. It has various packages and accordingly the cost varies
URL:
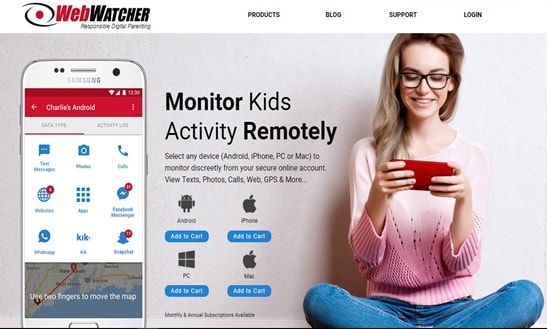
2. WebWatcher
Primarily targeted for parents who want to spy on their children’s activity. The WebWatcher has been one of the favorite apps of many Skype Hacker users. It is easy to use, intuitive interface and undetected background working in target’s mobile is what makes it ideal for any parent who is suspicious about the children. Other than just tracking Skype it also provides a lot of options to track down the messages on various other apps.
Pros:
- Easy to use and install without any massive setup.
- Can be used to track various social media sites
Cons:
The monthly subscriptions are way priced than yearly subscriptions.
Price:
around $99.99 per year and $39.95 per month
URL:

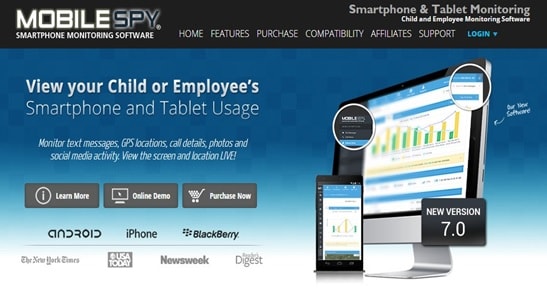
3. Mobile Spy
Mobile Spy proudly introduces a host of facilities that are useful not only for all the parents but also for couples, employers, and other personals who would like to keep a tab on the type of calls done on Skype. This Skype hack is very convenient to be used in Apple and Blackberry phones. It is even able to infiltrate the private messaging apps that come with additional security such as PIN or pattern lock.

Pros:
The Mobile Spy comes equipped with SnipperSPy which is aimed at activities like keylogging, password extractions, and a lot more.
Cons:
- The app is not so perfectly crafted for Windows or Android.
- No monthly trial. It begins with the 3-month purchase
Price:
Basic: $49.97 and Premium: $64.97
URL:
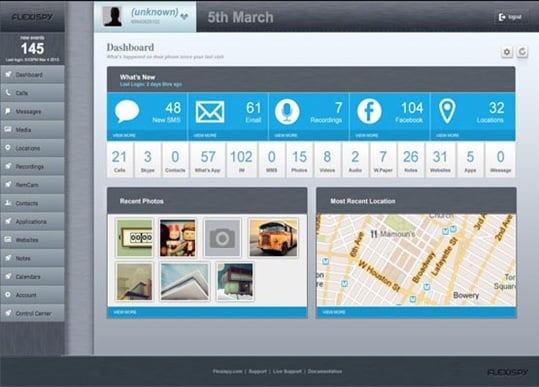
4. FlexiSpy
FlexiSpy is packed with a lot of features that can make some users overwhelmed at first look. Although one may never need all the features, they all are used to track and monitor the activities of the target. This Skype Hacker can be recommended for personal use.
Pros:
Packed with lots of features in a single clean package
Cons:
The package is a bit overpriced
Price:
Premium: $68 per month. Extreme: $199 per quarter
URL:
5. Skype Account Hacker
While all the apps mentioned above were multi-functional, this app is purely dedicated to Skype hacking. Skype Account Hacker comes with dedicated-hassle-free features that can only be used to hack Skype accounts. If your aim is solely to hack a Skype account then this application can be perfect for you. Such a Skype hacker makes it easy for the user to avoid the hassles of surfing through the app and instead get the work done straight.

Pros:
It is purely dedicated to stealing the Skype account password. This way you can get complete access.
Cons:
It cannot be used for other social media sites
Price:
Free
URL:
6. Highster Mobile
Highster Mobile has been one of the oldest apps that is available on the market. It not only hacks Skype but also helps to track other social media as well as carries out other monitoring activities which can be useful to monitor the target’s behavior. You will need to root your target device in order to spy on their Skype activities. Since this application runs in the background as well as hides under a pseudo name, it is difficult for the targeted user to find and delete it manually.
Pros:
It is packed with a lot of robust features, and it keeps updating on a timely basis.
Cons:
It is device-specific and for each device tracked you will need to pay separately
Price:
Starts from $75.00
URL:
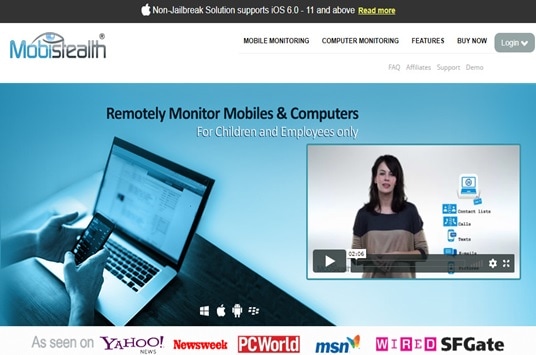
7. Mobistealth
Mobistealth is a highly capable software that can hack any Skype account in a matter of minutes. With this software, not only can you read the Skype chats and texts but also, record the Skype video chats on all types of devices like Android, iPhone, Symbian, etc. Highly recommended by the IT experts, Mobistealth profits from the fact that it has a team of highly qualified technical experts who are always available to a walkthrough you through all the features and guide you on how to use each feature with perfection.
Pros:
Robust and extensive features
Cons:
It is not possible to install this software remotely
Price:
Starting from $33.50 for premium and $40 for premium plus
URL:
Although it is a fascinating fact that we can maintain a level of secrecy in the everyday task, we perform on the computer, it is equally important to keep track of the activities of the beloved ones and those who are working under you. This helps you to hold them accountable even in your absence. Not only that you can also have peace of mind as you can access the apps remotely anywhere. This makes it easy for the user to monitor the activities at their comfort. These Skype account hackers are not only legitimate but also come with customer service support. Service support will always take care of any technical problem, in case, anything goes wrong.
How to Change/Fake Your Oppo Reno 9A Location on Viber
Viber is one of the most commonly used messenger apps. It allows you to send short messages like texts, videos, images, audio, and documents. Viber also has another exciting feature that will enable you to share your location. But sometimes, you might want to change location on Viber to prank your friends or for security purposes. So, read on to learn how to fake location on Viber with some simple solutions.
Part 1: What is the My Location feature on Viber?
If you’ve used WhatsApp’s location feature before, you’ll know what Viber’s “My Location” is all about. With this feature, you can share your live location for whatever reasons you may have. For example, you may want to share your live location with your kids or vice-versa. Or, you might simply want to share a fake location on Viber with your nosy friends.
But as good as it sounds, this live location feature is enabled by default on your Oppo Reno 9A/Android browser. Therefore, you can send a location on Viber without knowing. This can be advantageous to stalkers or even cause misunderstanding in your relationship. What’s worse, it shares your actual location with every text you send. But fret not because this post will help you disable or enable My Location on Viber according to your needs.
 PDF application, powered by AI-based OCR, for unified workflows with both digital and scanned documents.
 Part 2: How to disable or enable My Location on Viber?
So, without wasting too much time, let’s find out the steps to disable/enable Viber location-sharing feature. It’s straightforward.
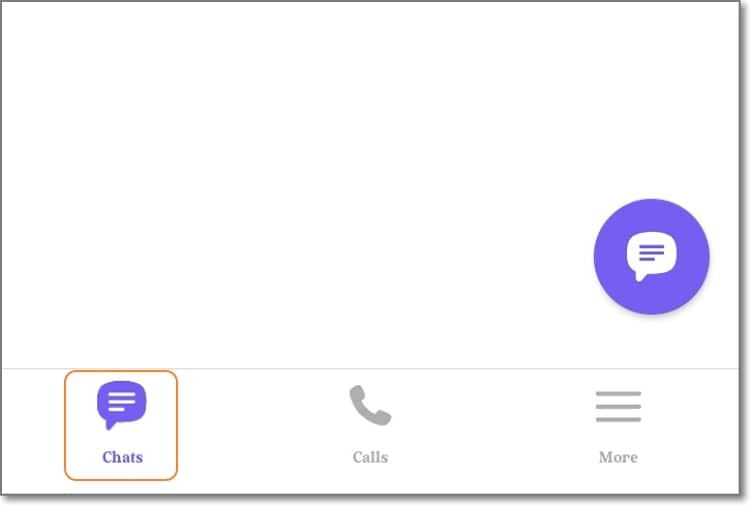
Step 1. Fire up your Viber app on mobile or PC and tap the Chats button. Here, proceed to open a chat that you want to enable/disable location sharing.
 Nero Burning ROM:
The ultimate burning program for all your needs!
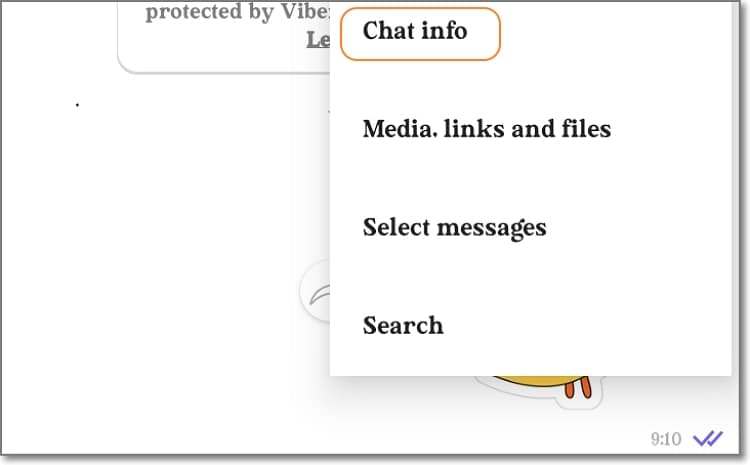
Step 2. Next, tap the Ellipsis (three dots) icon at the top-right corner of the screen and choose Chat Info. Alternatively, simply swipe the screen to the left.
Step 3. On the Chat Info window, simply enable or disable the Attach location always toggle. It’s done!

Pro tip: You might be wondering how to share your actual Viber location with a chat or group. Again, this is very straightforward. Simply open the conversation and tap the three dots on the text field. Then, click the Share Location button and choose your location on the Google map. Lastly, tap Send location to share the Viber location with your selected contact.


Part 3: Can I send a fake location on Viber, and How?
So, is it possible to Viber’s fake location? Unfortunately, Viber doesn’t allow users to share a different place from the real one. That’s because the app asks to automatically access your actual location data using Wi-Fi or GPS while signing up. Therefore, based on the permission you set yourself, the answer is NO.
But nothing is impossible in the tech world. You can easily instruct Viber to share a different location using a third-party app or service like Dr.Fone - Virtual Location . With this professional GPS tool, you teleport your Viber location to anywhere in the world with a simple mouse click.
It’s compatible with Android/iOS devices and boasts a simple-to-understand map. Interestingly, you can walk or drive to your new location and even stop between destinations to make it more believable. It’s nothing complex!
You can check out the this video for further instruction.
Key features of Dr.Fone - Virtual Location:
- Compatible with all Android and iOS versions.
- Teleport Viber location to anywhere in the world.
- Walk or drive to your new Viber location.
- Simulate Viber movements with custom speed.
- Works with Pokemon Go , Facebook, Instagram , Snapchat , Viber, etc.
Steps to change Viber location with Dr.Fone:
Step 1. Launch Dr.Fone Virtual Location.


Install and run Wondershare Dr.Fone on your Windows/Mac computer, and then tap the Virtual Location tab on the Home page.
Step 2. Connect your phone to Dr.Fone with a USB cable.
Connect your smartphone to your PC using a USB wire and tap Get Started on the new Dr.Fone pop-up window. Remember to enable the “File Transfer” option on your smartphone instead of “Charging.”
Step 3. Link your phone to Dr.Fone via USB debugging

Press the Next button to begin connecting your phone to Dr.Fone. If the connection fails, enable USB debugging on your phone by following the on-screen instructions. On Android phones, tap Settings > Additional settings > Developer options > USB debugging. In addition, set Dr.Fone as the mock location app on your phone.
Step 4. Enter the GPS coordinates or location address.

If the connection is successful, the Virtual Location map will launch automatically on Dr.Fone. Now enter the coordinates or address in the location field at the top-left corner. After finding the exact location that you want, simply tap Move Here before sharing your new location on Viber. That is easy, right?

Dr.Fone - Virtual Location
1-Click Location Changer for both iOS and Android
- Teleport from one location to another across the world from the comfort of your home.
- With just a few selections on your computer, you can make members of your circle believe you’re anywhere you want.
- Stimulate and imitate movement and set the speed and stops you take along the way.
- Compatible with both iOS and Android systems.
- Work with location-based apps, like Pokemon Go , Snapchat , Instagram , Facebook , etc.
3981454 people have downloaded it
Part 4: Why send fake location on Viber?
Now that you know how to spoof location on Viber. Let’s discuss some reasons to spoof location on this messaging app. Below are some common ones:
- Protect your privacy
Many people don’t want other online users to have a clue of their actual whereabouts. If you’re one of them, use a third-party tool to spoof your Viber location on your Oppo Reno 9A or Android.
- Prank your friends
Do you want to show your friends that you’re in London or New York when you’re in some remote village/town somewhere in reality? Yes, that sounds cool!
- Improve sales
If you’re a digital marketer, you might want to convince your potential clients that the goods are from a specific region or city close to them. Believe it or not, this can lead to more sales closures.
Wrap it Up
You can share your live location on Viber just like you would on Facebook, WhatsApp, and other social media apps. But because most of these apps don’t allow you to share fake locations, I recommend Dr.Fone - Virtual Location change your area to anywhere in the world. Give it a try!
How to Change/Add Location Filters on Snapchat For your Oppo Reno 9A
Snapchat is an Android/iOS messaging app developed in 2011. Currently, this app is home to 350+ users who share photos, videos, audio, texts, emojis, GIFs, and documents. But one of the most exciting Snapchat features is allowing users to share locations, whether fake or real. For instance, you might want to protect your privacy or simply prank your friends with a new location. So, whichever the reason, we’ll show you how to add a location filter on Snapchat effortlessly. You’ll also know how to add a fake location filter on Snapchat. Let’s learn!
Part 1: What are Location Filters on Snapchat?
If you’re an avid Snapchatter, you must have heard of “Snapchat Location Filters” before. So, what exactly is this? A Snapchat location filter or geofilter is simply a creative and interactive way to add a location to your posts. In a nutshell, Snapchat users can search and add a location filter to their videos or photo before posting on the platform. Just think of it as a Snapchat location tag.
Having said that, Snapchat is famous for its myriad of filters, including geofilters. So, before sharing a post, you can choose an overlay design describing your location. Just remember that some places can have more filter options than others. So, keep reading to know how to get a location filter on Snapchat.
Part 2: How to enable/disable and share Location Filters on Snapchat posts?
First and foremost, creating a Snapchat location filter on Android or iPhone is super-duper easy. However, to share your location on Snapchat posts, you must activate this setting within the app. Also, enable the location service on your smartphone. On Android, open Settings > Location, whereas on iPhone, click Settings > Privacy > Location Services.
Here’s how to enable or disable the Location Filter settings:
Step 1. Fire up Snapchat on your Oppo Reno 9A or Android phone and tap your Profile icon.
Step 2. Then, press the Settings button and find and press the Additional Services option.
 Greeting Card Builder
Step 3. Lastly, tap Manage and then enable the Filters to toggle, and that’s it!
Now that this setting is enabled on Snapchat, you can add your location filter effect. Follow me:
Step 1. Open Snapchat and take a video or a photo.
Step 2. Next, swipe the screen to the left until you find the location effect. Remember, Snapchat uses your actual GPS location.
Step 3. You can also tag a location on Snapchat by clicking the Sticker icon on the right rail. Then, tap the Location button and then choose your GPS location. Interestingly, you can spoof a location with this feature.


Step 4. Finally, customize your video further and then click Send To. Your selected location filter will be added to your Snapchat post.
Parental Control Software
Part 3: How to Change or Add a Fake Location on Snapchat Filters?
The thing is that Snapchat uses your phone’s GPS or Wi-Fi connection to determine your actual location and add it to the location filter. Therefore, it’s virtually impossible to spoof Snapchat’s location unless you’re using a VPN service.
Fortunately, you don’t need those overpriced VPNs if you can get Dr.Fone . This smartphone utility program allows you to change your Snapchat location to anywhere in the world with a simple mouse click on your PC. In addition, you can simulate Snapchat location movements to make it look more realistic. And apart from Snapchat, you can spoof location on WhatsApp, Viber, Facebook, Facebook Messenger, Instagram, etc.
So, without dilly-dallying much, here’s how to fake a Snapchat location tag with Dr.Fone:

Dr.Fone - Virtual Location
1-Click Location Changer for both iOS and Android
- Teleport GPS location to anywhere with one click.
- Simulate GPS movement along a route as you draw.
- Joystick to simulate GPS movement flexibly.
- Compatible with both iOS and Android systems.
- Work with location-based apps, like Pokemon Go , Snapchat , Instagram , Facebook , etc.
3981454 people have downloaded it
Here is the complete guide for you to refer to while you use the Dr.Fone - Virtual Location.
Step 1. First, grab a USB cable and connect your smartphone to the PC. Remember to enable “Transfer Files” on your phone.
Step 2. Next, install and run Dr.Fone on your computer. Then, tap the Virtual Location button on the home window, and tap Get Started.

Step 3. Now allow USB debugging on your Oppo Reno 9A before clicking Next on Dr.Fone. Don’t know how to do that? Open Settings > Additional Settings > Developer options > USB debugging. Also, choose Dr.Fone as the mock location app.
Step 4. The Virtual Location map will launch immediately. Enter the GPS coordinates or location address on the field in the top-left corner and select the new location. If satisfied, press Move Here.
Step 5. Finally, open your Snapchat app, create a photo, and choose the location filter with your new location. It’s that simple!

Part 4: FAQs about Snapchat
Q1: What is Ghost Mode on Snapchat?
Snapchat comes with an inbuilt Snap Map introduced in 2017. Besides sharing Snaps by the Our Story feature, Snap Maps lets other Snapchatters see your real-time location using Bitmojis. That said, Ghost Mode makes you invisible on the Snap Map. In other words, no one can know where you are. Cool!
Q2: What are the differences between Ghost Mode and disabling Location Filters?
The Ghost Mode makes you invisible for a specific duration or until you disable it. To use this feature, you don’t have to turn off the location feature on your smartphone. On the other hand, you just need to disable the Location Filters settings on Snapchat to turn off sharing your location tag on posts.
Q3: How accurate is the Snapchat map?
Very accurate! Snapchat uses your GPS coordinates to determine your actual location on the map. However, this map gives a location based on where you were last seen when you logged into the app. So, if you stay for a long without opening the app, it won’t update your location. But if you log in and your location service is enabled, this app will auto-update it.
Q4: How does Snapchat Get Information on Your Location?
While installing the Snapchat app and creating an account, the app will practically ask you to allow it to access your location. The app will use your phone’s GPS coordinates to determine your actual location. Also, your Wi-Fi connection will tell Snapchat exactly where you are.
Q5: How to find someone in Ghost Mode on Snapchat?
Sometimes you might want to urgently find a friend on Snapchat when you are in Ghost Mode. To do that, deactivate Ghost Mode on Snapchat by clicking Profile > Settings > See My Location and disabling Ghost Mode. Now open the Snap Map, and you’ll see your location with a red Bitmoji. You’ll also see your nearby friends with enabled Snapchat locations on the map. If you can’t find them, tap the Search icon, choose or enter their name, and see them on the map or send a text.
Wrap it Up
Now you have a complete idea of what the Snapchat location filter is. In short, it is simply a creative way to share your Snapchat location tag on a post. But because you can’t spoof your location on Snapchat, I recommend using Dr.Fone - Virtual Location to teleport your Snapchat location to anywhere in the world. This tool also works with other social media apps like Facebook, WhatsApp, and Telegram. Enjoy!
- Title: Top 7 Skype Hacker to Hack Any Skype Account On your Oppo Reno 9A | Dr.fone
- Author: Abigail
- Created at : 2024-07-24 18:29:13
- Updated at : 2024-07-25 18:29:13
- Link: https://location-social.techidaily.com/top-7-skype-hacker-to-hack-any-skype-account-on-your-oppo-reno-9a-drfone-by-drfone-virtual-android/
- License: This work is licensed under CC BY-NC-SA 4.0.